.png)
User Security Membership and Permissions
Context
A member and a user are two separate objects.
An active member must be a user with the status active and with a membership in a security user group, to be able to log in and trigger the security requirements needed during the his or her session.
A member does not need to be a user; however, all transactions and actions must be associated to a member. For example, a time entry record needs a member that may not be a user as the working member (timekeeper) as well as a member that is a user to be stored as the time entry creator.
User
Access
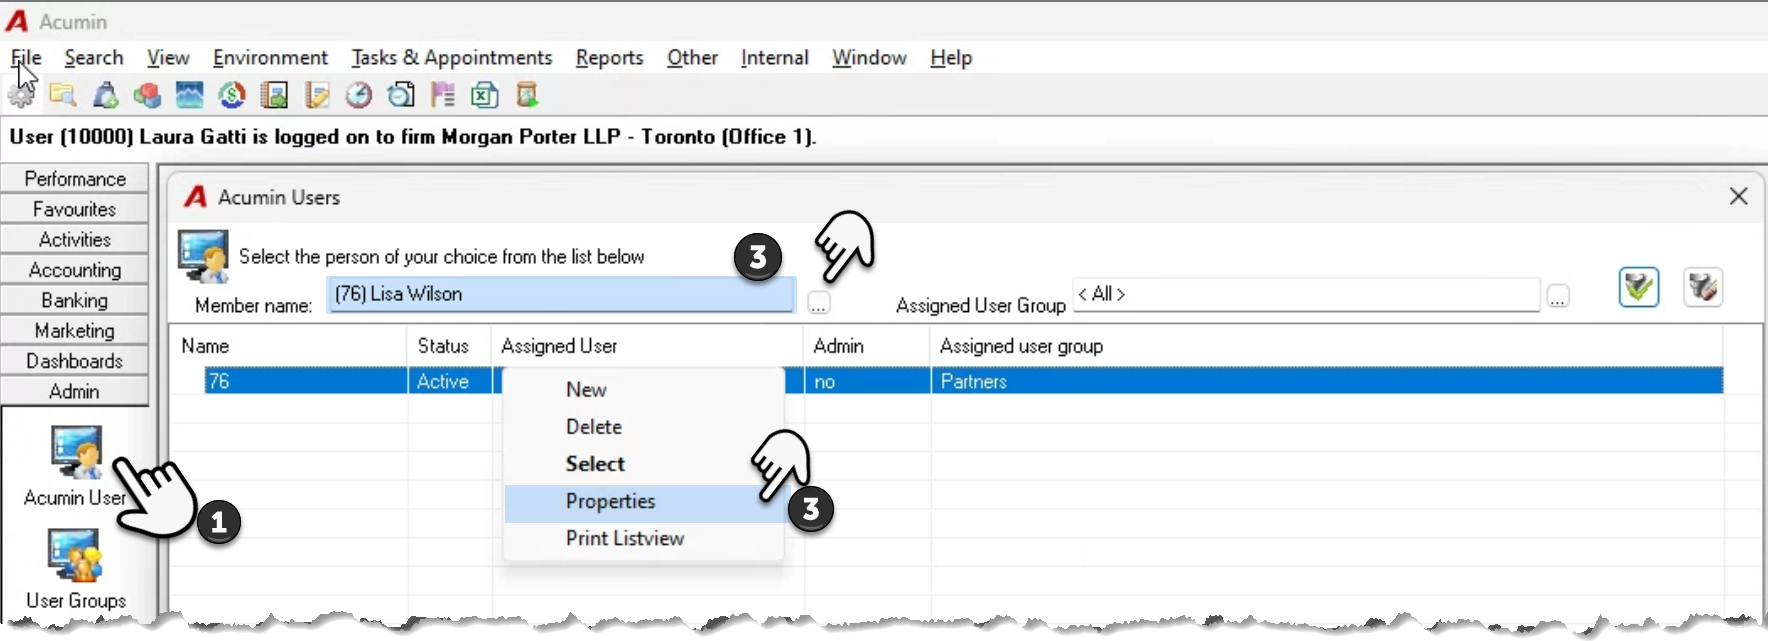
From the “Admin” section of the task bar, press on the “Acumin User” button to launch the “Acumin Users” list-view.
Enter the member’s code into the member’s name field and tab-out or press on the ellipsis button to the right of the “member name” field to launch the search – person tool for members. Search, find and select the member.
Highlight the member and right-click to select properties from the contextual menu.
Tab Content
The related member field should already be displaying the associated member and the active checkbox check-marked on the general tab. Navigate to the “User Group” tab, and assign the user to a user group.
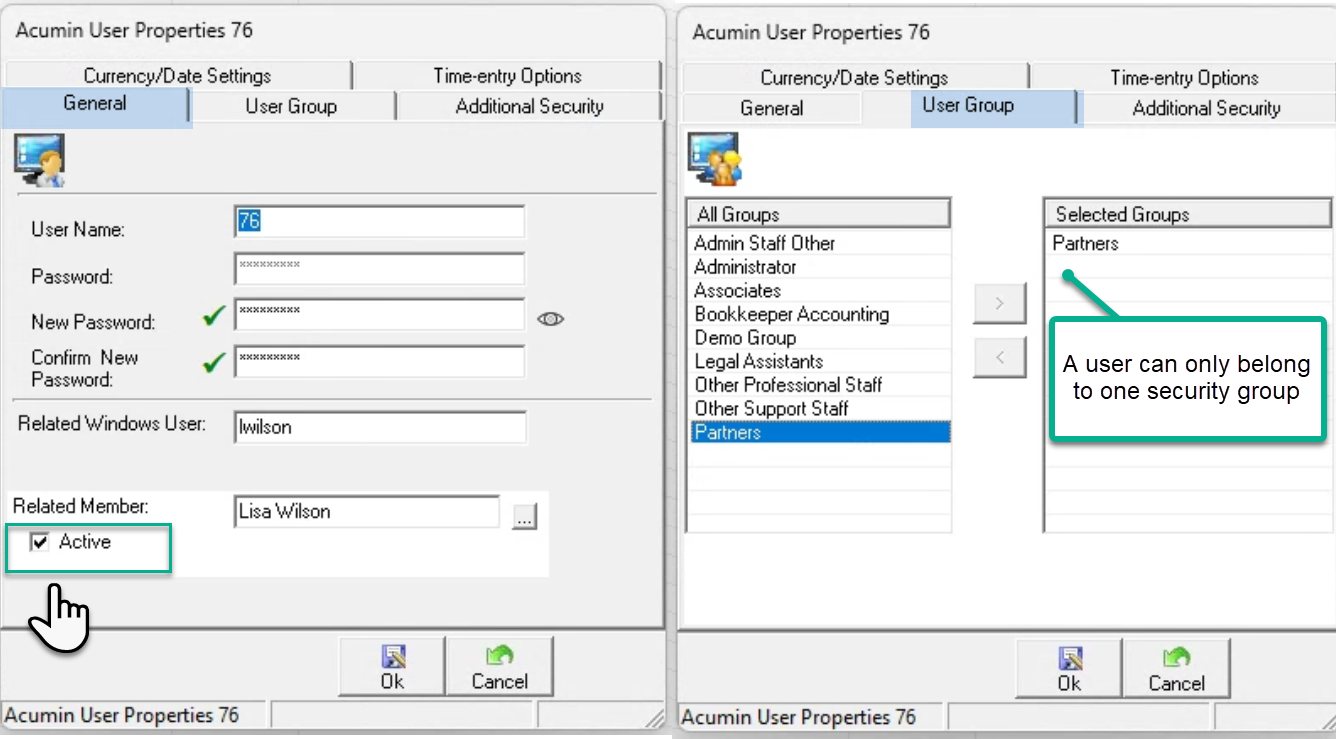
User Group Security
Access
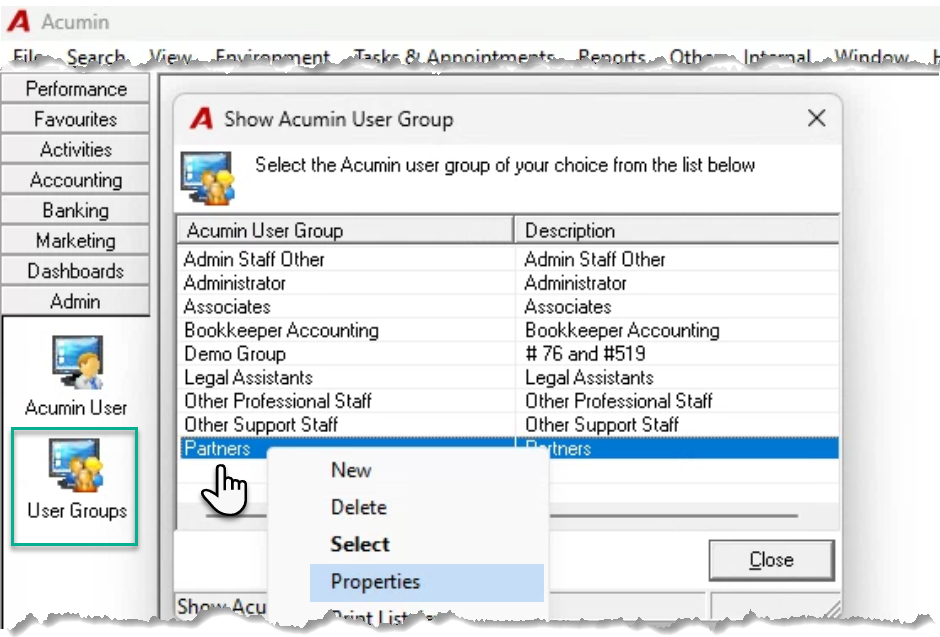
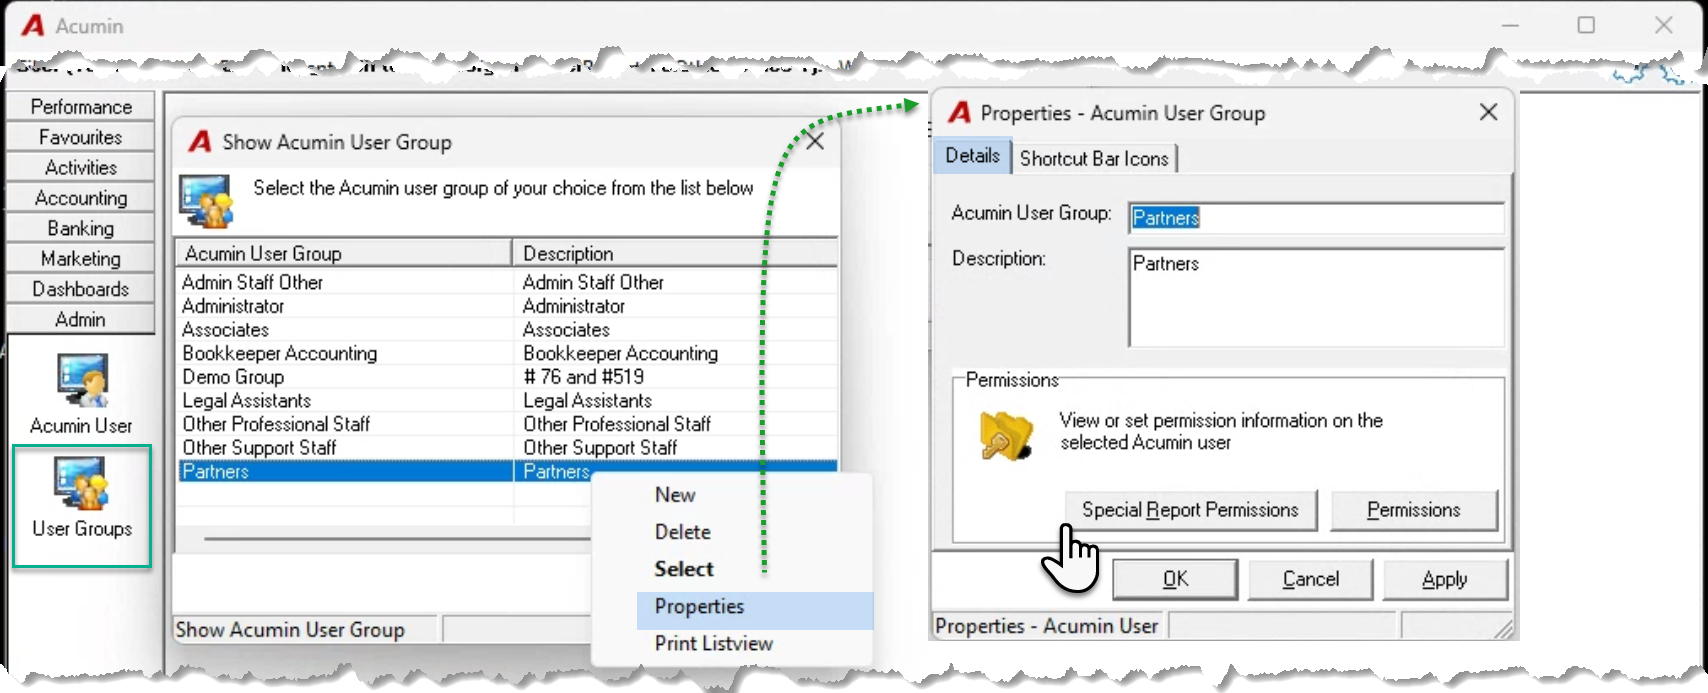
From the “Admin” section of the task bar, press on the “User Groups” button to launch the “Show Acumin User Group” list-view. Highlight the security group to confirm or modify its content.
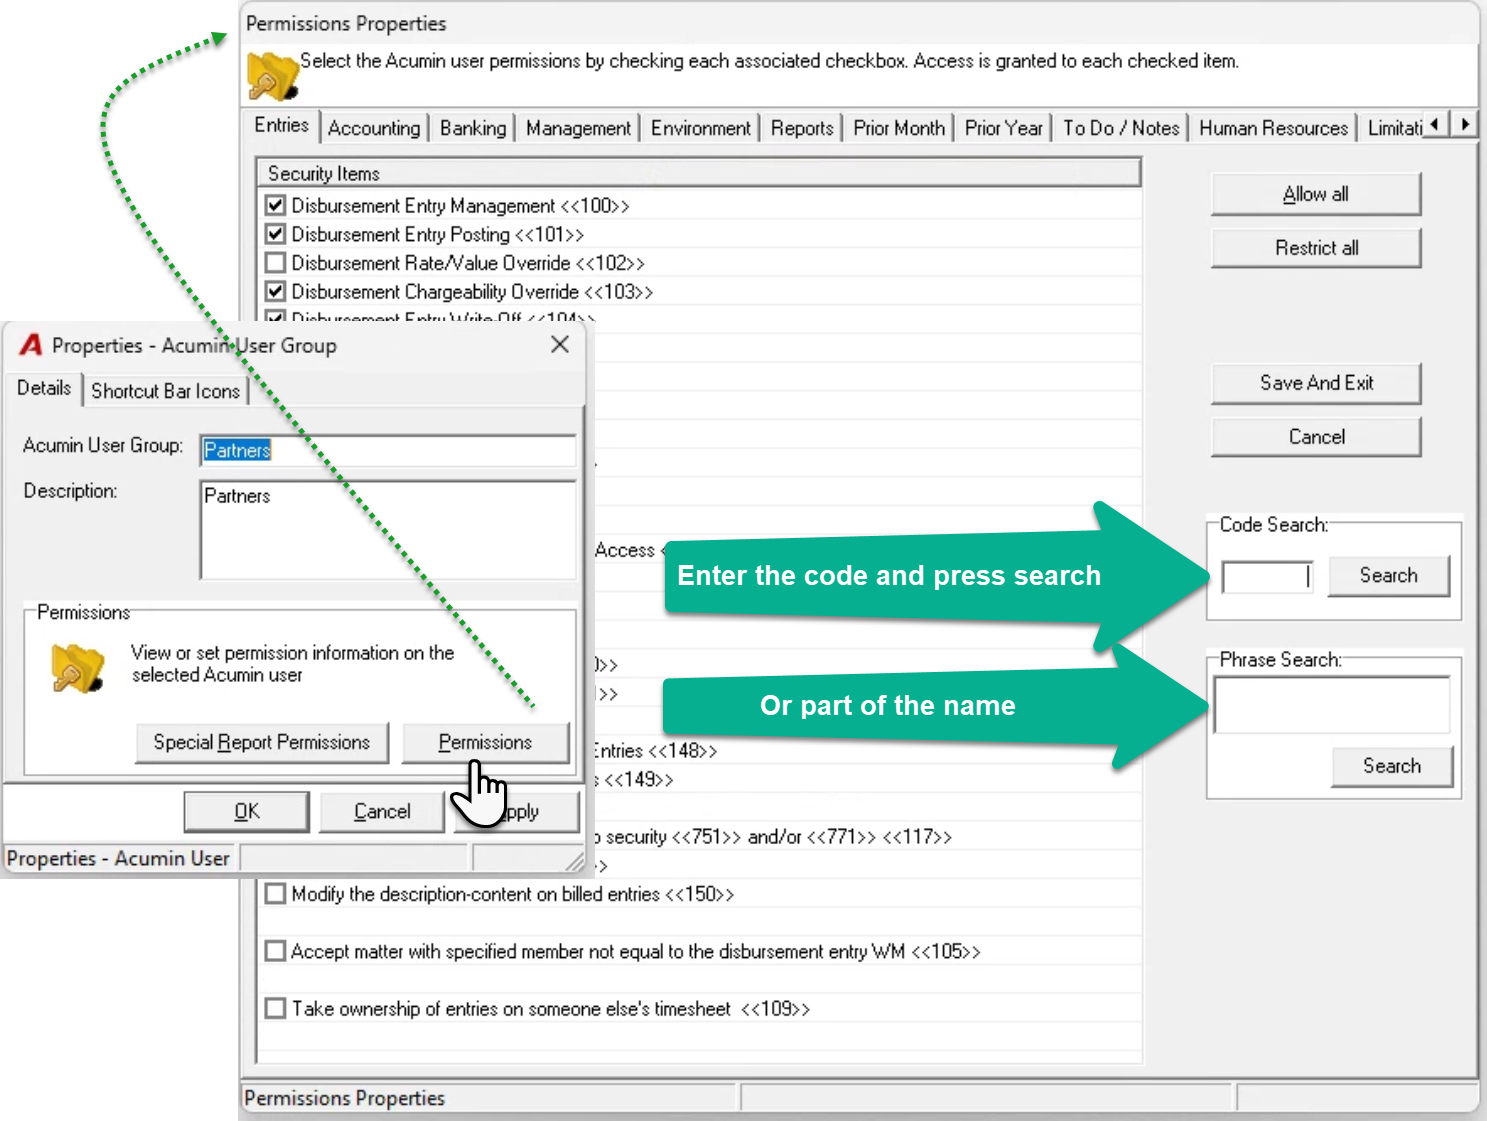
Permissions
From the “Details” press on “Permissions” to access the permissions properties form. To reach a permission enter the code – for example 302 – and press search to reach “AP Third Party Access”, or enter “AP” in the Phrase Search field and press search to reach the first option with AP, or navigate through the tabs.
Special Report Permissions
To grant user access to member activity reports and dashboard measures, press the “Special Report Permissions” button to launch the special report permission form.
Checkmark the security level for each of the reports listed.
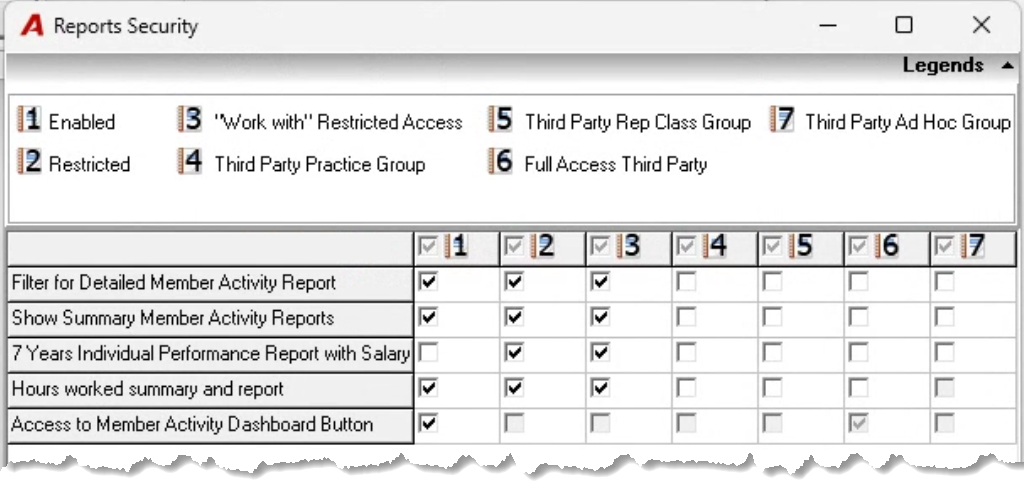
|
1 |
Enabled |
Enables access. This is a minimum requirement for all levels |
|
2 |
Restricted Access |
The member is restricted to only see their own measures; therefore the member field will show the logged-in member greyed-out. |
|
3 |
“Work with” Restricted Access |
The member is restricted to only see their own measures, and the measures for the members he/she "works with". Usually used assistants, responsible for generating the member activity reports for the lawyers they work with – the association completed in member properties between lawyer and assistant. |
|
4 |
Third Party Practice Group |
The member can access their own measures, and the measures for the members in his/her own practice group. To limit access to the practice group leader only, grant this permission at the user level instead of the security group level. |
|
5 |
Third Party Rep Class Group: |
The member can access their own measures, and the measures for the members in his/her own reporting classification. For example, as a partner I would be able to see the measures for all other partners. |
|
6 |
Full Third Party Access: |
The member can access their own measures, and the measures of everyone else. |
|
7 |
Third Party Ad Hoc Group: |
The member can access their own measures, and the measures of everyone in his Ad Hoc Group. To limit access to the Ad hoc leader (mentors) only, grant this permission at the user level instead of the security group level. |
Shortcuts
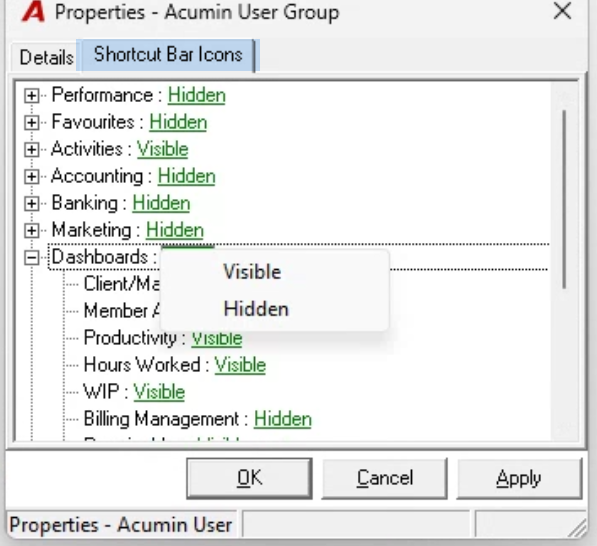
Navigate to the “Shortcut Bar Icons” to make a section of the task bar and its contents visible or hidden. Press on the plus sign to expand or collapse a branch. Double click on the green text to reach the contextual menu – Visible or Hidden – to change the position of the branch or the icon within.
How to grant a permission to a specific user
How to grant permission to a user groups (affecting all users within the group)