.png)
Initial Set up in Matter Properties
The firm will need to acquire the licence specific for the 98BI Flat Fee invoice to get the Flat fee option enabled and available for selection in the firm properties.
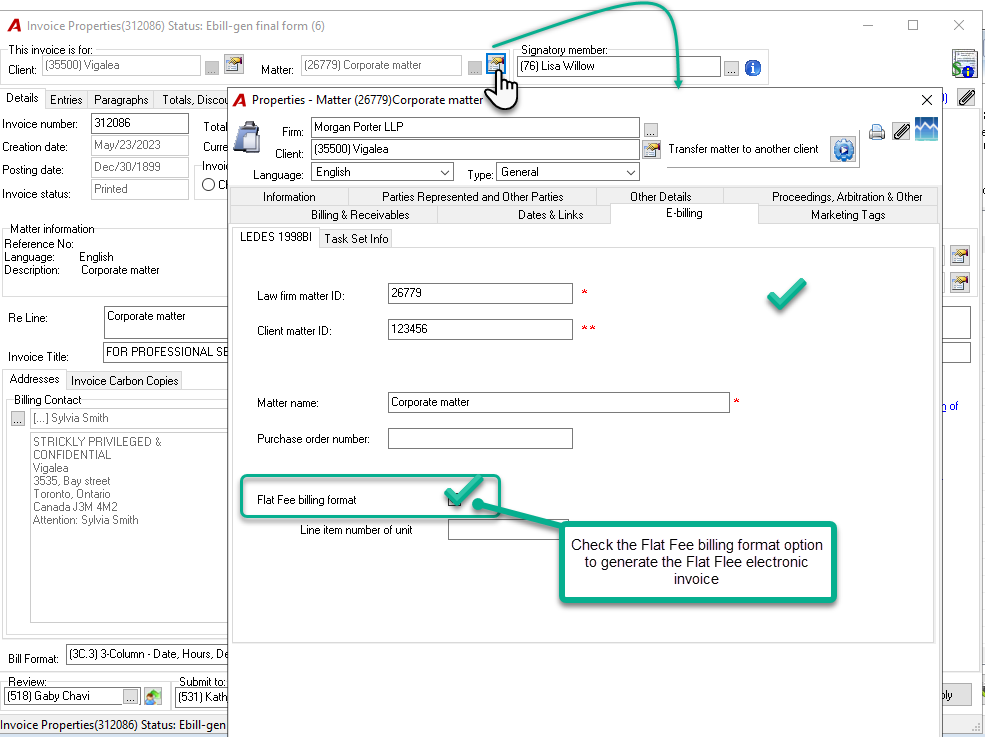
Enable the “Flat Fee billing format” option located in the matter properties E-billing tab – LEDES 1998BI subtab.
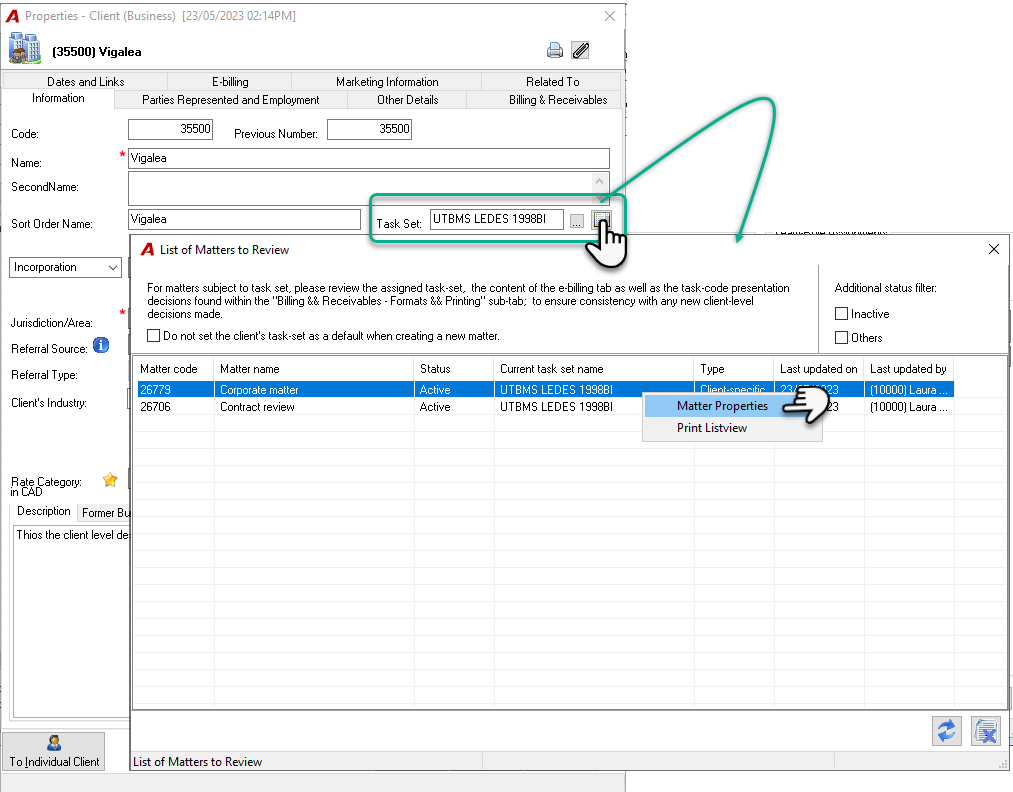
The properties of the matter can be accessed from the "Client Properties – List of Matter to Review" button or from within the invoice – matter properties icon.
Note: The “Line item number of unit” field is not used in this format.
Creating the flat fee invoice in Acumin
For the system to properly create the specific flat fee line in the electronic file, the user will have to use the “Combine for Presentation Purposes” option to present the correct member, Task and Activity codes, description and flat fee amount for this line. The capacity of generating the flat fee format relies on the use of this option.
Step 1 – Position as the first entry, a time entry with the correct member
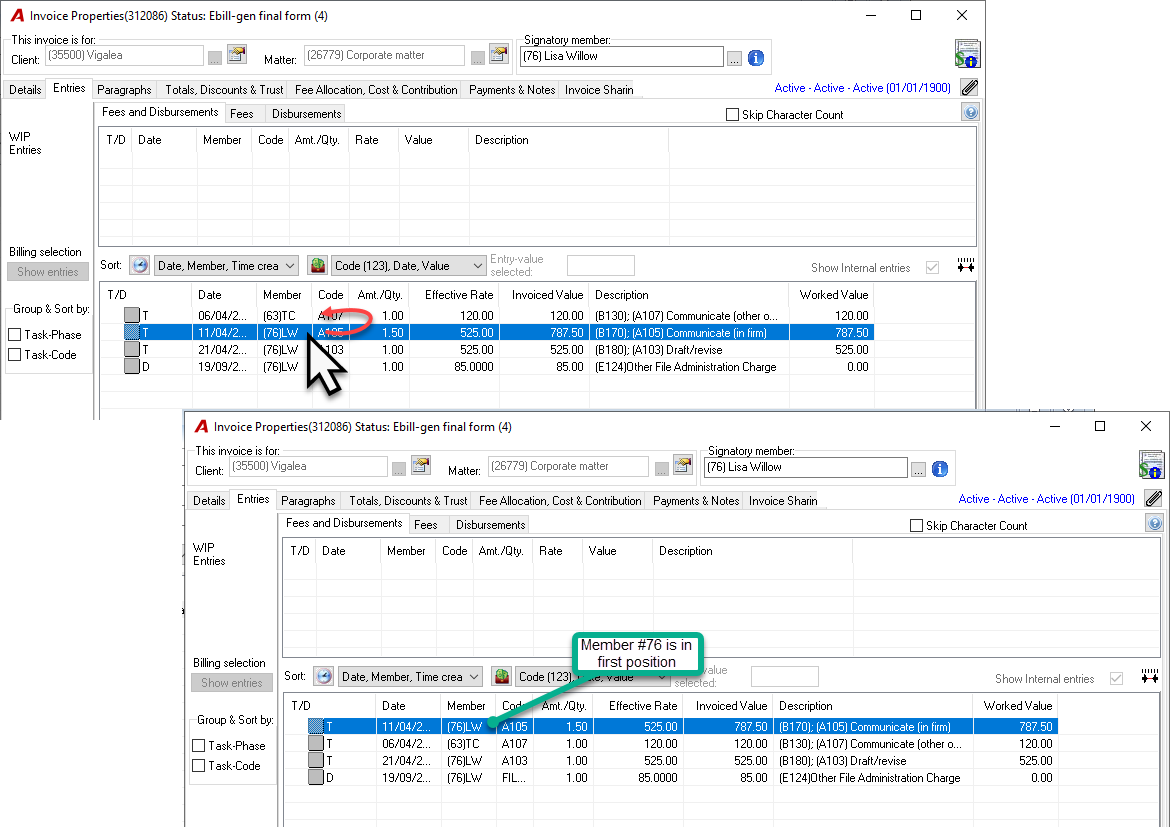
In the example below, I want the member #76 to be the one to appear in the flat fee line of the flat fee electronic invoice.
Select an entry with the member and drag it up into the first position.
Note that it implies that the member must have a time entry recorded as part of the invoice.
Step 2 – Create the combined entry
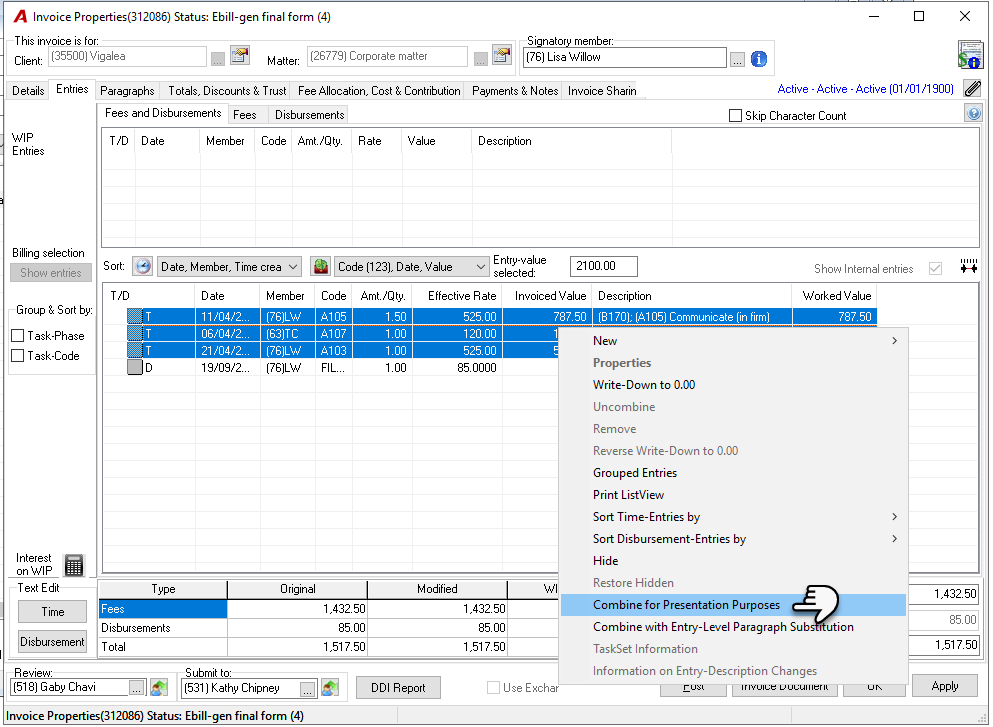
Multiple select all time entries in the Billing section and select the “Combine for Presentation Purposes” option in the contextual menu.
Note: if the description of a specific entry needs to be modified, this must be done BEFORE creating the combined line.
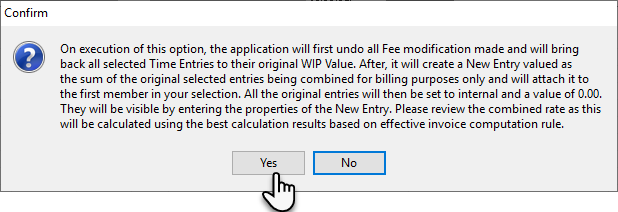
Answer Yes to the message below.
A new combined entry will now appear in the Billing section in place of the time entries selected.
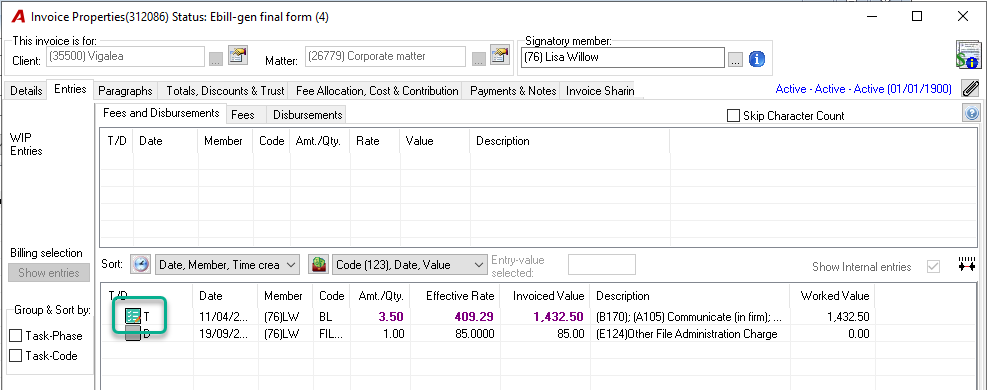
Go to the properties of the combined entry.
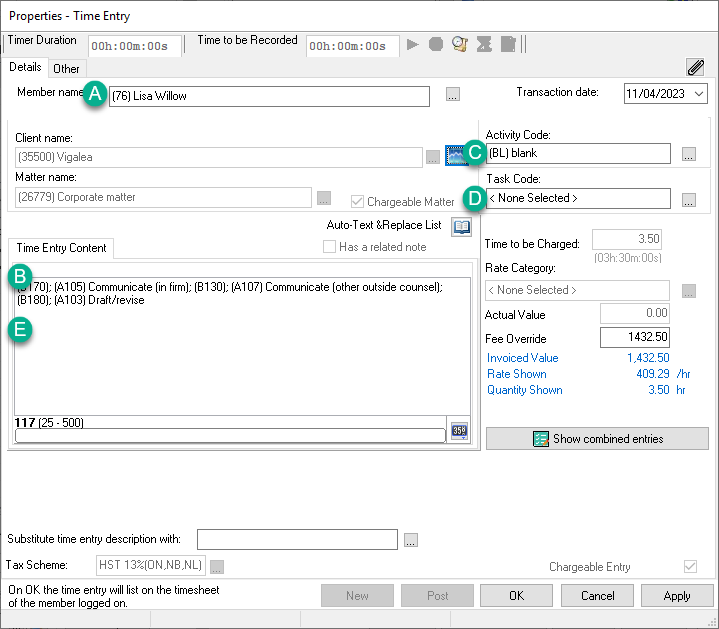
a) Member name: Should present the correct member. If not return to Step 1;
b) Time entry content: Remove the description completely;
c) Activity code: Select the proper activity code from the list;
d) Task code: Select the proper task code from the list;
e) Time entry content: You should now see the Activity and task codes selected in the description field. You can add a description but regardless, the LINE_ITEM_DESCRIPTION column content in the electronic file will always show “Fee adjustment”.
Note: Don’t enter the flat fee amount at this point.
You should now see the below:
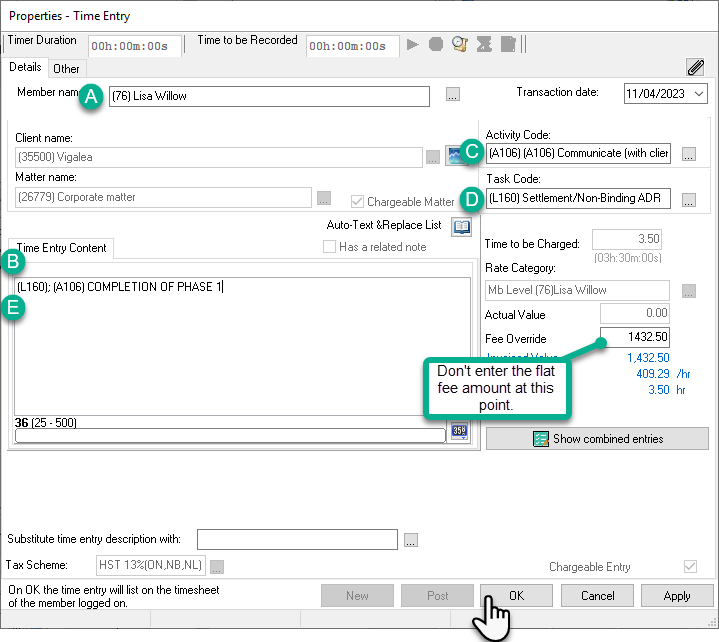
Step 3 – Enter the flat fee amount in the Fees field
Enter the flat fee amount in the “Fees” field. In our example $1400.00
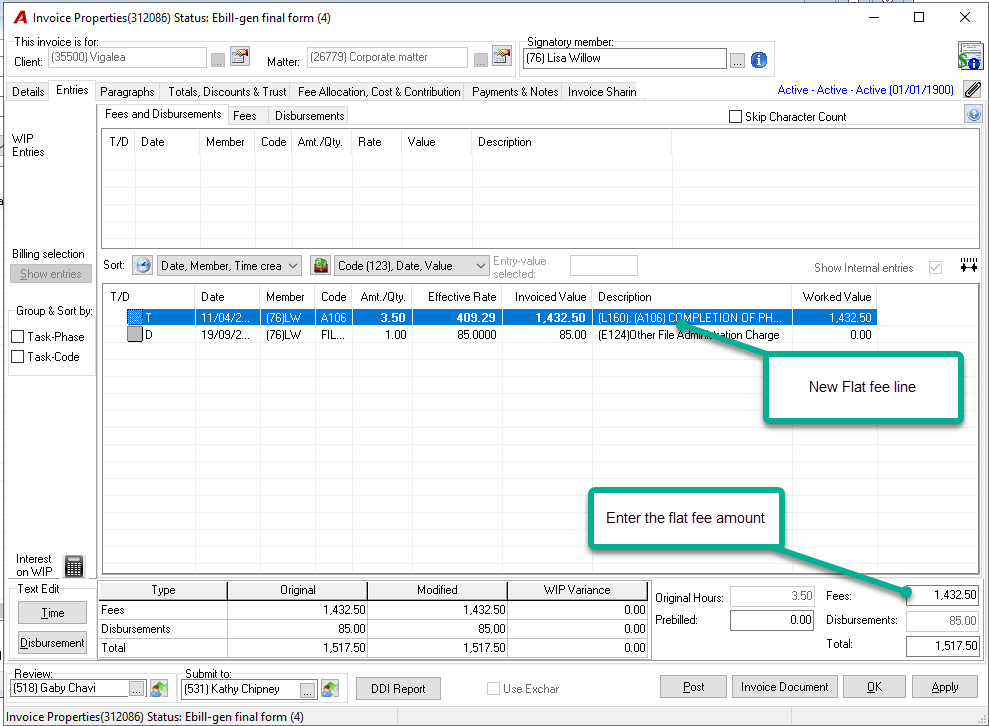
Now we see that the flat fee amount is 1400.00.
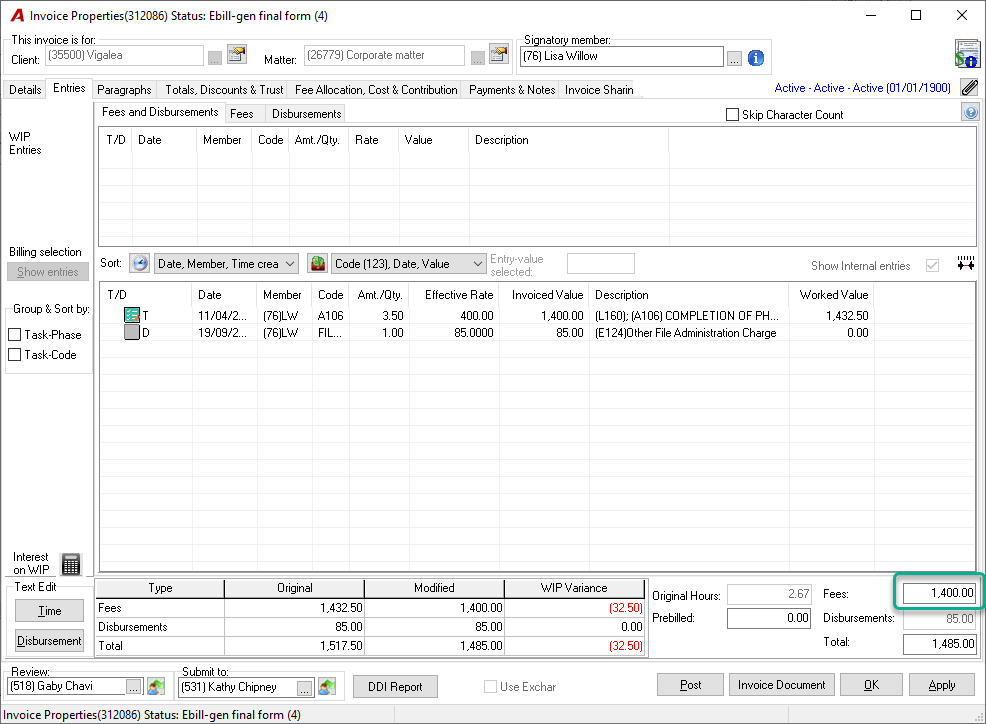
Step 4 – Complete the flat fee invoice as usual and save
-
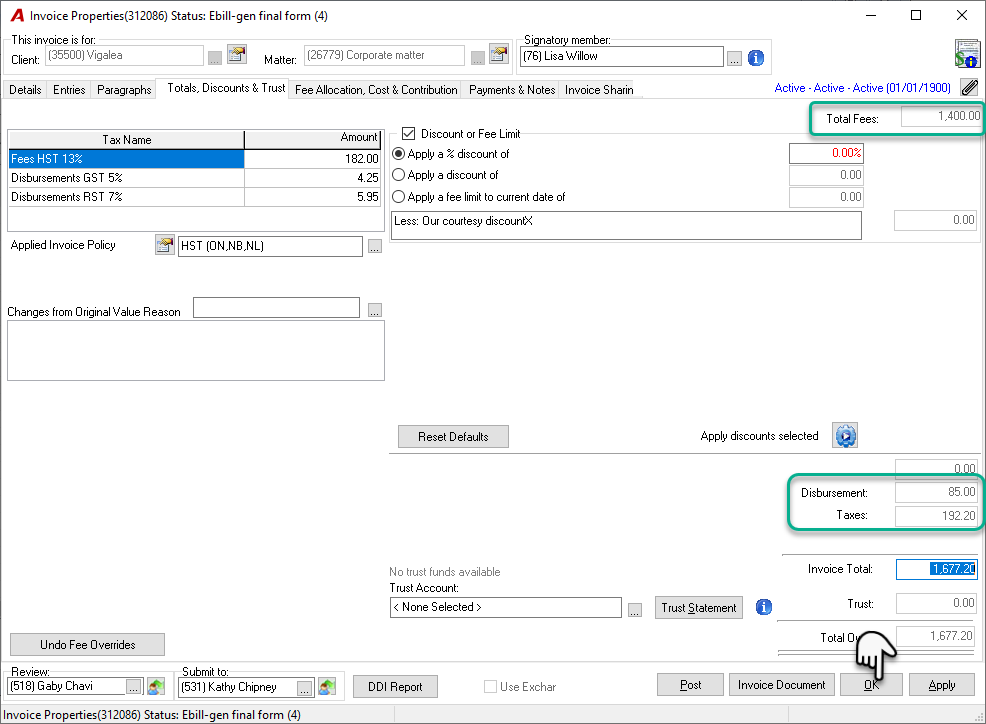
Complete the rest of the invoice as usual.
-
In the Totals, Discount & Trust tab, you will see the total fees, disbursement and taxes .
Generating the flat fee electronic invoice
The user will generate the electronic as any other electronic invoice selecting the proper invoice status if it is required in the file.
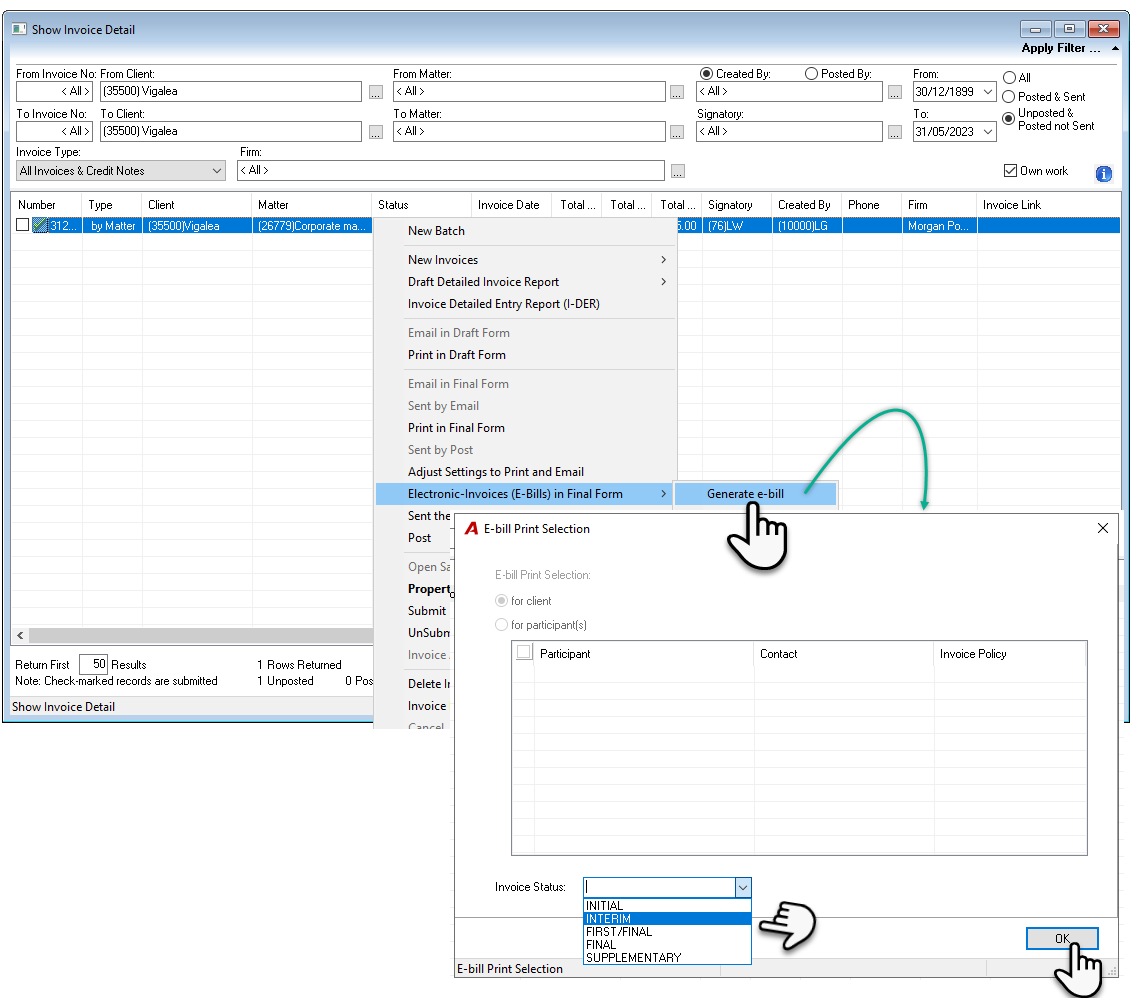
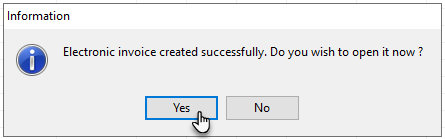
Click yes to open the file if needed.
In the electronic invoice,
-
All entries will be listed with all the information.
-
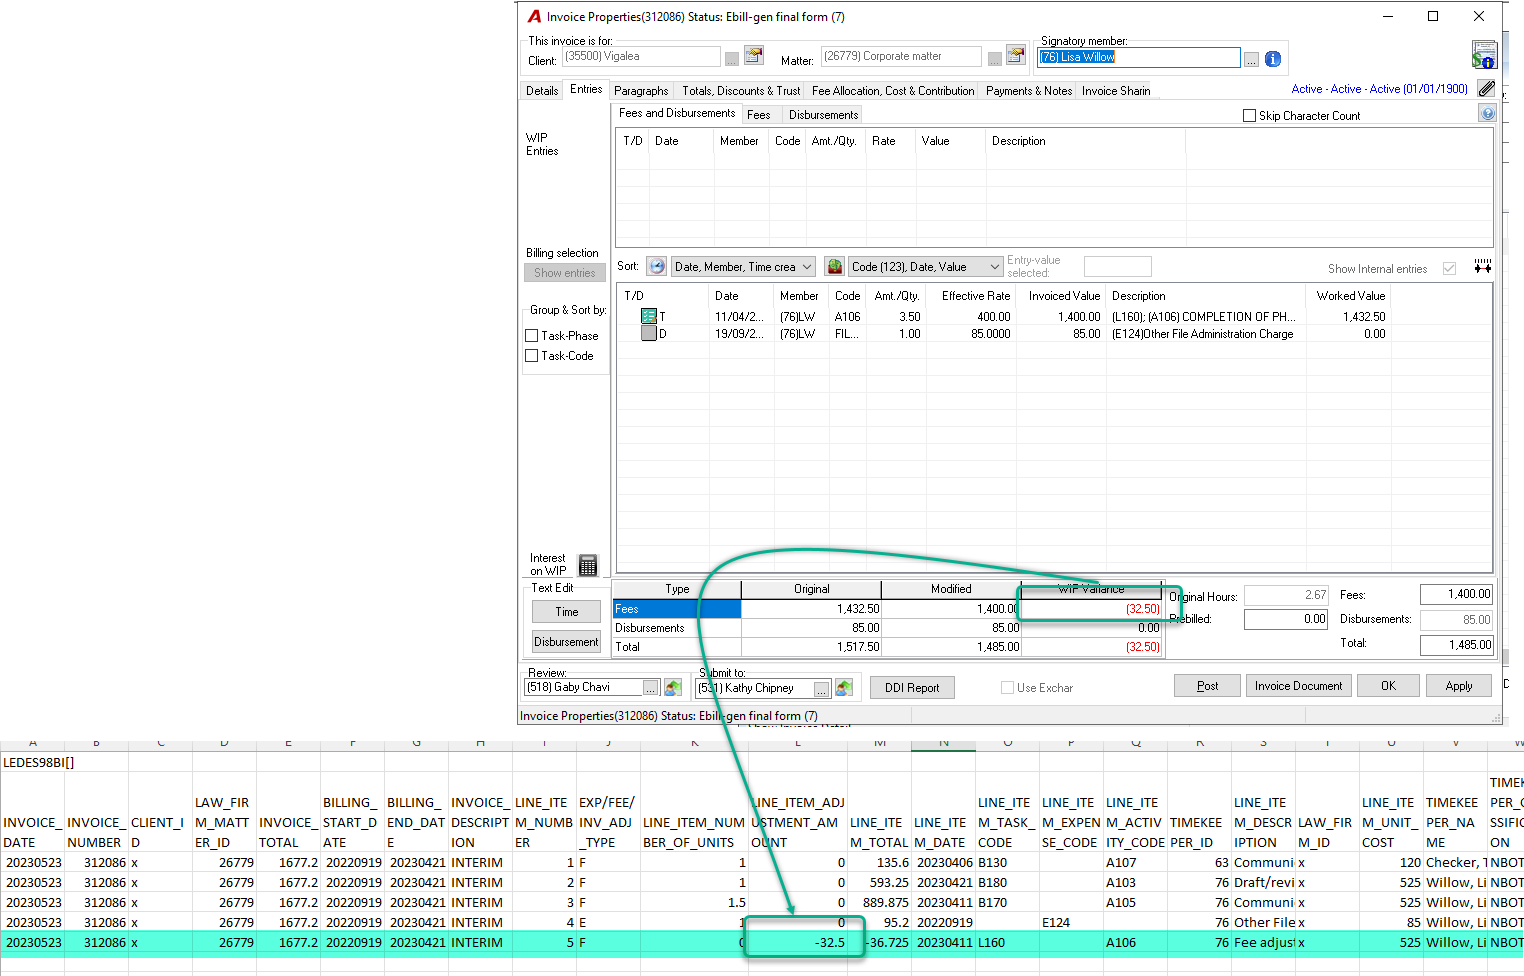
The flat fee invoice line is the last F line. It should show the amount difference, positive or negative, compared to the real amount of the invoice. The member, task and activity code are coming from the combined line.

Submit the file to the client platform
We recommend waiting to see if the invoice will be accepted before posting the invoice in case the user needs to make changes in the invoice properties.
Setting the matter back to an Hourly Billing format
If the matter needs to be set as an hourly billing format,
-
Uncheck the Flat Fee Billing Format option in the matter properties;
-
Prepare the invoice as usual. No need to use the “Combine for Presentation Purposes” option.
-
Generate the electronic invoice as usual.
-
Submit the invoice to the client’s platform.
-
When accepted, post the invoice.