.png)
This document is intended to clarify how to properly select transactions that need to have their date changed when using the "Transfer" option as the tool to do the date change.
Completing The Time & Disbursement Transfer form
Note: Selection of data is for one specific date (mm/dd/yyyy) at a time, this is NOT a 'From – To' selection
Steps 1, 2, 3 etc. must be followed exactly in that order, no deviation.
Step 1:
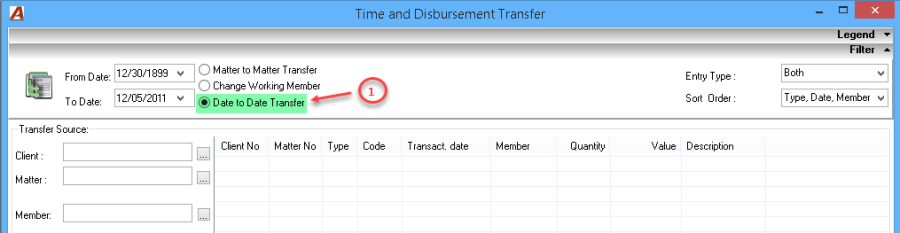
After opening the transfer form, the user's first selection "must" be to select the "Date to Date Transfer" Option
Step 2:
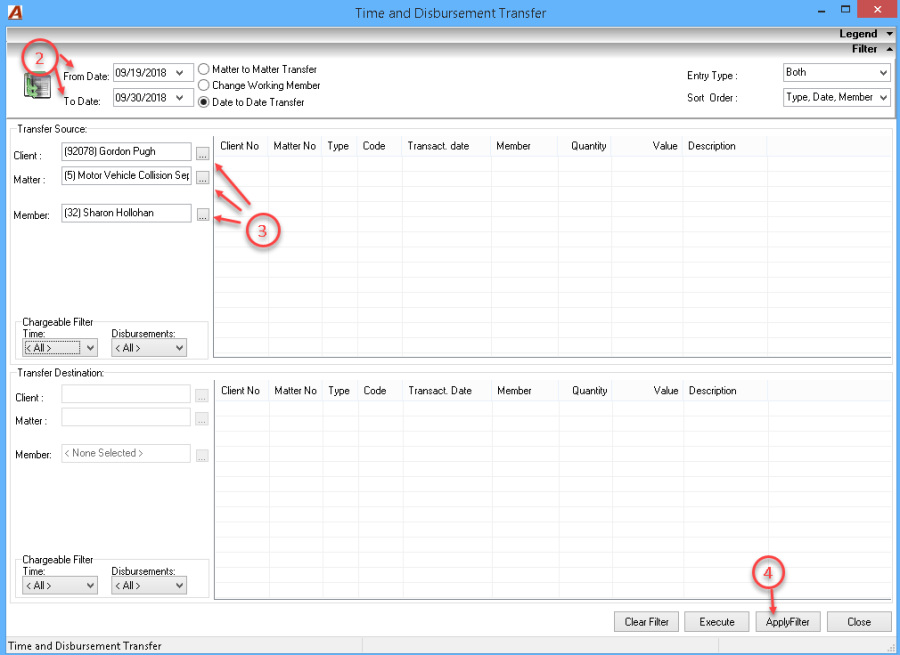
The "From Date" must be changed to indicate the specific transaction date that needs to be changed. This date can never be left as 12/30/1899 Acumin's beginning of time.
-
Specifying the client and matter and other criteria will come later.
-
If multiple dates need to be changed within the client/matter, each needs to be done as a separate transfer.
The "To Date" must be changed to indicate the "New" transaction date to be updated in all transactions affected by this Date to Date transfer.
In the example below the specific transaction date being selected is September 19th 2018 (From date = 09/19/2018).
The new Transaction's date is to be September 30th 2018 (To date = 09/30/2018).
Step 3:
Complete the Client, Matter and Member information
Step 4:
Click the "Apply Filter" button
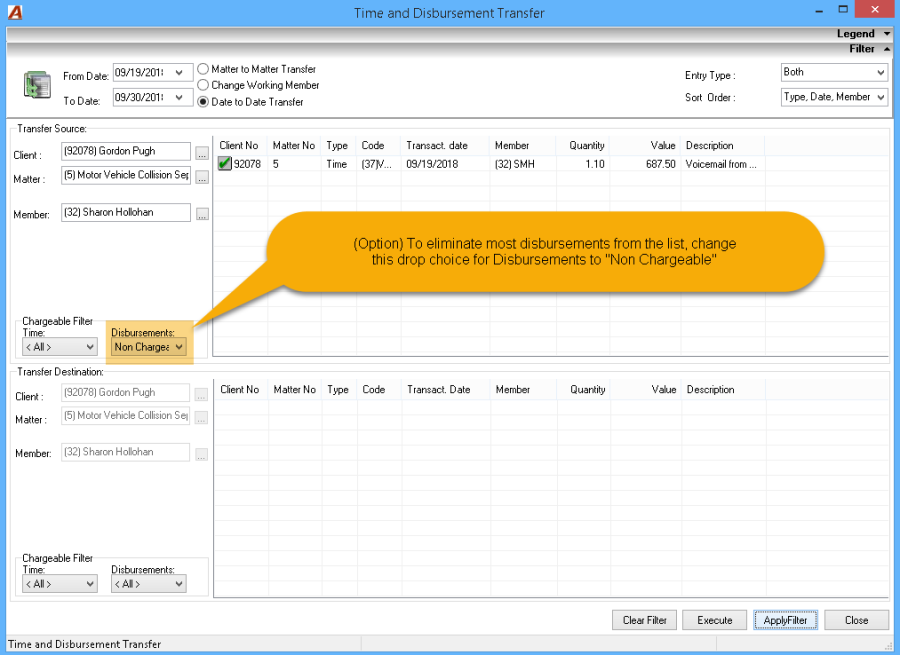
The selected transactions are listed in the top portion of the Transfer screen (Transfer Source) after the "Apply Filter" button is <clicked>
Step 5:
At this point the user has to move the desired transactions to the bottom section of the transfer form, (Transfer Destination).
Select or multiple select transactions appearing in the top section and "drag" them down to the bottom section. Releasing the hold makes them appear in that bottom section.
The user then <clicks> the Execute button.
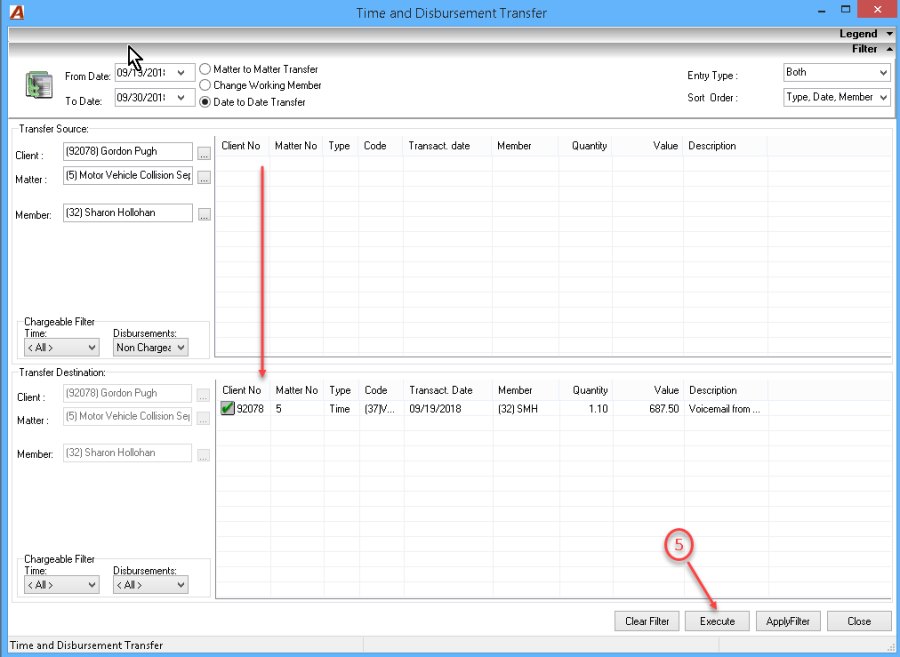
After "Executing" the date(s) will change on the transactions shown in the bottom section.

Subsequent Date to Date transfers
Begin the process again for the next "Date to Date" transfer by simply changing the 'From'
and 'To' dates and adjusting the Client, Matter and member criteria. Apply Filter with the new date criteria and follow the process as described.