.png)
Invoice Format Library – User Instruction Guide
This guide provides step-by-step instructions for setting up and managing the Invoice Format Library in Acumin. Use this guide to create, configure, and assign document templates that control how invoices, credit notes, cover letters, and other client-facing documents are presented.
Each organization can code, name, define, and personalize the template library to meet its specific document output requirements.
Prerequisites
Before you begin, ensure you have the following:
-
Access to the System Configuration menu in Acumin
-
Knowledge of your organization's template file naming conventions
-
Template files (.doc) saved in the appropriate language folders on your server
1. Accessing the Invoice Format Library
To open the Invoice Format Library:
-
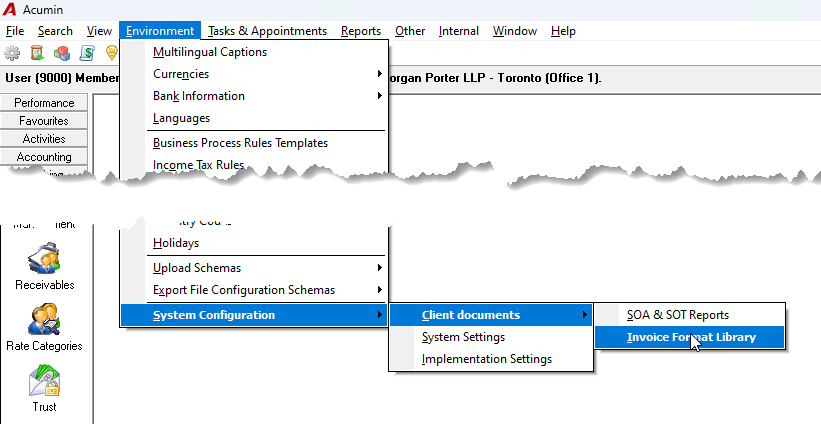
From the main menu, navigate to Environment → System Configuration → Client Document Options → Invoice Format Library.
2. Understanding the Show Bill Formats List View
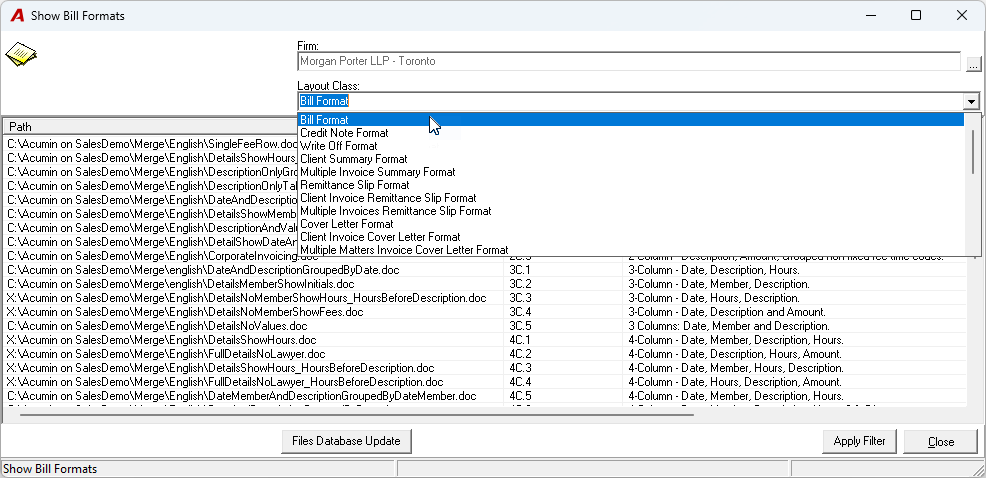
When the Invoice Format Library opens, the "Show Bill Formats" list view is displayed. By default, it filters to the layout class "Bill Format", showing the bill formats available for the firm and language of the matter being billed.
Available Format Types (Layout Class)
The organization can select from the following format types available in Acumin:
Billing & Financial Documents:
|
# |
Format Type |
|---|---|
|
1 |
Bill Format |
|
2 |
Credit Note Format |
|
3 |
Write Off Format |
|
4 |
Client Summary Format |
|
5 |
Multiple Invoice Summary Format |
|
6 |
Remittance Slip Format |
|
7 |
Client Invoice Remittance Slip Format |
|
8 |
Multiple Invoices Remittance Slip Format |
|
9 |
Cover Letter Format |
|
10 |
Client Invoice Cover Letter Format |
|
11 |
Multiple Matters Invoice Cover Letter Format |
Templates & Letters:
|
# |
Format Type |
|---|---|
|
1 |
Template Link |
|
2 |
E-mail Link |
|
3 |
Document Link |
|
4 |
Client Engagement Letter |
|
5 |
Matter Engagement/Retainer Letter |
|
6 |
Purchase Trust Bank Letter Format |
|
7 |
Redemption Trust Bank Letter Format |
|
8 |
Word Document Merge |
|
9 |
Closing Matter Formats |
|
10 |
Label Templates |
|
11 |
Statement of Account Email Template |
3. Using the Contextual Menu
Right-click anywhere in the "Show Bill Formats" list view to access the contextual menu.
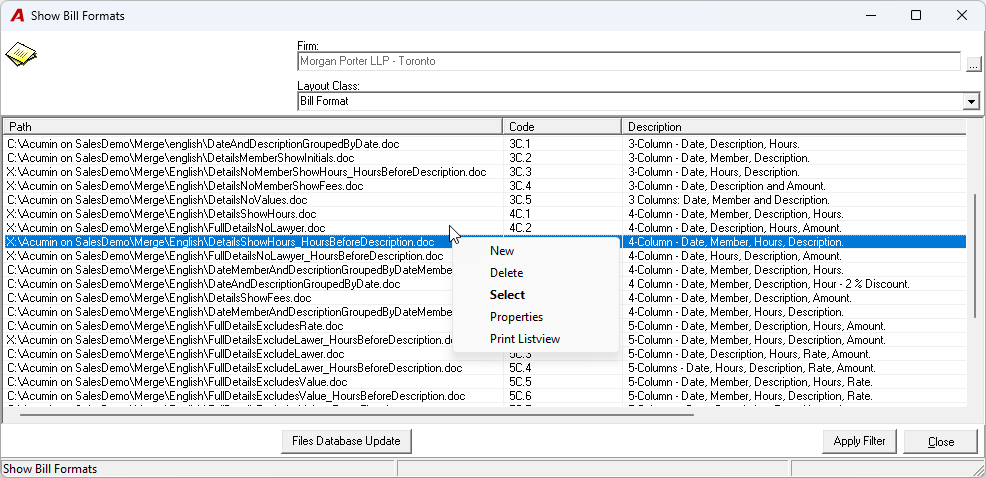
The following options are available:
|
Option |
Description |
|---|---|
|
New |
Opens a blank format properties form to create a new format entry. |
|
Delete |
Deletes an unused format code. See the warning in Section 7 before deleting. |
|
Select |
Selects a format different from the default for the applied option. This option is used when accessing the "Show Bill Formats" list view as part of other functional processes. |
|
Properties |
Opens the properties form of an existing format so you can view or edit its details. |
|
Print List view |
Prints the current list view. |
4. Filtering Formats by Layout Class
To view formats for a specific layout class:
-
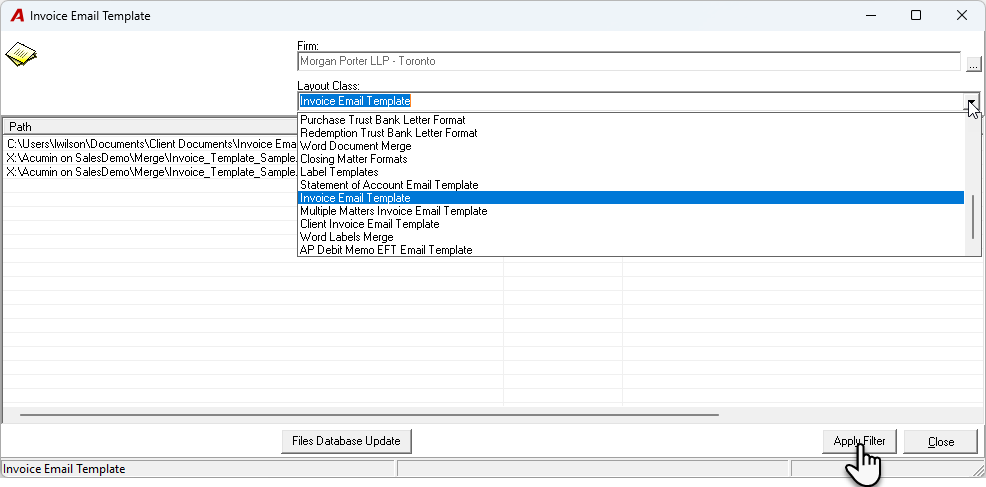
In the "Layout Class" dropdown field, select the type of format you want to view (e.g., Invoice Email Template, Bill Format, Cover Letter Format, etc.).
-
Click the "Apply Filter" button.
-
The list view will refresh to show only the templates available for the selected layout class, in the office you are logged into and the language you are using.
5. Creating a New Format
To insert a new format in your library:
Step 1: Initiate Creation
-
From the "Show Bill Formats" window, right-click anywhere in the list.
-
Select New from the contextual menu.
-
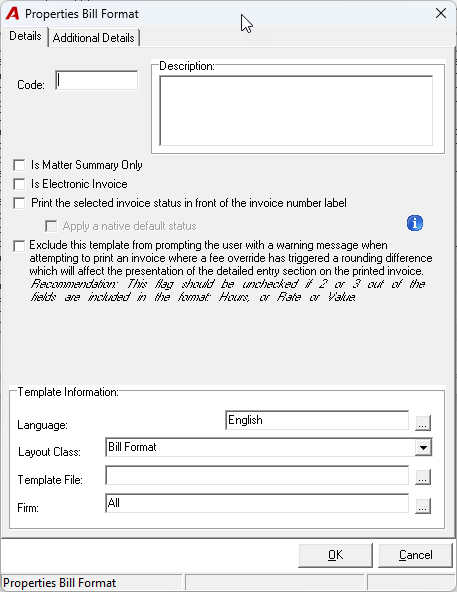
A blank format properties form will open.
Step 2: Complete the Details Tab
When developing the code structure, consider that the code is the default sort order for the "Show Bill Formats" list view.
Fill in the following fields:
|
Field |
Description |
|---|---|
|
Code |
Enter an alphanumeric code for the format. This code determines the sort order in the list view. |
|
Description |
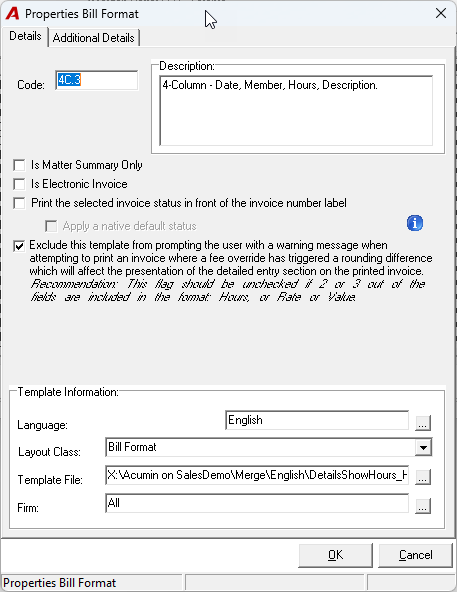
Enter a description that relates to what the user would see on print, plus the name of the template file. Example: 4-Column: Date, Member, Entry Text, Hours. DetailsShowHours.doc |
|
Is Matter Summary Only: |
Unlike the client summary, the matter summary is considered a layout class "Bill Format". Check-on this option when the properties' form is being completed for the matter summary; |
|
Is Electronic Invoice: |
Check-on this option when the properties' form is being completed for a template layout that is considered for internal use only as the client would be receiving the invoice in electronic format (Ledes 2000 etc.); |
|
Print the selected invoice status in front of the invoice number label: |
Check-on this option to have an additional option at the bill creation to choose the invoice status to be shown in the header; |
|
Apply a native default status: |
Check-on this status if you want a status selected by default based on these rules:
|
|
Exclude this Template from prompting….. |
Check-on this option if you want to prevent the system from showing a warning message when printing an invoice where a fee override has caused a rounding difference that affects how the detailed entry section is displayed. Tips: Leave this option unchecked if the template includes two or more of the following fields: Hours, Rate, or Value. |
|
Language |
Select the language for this template. Templates are created for every language licensed to the organization, so each format entry must be assigned its language. |
|
Layout Class |
Defaults to the layout class selected in the "Show Bill Formats" window. You can select a different one from the dropdown list if needed. |
|
Template File |
Click the ellipsis button (…) to associate a template file to this format. See Step 4 below. |
|
Firm |
Defaults to "All" (applies to all firms). To restrict the format to one specific firm, change the selection to the required firm. |
Step 3: Complete the Additional Details Tab
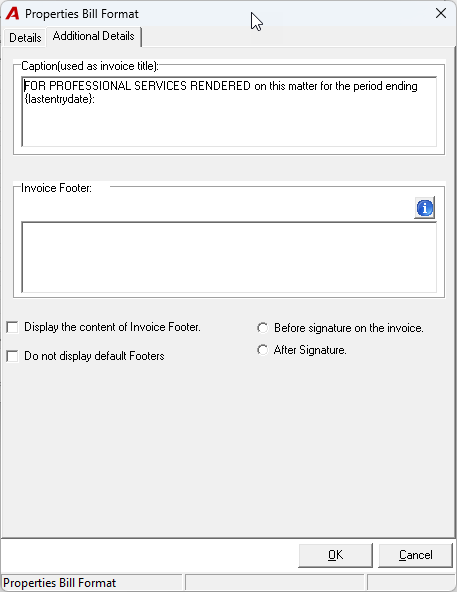
Consider further personalizing a template by changing its opening text and/or including additional text at the end of the document via the invoice footer and/or withholding the presentation of default footers.
|
Field |
Description |
|---|---|
|
Caption (used as invoice title): |
The system will print the content as the invoice title below the re line section. The variable Note: At implementation, a defaulted invoice title is entered in each format properties. It can be changed afterward. |
|
Display the content of the invoice Footer: |
N/A |
|
Do not display defaults Footers: |
When selected, the content of the 3 footers fields set in the Footer tab in the Client Document section of the System Settings will not print. |
Step 4: Select the Template File
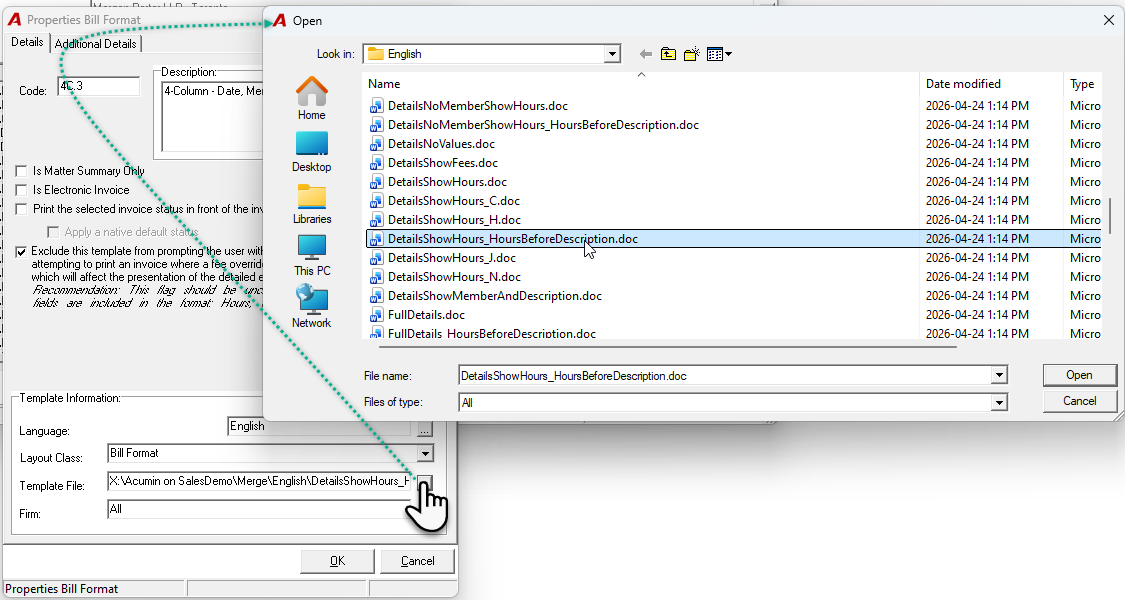
-
In the Template File field, click the ellipsis button (…) at the end of the field.
-
A file browser window will open.
-
Navigate to the correct language folder on your server.
-
Select the appropriate template file (.doc) for the format you are creating.
-
Click OK to confirm the selection.
6. Editing an Existing Format
To modify the properties of an existing format:
-
In the "Show Bill Formats" list view, locate the format you want to edit.
-
Right-click on the format entry.
-
Select Properties from the contextual menu.
-
The format properties form will open with the current values.
-
Make your changes to any of the fields described in Section 5, Steps 2 and 3.
-
Save your changes.
7. Deleting a Format
Warning: If a format code has been used to create a link between an object (for example, an invoice) and a template, you must first reassign the linked objects to a new format code before deleting. Failure to do so may break existing document associations.
To delete a format:
-
In the "Show Bill Formats" list view, locate the format you want to delete.
-
Right-click on the format entry.
-
Select Delete from the contextual menu.
-
Confirm the deletion when prompted.
Tips & Best Practices
-
Naming conventions: Use a consistent code structure across all format types to make sorting and searching easier.
-
Descriptions: Include both the print layout description and the template file name in the Description field for quick identification.
-
Test before deploying: After creating a new format, test it with a sample document to verify the template renders correctly.
-
Firm-specific formats: Use the Firm field to restrict formats that are only relevant to a specific office or entity.
-
Backup before deleting: Always verify that no active documents are linked to a format before removing it.
RELATED DOCUMENT:
WIP & Invoice Management Process - Invoice Properties and Printing - Quick Start