.png)
Scope and Purpose
The purpose of the cheque clearing document is to outline the process for producing the list of outstanding cheques for a non-system bank reconciliation process
Its scope extends across access, execution and conclusion
The Cheque Clearing Process
Access
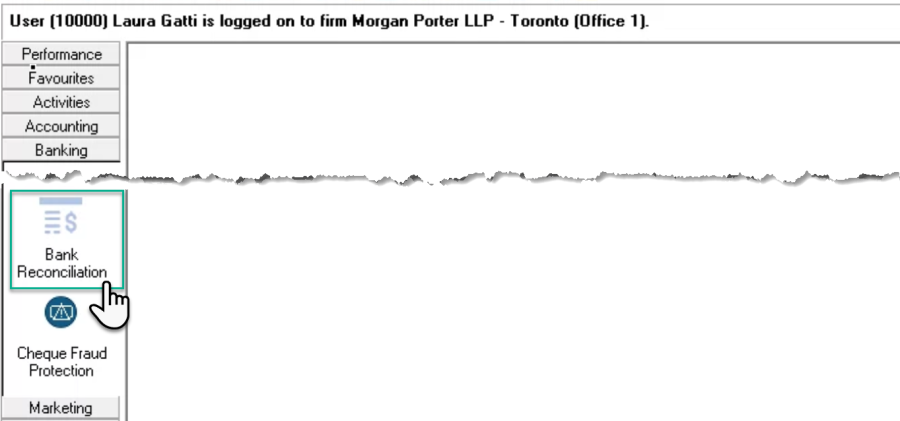
Press on the "Bank Reconciliation" icon located within the banking section of the task bar to get started.
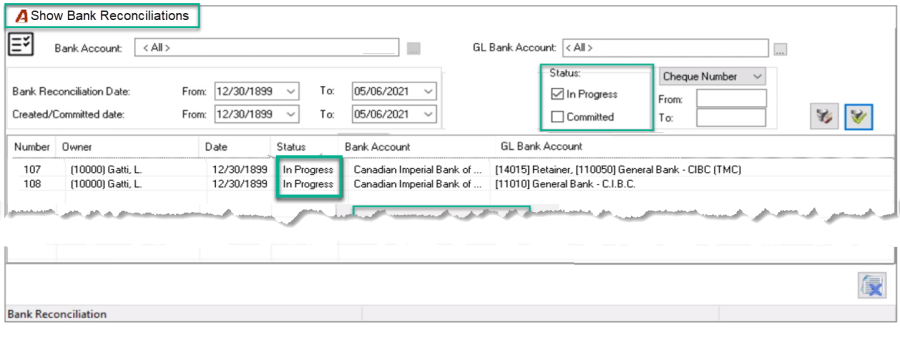
Show Bank Reconciliations:
The show bank reconciliations filter and list-view will launch pre-populated with the bank reconciliations in-progress which will be used to clear cheques only.
Right-Click Contextual Menu:
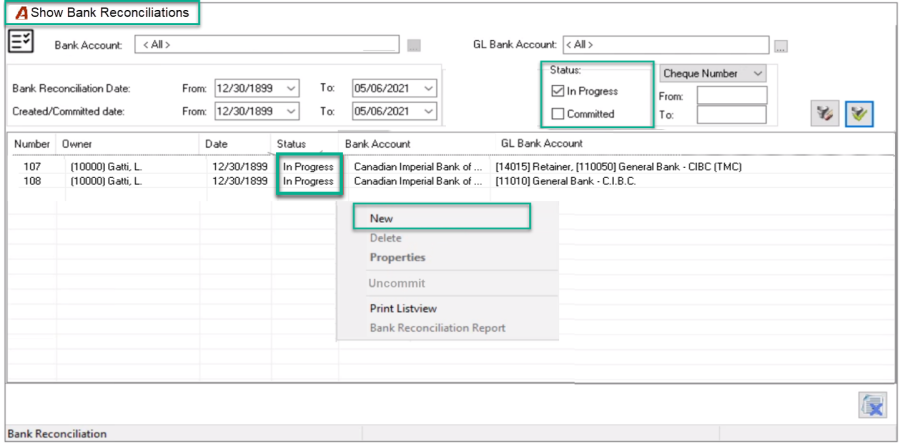
Option definitions:
New: Launches a new Bank Reconciliation form.
Delete: Applies to Bank Reconciliations that have the status "In Progress". Committed bank reconciliations cannot be deleted.
Properties: launches the Bank Reconciliation Form. If the status is "In-Progress" the user will have full read-and-write access, however if the status is "Committed", the user will be able to filter and report content but will have a limited access to bank reconciliation changes.
Uncommit: Reverses the bank reconciliation committed status, to status in-progress provided the subsequent bank reconciliation is in-progress. Although the user can make modifications, if there is a subsequent bank reconciliation, regardless of its status, the dates cannot be changed due to their interdependency. This provides the control needed to avoid creating unwanted gaps.
Print List View: Standard functionality, where depending on the user's preferences set, the list view will generate as a report or as an export to excel.
Bank Reconciliation Report: Generates the Bank Reconciliation Report.
Select "New" to start a new bank reconciliation process.
The Bank Reconciliation Form
-
Press on the ellipsis button to select the physical bank account for which you will generate the outstanding cheque list
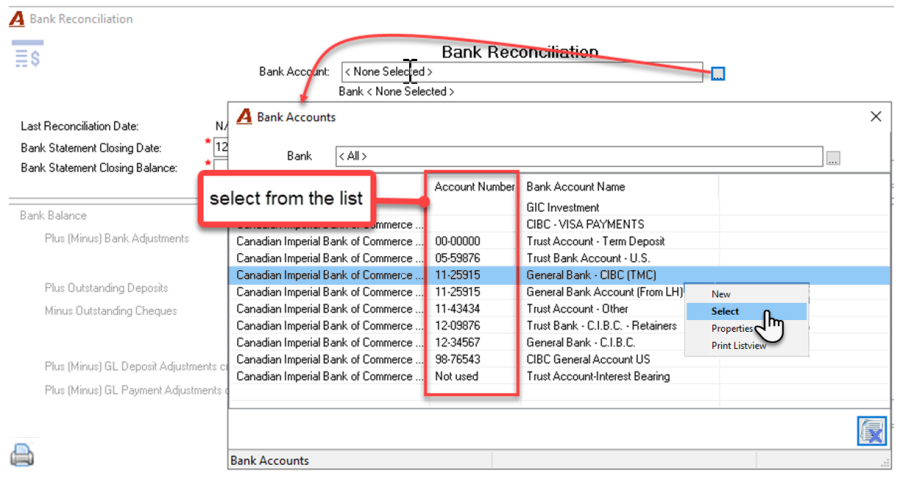
2. Choose the Bank Statement Closing Date – Bank Reconciliation Date
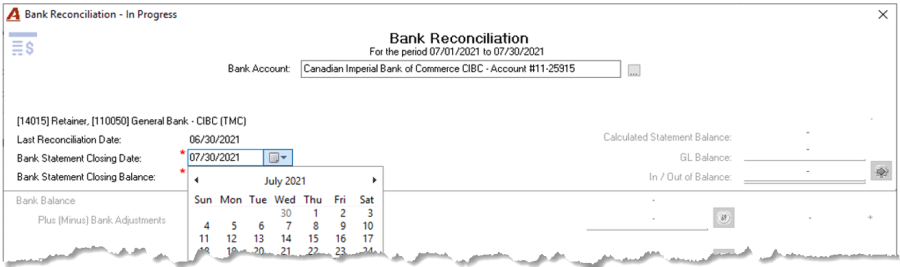
3. Enter 1.00 in the bank statement closing balance field and press execute.
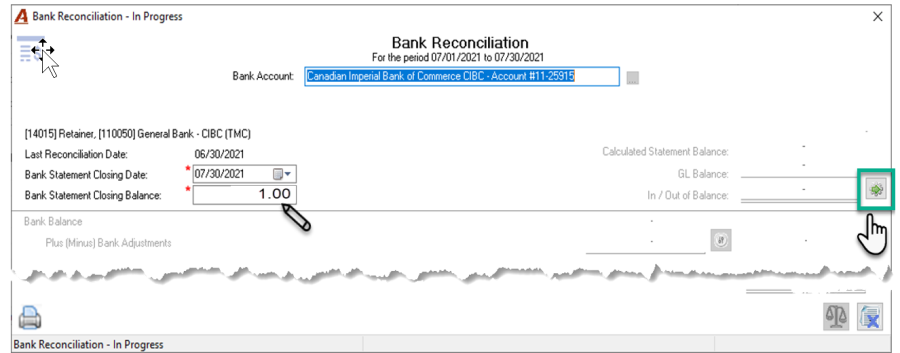
Cheque Clearance Process
Press on the button to the right of the outstanding cheques measure to launch the cheque clearance form.
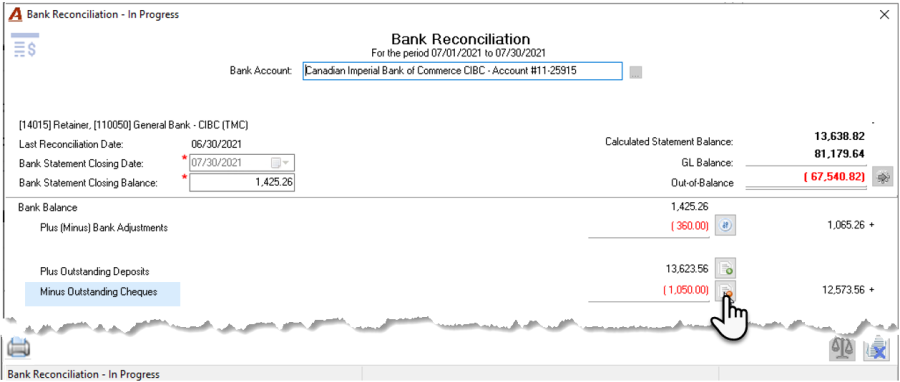
Outstanding Cheques
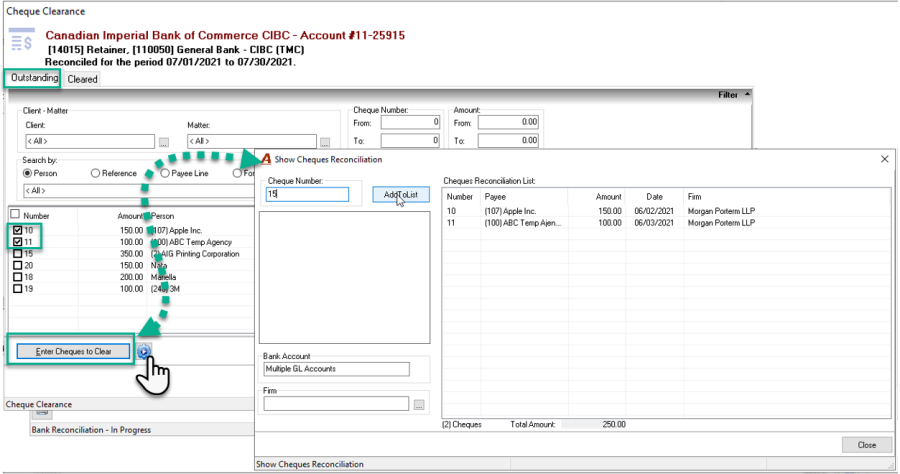
Although it is possible to checkmark the cheques that have cleared the bank directly on the the "Outstanding" cheques tab, due to volume and order, it is more effective to press on the "Enter Cheques to Clear" button – bottom left - and launch the "List of Cheques to Clear" form and enter the cheques to clear by cheque number.
Once the list is complete, close the form. The corresponding cheques will be automatically check marked. Press on the execute button to clear the selected cheques and transfer them to the cleared tab.
Cleared Cheques
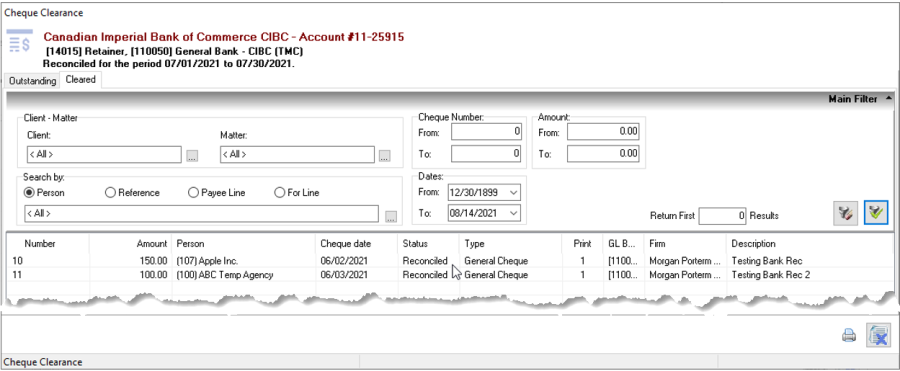
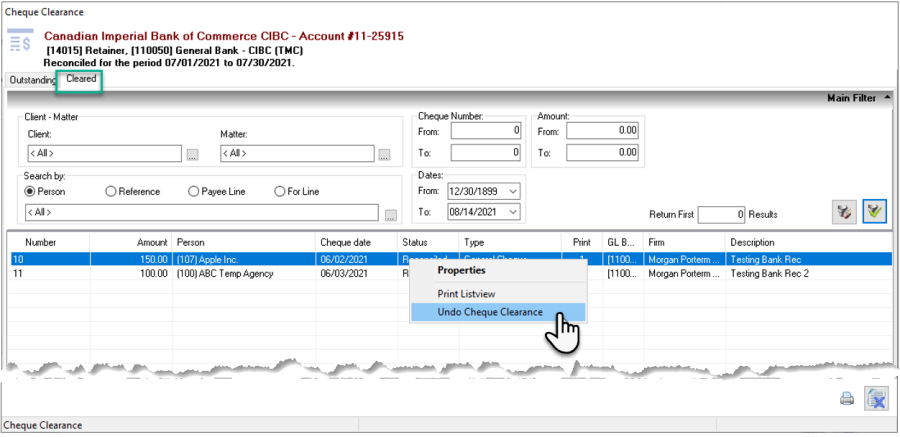
The "Cleared" tab contains the cheques that were cleared during the bank reconciliation process. To reset an outstanding cheque cleared in error, right click and select the "Undo Cheque Clearance" option.
Filter Options
Users can apply filter options to find "Outstanding" or "Cleared" cheques using the filter criteria offered.
Outstanding and Reconciled Cheque Report Options
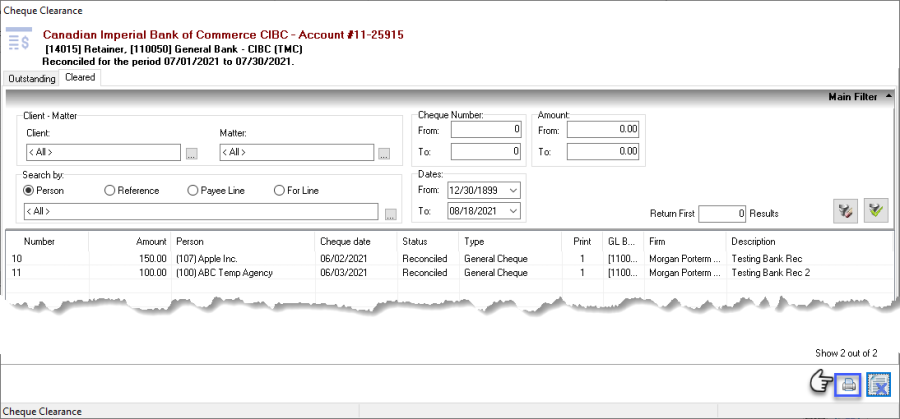
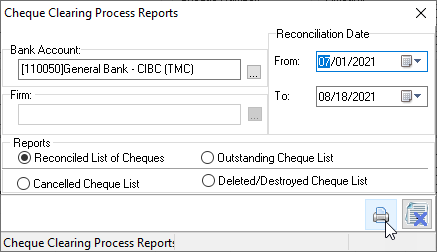
Press on the printer button to launch outstanding or cleared (reconciled) cheque report options.
The report filter will default to the GL bank account correspondong to the physical bank account and the date range for the bank reconciliation period.
Final Steps
Complete the Bank Reconciliation
Used the list of outstanding cheques to complete the bank reconciliation outside of the system. Once it is in balance return to the one in the system – where you cleared the cheques.
Complete and Commit
Once the bank reconciliation is in balance - return to the one in the system – where you cleared the cheques; and update the bank statement closing balance from 1.00 to the value needed so the form is in balance – difference to the right shows as 0.00.
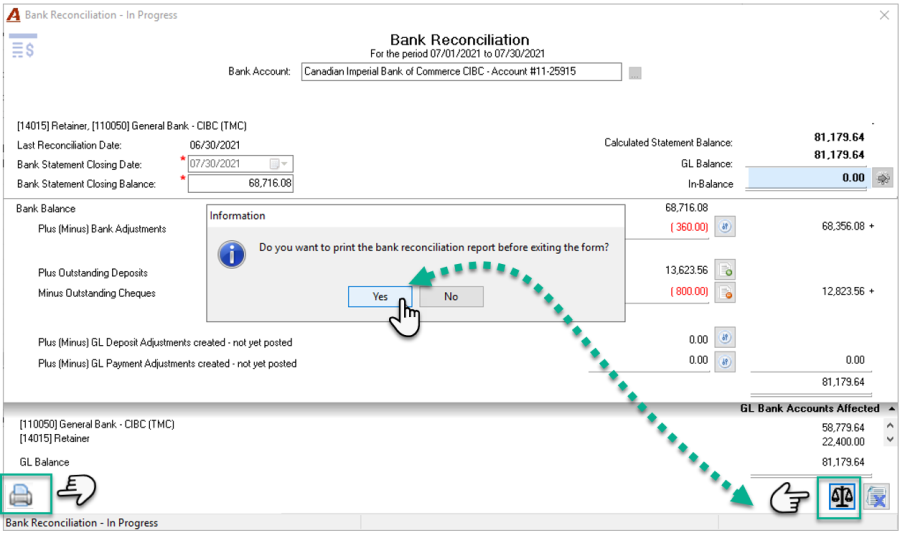
Press on the balance button and as this process is not used to complete the full bank reconciliation you do not need to print the form.