.png)
Scope and Purpose
This document outlines the requirements and processes for creating and managing GL bank accounts in Acumin. It covers GL accounts and their relationship with bank properties, ensuring proper functionality within the system.
Prerequisites
Before working with GL bank accounts, ensure the following:
-
Bank Branch: Verify that the bank branch is listed in the Bank Branch form. If not, create it.
-
Bank Account: Confirm that the bank account is listed in the Bank Account form. If not, create it.
Accessing G/L Accounts
-
From the Accounting sidebar on the left side of the screen, select the G/L option.
-
The General Ledger Inquiry form will appear.
-
-
Click on the G/L Accounts button to display the list of existing accounts in Acumin.
-
The Manage General Ledger list will launch.
-
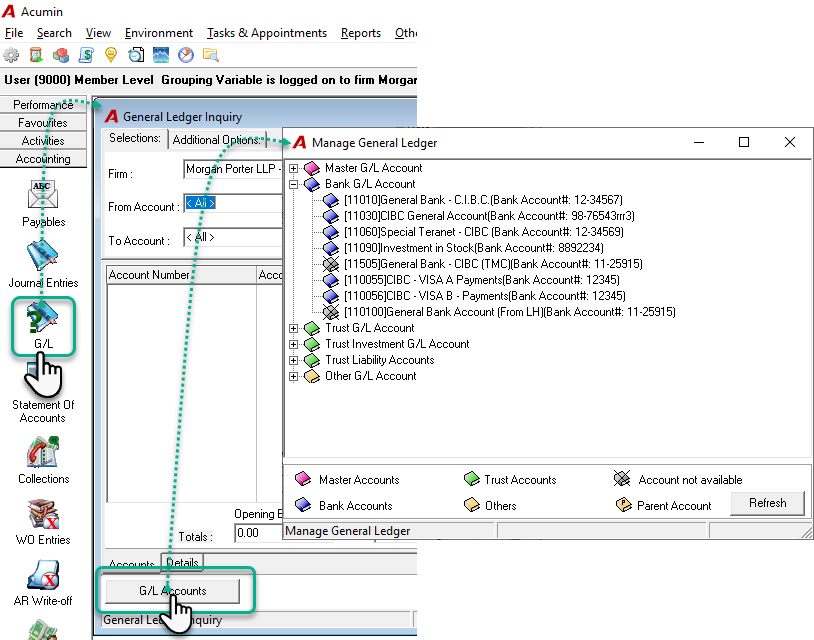
Viewing General or Trust Bank G/L Accounts
-
Click on the "+" icon next to the General or Trust G/L Account you want to view.
-
Select a specific account and click on Properties to open the GL Bank Account Properties window.
-
If the required account doesn’t exist, it will need to be created.
-
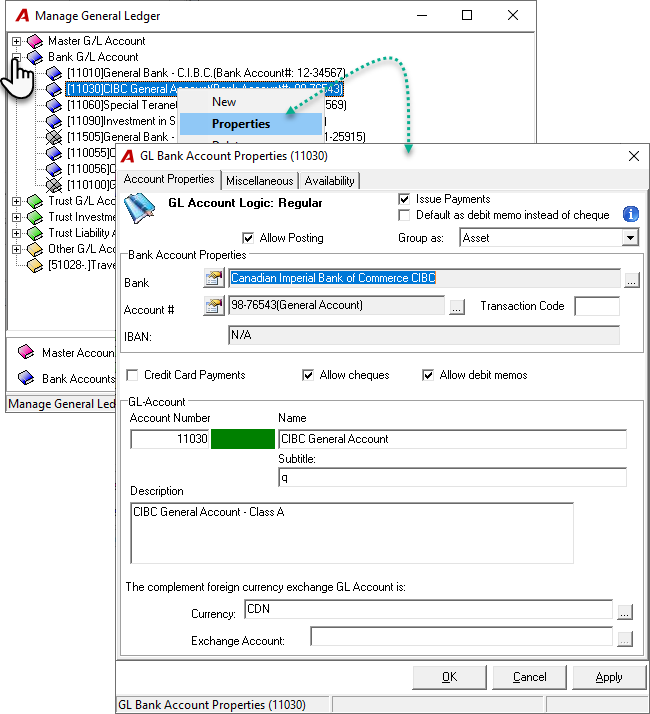
Creating a New General or Trust Bank G/L Account
-
In the Manage General Ledger form, right-click on the bank G/L Account and select New to create a new bank account.
-
The Bank GL Properties form will open.
-
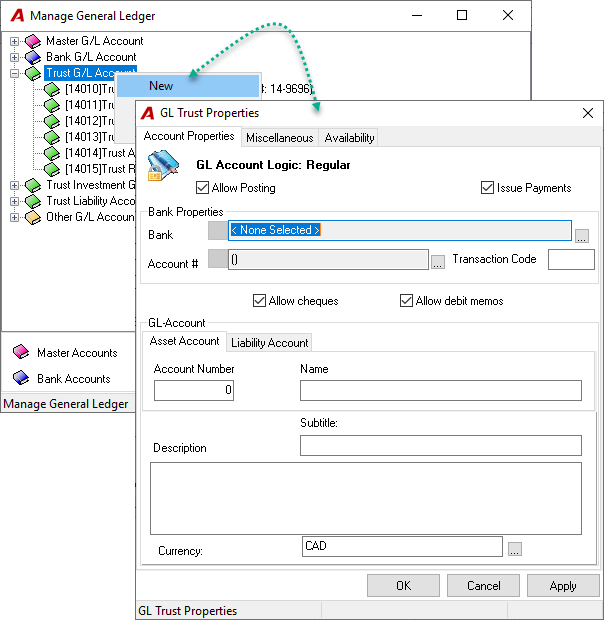
Key Fields in the Account Properties Tab:
|
Fields |
Definition |
|---|---|
|
Allow Posting |
Enable this option to allow posting transactions using this G/L account. |
|
Issue Payments |
Enable this option if payments will be issued from this bank account. |
|
Default as debit memo instead of cheque (general only) |
Enable this option if the default type of payment for this account is Debit memo instead of cheque. |
|
Group as (general only) |
Select the account kind. This is required for control of a complete income statement or balance sheet; |
|
Bank |
Click the ellipsis button to select the bank branch from the Bank Branches List. More info |
|
Account # |
Click the ellipsis button to select the bank account from the Bank Account List. More info |
|
Transaction code |
Enter a transaction code if needed. This will appear in the MICR line of printed trust or general cheques. More info |
|
IBAN (general only) |
Will display the IBAN number entered in the bank account if any. |
|
Credit Card Payments (general only) |
Enable this option if this account will be used as a Credit Card Clearing Account which is required if the firm wants to pay Vendors by credit card. |
|
Allow Cheques |
Enable this option if cheques will be generated from this bank account. |
|
Allow Debit memo |
Enable this option if debit memos will be generated from this bank account. |
|
Asset Account - Account number |
Enter the General Ledger account number. |
|
Asset Account - Name |
Enter the name of the General Ledger account number. This name will appear in your financial statement. |
|
Liability Account - Account number (trust only) |
The system automatically assigns a corresponding GL number by replacing the first digit with "2". For example, 14012 becomes 24012. |
|
Liability Account - Name (trust only) |
The system automatically appends "Liability" to the account name (e.g., "General Trust Bank - C.I.B.C. Liability"). |
|
Subtitle |
Enter a subtitle for the account; this will appear on cheques. |
|
Description |
Provide a description for this G/L account (for informational purposes only). |
|
Currency |
Click the ellipsis button to select the currency for this account. |
|
Exchange Account (general only) |
Select the sister account created for the foreign currency selected. |
Other Tabs:
-
Miscellaneous Tab: No configurations are required here.
-
Availability Tab:
-
Select each firm and double-click to make this account available for that firm. A green checkmark will indicate availability.
-
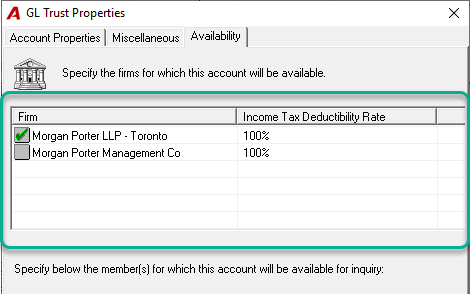
-
After completing all required fields, click OK to save changes.
-
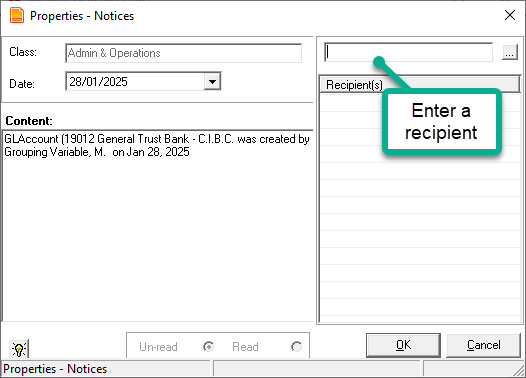
A Properties - Notices form will appear, prompting you to add recipients for notifications about this new GL account (e.g., adding it to Financial Statement Reports). Click OK to confirm.
Non-Base Currency Bank Accounts
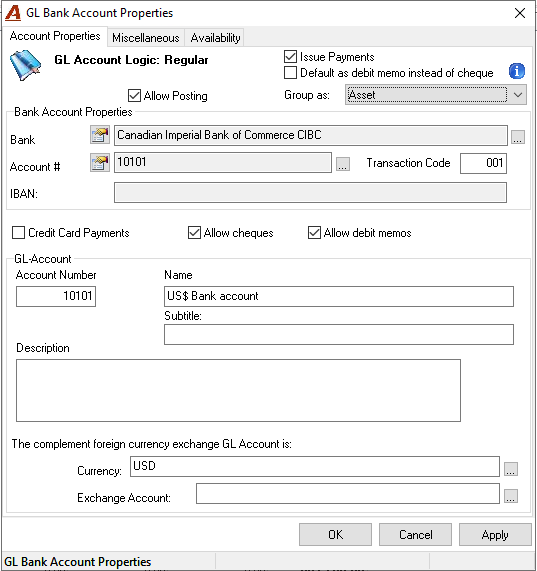
If you need to create a bank account in a currency other than your base currency (e.g., USD vs. CAD), follow these additional steps:
-
Create the non-base currency bank account as usual, selecting a currency other than your base currency.
-
Access the Availability Tab, and assign firms that can use this account.
-
Click OK to save changes.
-
A warning message will indicate that an Exchange Account is required—this will be addressed in the next steps.
Creating an Exchange Account
An Exchange Account acts as a placeholder for currency differences in transactions between currencies (e.g., USD vs. CAD). Acumin automatically calculates these differences based on exchange rates (which must be updated regularly).
For example, I receive a cheque for 100$ USD. My base currency is Canadian and based on the exchange rates in Acumin, it worth 150$ Canadian dollars. The amount appearing in the Exchange account is the difference between the amount in USD and the amount in Canadian. In this case, $50.
-
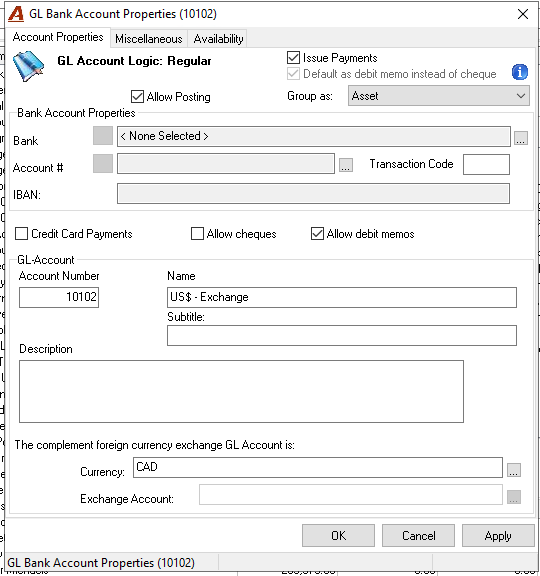
Using the G/L Bank Accounts form, create an exchange account:
-
Do NOT enter Bank Account Properties (e.g., no Bank or Account number is required).
-
Provide a G/L Account Number and a descriptive name (e.g., "Exchange Account").
-
Set it as an Asset account that does not allow cheques.
-
Ensure the currency matches your firm's base currency.
-
-
Assign availability of this account to one or more firms as needed.
Associating the Exchange Account:
-
Reopen the non-base currency bank account created earlier.
-
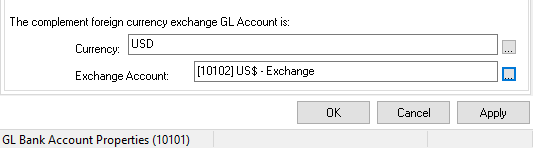
In the last field of the form (Exchange Account), either type the name of your Exchange Account or use the ellipsis button to select it.
Either type the name of the account in the Exchange Account field or use the ellipsis to select the exchange account created.
Once the account is selected, click on OK to save the changes.
RELATED DOCUMENT:
GL Bank Account - Setting Up Bank Accounts for General or Trust Bank GL Accounts
GL Bank Account - Setting Up Bank Branches for General or Trust Bank GL Accounts