.png)
Overview
The Basic Information section in the Client/Matter dashboard displays selected team roles and other key details — without needing to open the full client or matter record.
-
Your firm can define a default view for all users.
-
Each user can further customize the information to suit their personal preferences.
Part 1: Set Up the Display at the Firm (Environment) Level
This setup affects all users across the firm.
Step-by-Step Instructions:
-
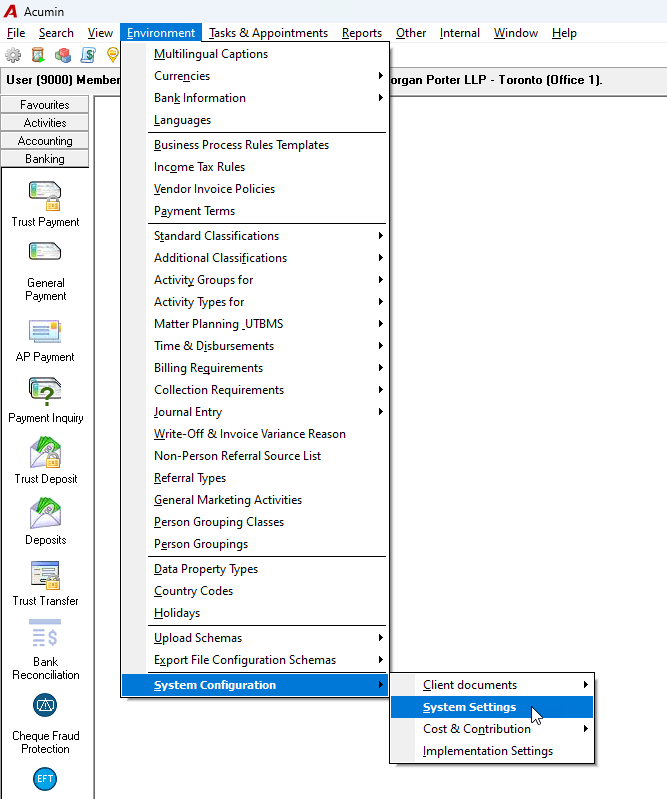
Go to:
Environment > System Configuration > System Settings -
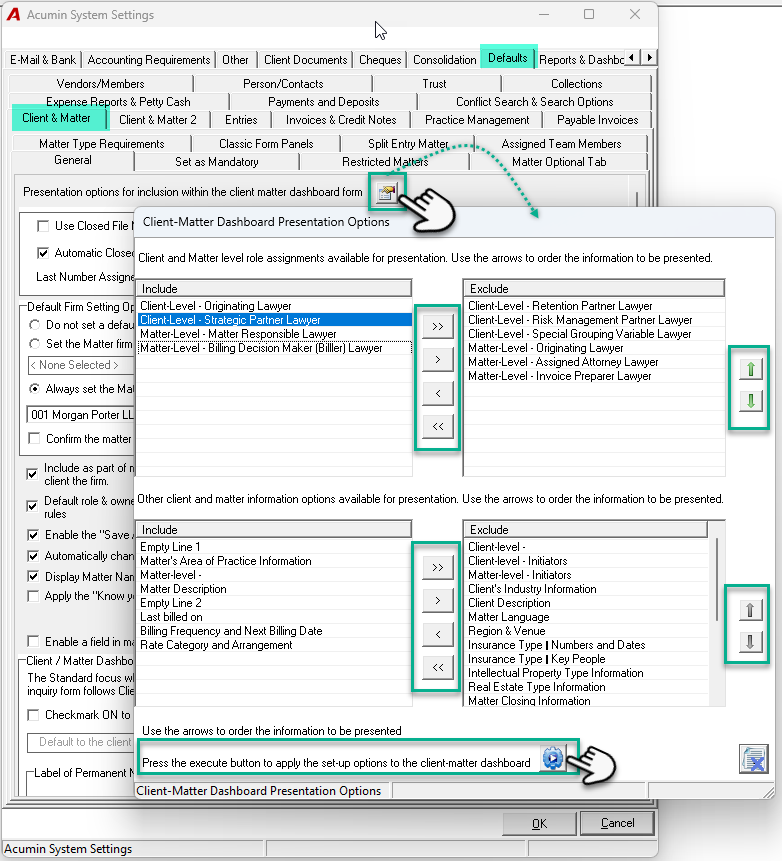
In the AcuminSystem Settings window, go to:
Defaults > Client & Matter -
Click on:
🟦 Presentation options for the inclusion within the client matter dashboard form
-
In the Client-Matter Dashboard Presentation Options window:
-
Use the ➡️ / ⬅️ arrows to move elements between the Include and Exclude lists.
-
Use the ⬆️ / ⬇️ arrows to reorder elements within the Include list.
-
Use “Empty line #” items to insert line breaks for easier reading.
-
-
When your changes are complete, click Execute to apply them.
-
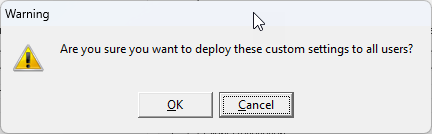
Confirm when prompted — this will apply the layout to all users.
Note: Changing this configuration at the firm level will override any personal user-level customizations.
Part 2: Set Up the Display at the User Level
This setup applies only to your personal user profile.
Step-by-Step Instructions:
-
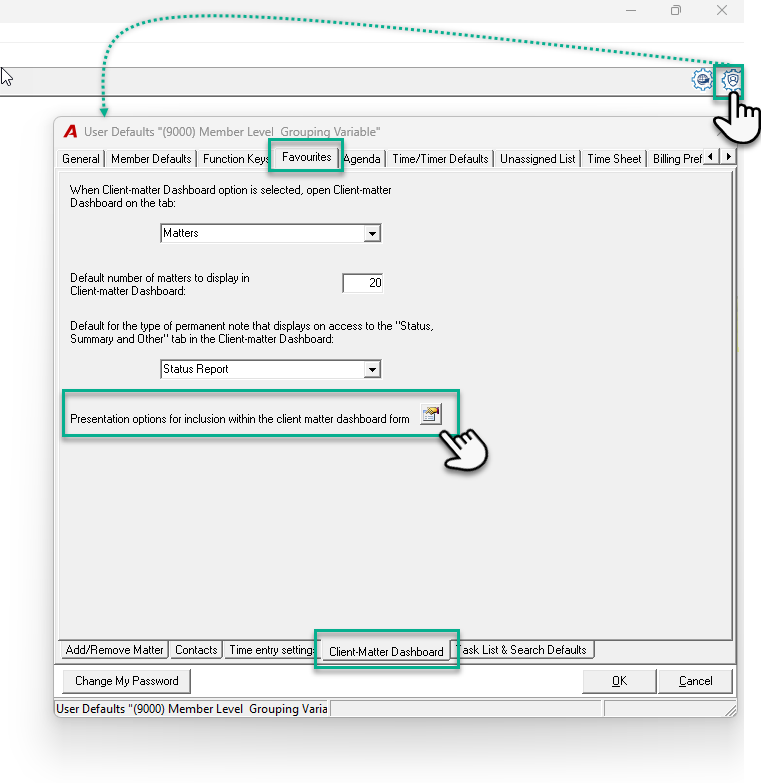
Click on the ⚙️ User Defaults button in the top-right corner of Acumin.
-
In the User Defaults window, go to:
Favourites > Client-Matter Dashboard -
Click on:
🟦 Presentation options for the inclusion within the client matter dashboard form
-
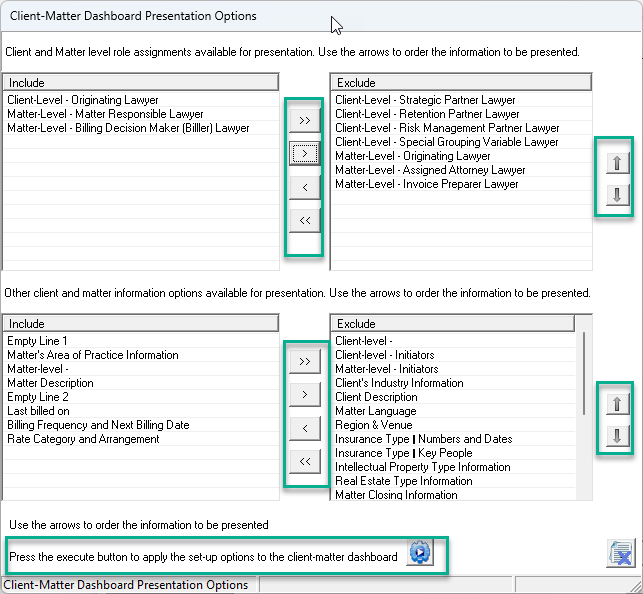
In the Client-Matter Dashboard Presentation Options window:
-
Use the ➡️ / ⬅️ arrows to move elements between the Include and Exclude lists.
-
Use the ⬆️ / ⬇️ arrows to reorder elements within the Include list.
-
Use “Empty line #” items to insert line breaks for easier readability.
-
-
When your changes are complete, click Execute to save them.
Note: If your organization updates this layout at the firm level later on, it will override your personal settings.