.png)
Invoice E-signature Set up
Scope and Purpose
The purpose of this document is to provide the information needed to use and print the E-signature on final invoices.
Highlights
-
When uploading the E-signature in Acumin, the image is encrypted and saved directly in the database and cannot be accessed.
-
Authorized users can remove the E-signature from the member properties form by clicking on the Destroy button.
-
The E-signature will print:
-
if the signature option is enabled for the invoice and,
-
if the option "Printed in Final form" is selected and,
-
if the invoice signatory member selected has an E-signature file uploaded in his member properties.
-
-
The signature image must respect the size requirements to display without distortion which is crucial for a signature.
-
The E-signature will print when the PDF format is selected.
Steps to implement the E-signature:
To proceed, the user needs to have permission "#417 – Load and view Signature for Use with invoice".
-
Prepare the E-signature file;
-
Save the E-signature file in a temporary folder;
-
Upload the E-signature file in the member properties;
-
Test the E-signature;
-
Delete the E-signature file from the temporary folder.
Setting up the E-signature
Prepare the image file
-
The E-signature must be saved in either .jpg or bmp format.
-
The physical size of the signature canvas is fixed and should be:
-
8 cm width X 2 cm height. OR
-
485 pixels width X 121 pixels height (145 dpi)
-
This includes the white space around the signature itself.
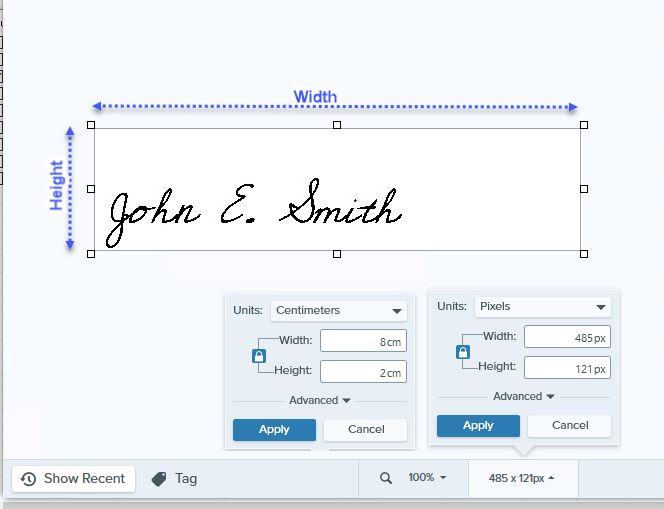
For a better result, see our recommendations below:
-
Position the signature on the bottom left of the canvas to appear aligned with the text and the signature line.
-
Set the signature colour in black and the canvas background colour "transparent" (if saving in jpg format).
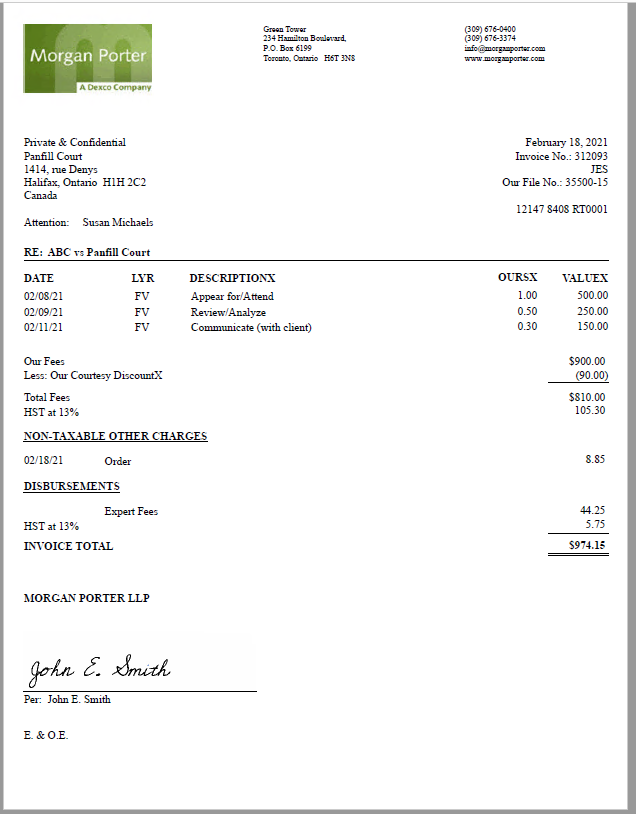
Invoice example using an E-signature.
Saving the E-signature file
The member's E-signature files will have to be saved in a temporary folder accessible by the authorized user that will set up the signature in the member propertie, in the Other Images folder under the Executable folder for example.
Uploading the E-signature in Acumin
To upload the E-signature in the member properties,
-
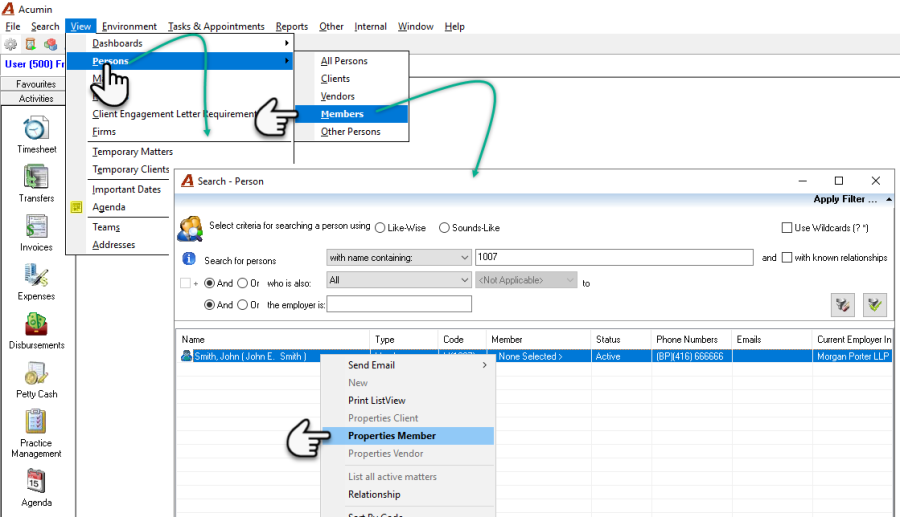
On the main option bar, click on View then Persons then Members;
-
In the Search- Person form,
-
Enter the member number or name and click on the filter icon.
-
Right-click on the appropriate member and select Properties Member.
-
-
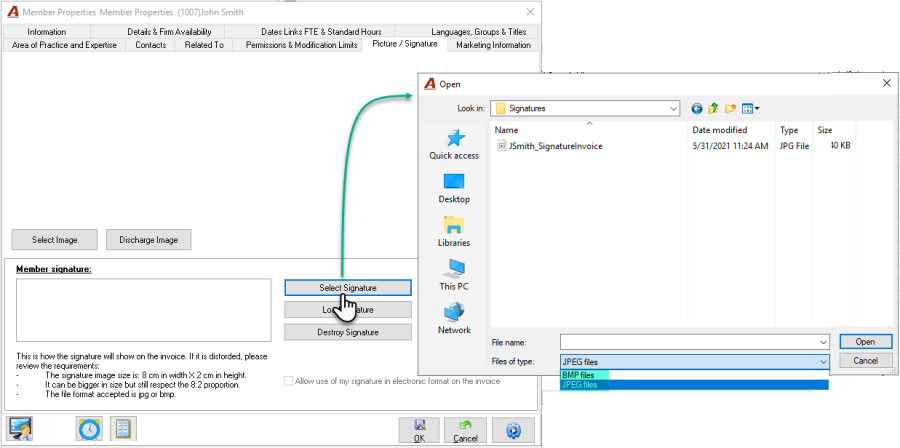
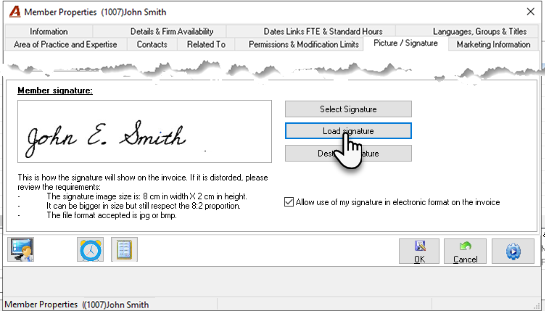
In the Member Properties form, click on the Picture/Signature tab;
-
In the Member Signature section, press on the Select Signature button and select the folder where the signature is temporarily saved and select the signature file needed.
Tip :
-
The image of the signature displayed will be the same as printed on the invoice document. If distorded, it means that the signature image doesn't respect the size or proportion.
-
Don't forget to select the correct image format "jpg" or "bmp"
-
Once the E-signature is visible the Member Image section, click on the Load Signature button to encrypt and save the signature in Acumin. The
-
The option "Allow use of my signature in electronic format on the invoice" will be checked by default.
-
You can then click on OK button to save and exit from the member properties.
Test the signature
To test the signature on invoices, you need the following.
-
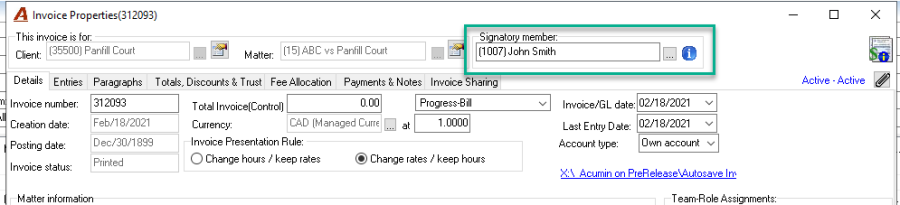
An unposted invoice with the correct member set as the signatory.
-
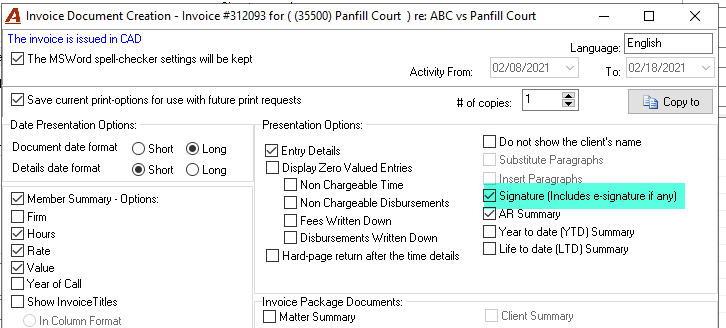
The Signature (Include E-signature if any) option needs to be enabled in the Invoice Document Creation form.
-
The invoice must be printed as the "Final" invoice for the E-signature to appear on the printed invoice.
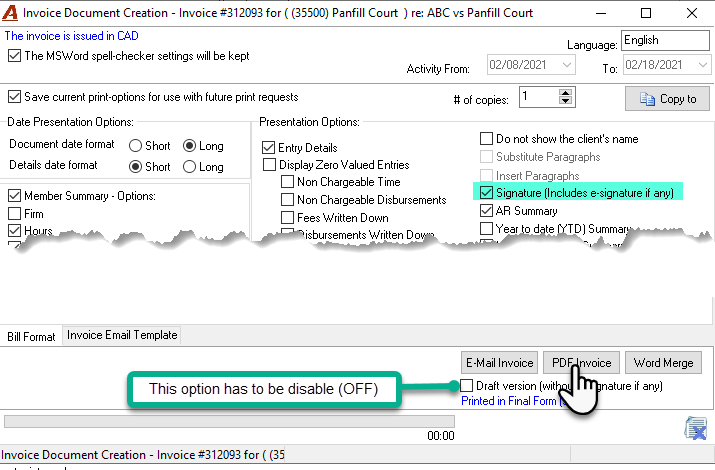
To print the Final invoice from the Invoice Document Creation form, do the following.
-
The Draft version (without the E-signature if any) option must be disabled.
-
Click on the PDF Invoice button.
-
Click on No to the question Do you want to print the saved Invoice?
-
The invoice will launch with the signature.
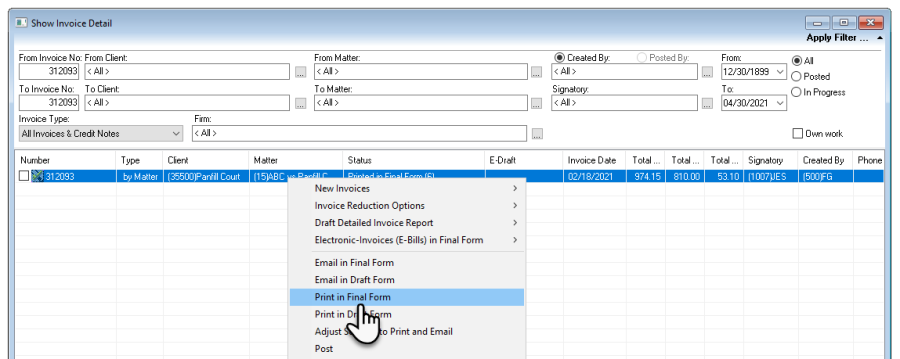
To print the Final invoice from the Show Invoice Details form:
-
-
Verify that the options previously outlined in the Invoice Document Creation form are set and saved.
-
Select the invoice. Right-click and select the Print in Final Form option.
-
-
Click on OK in the Paper Clip form.
-
Click on No to the question Do you want to print the saved Invoice?
-
The invoice will launch with the signature.
Delete the E-signature file
Once the E-signature is uploaded and tested, the authorized user can delete it from the temporary folder that was used to upload it into Acumin. This is done with Windows-File Explorer.