.png)
This guide explains how to add a new person to Acumin using the Member Wizard, create the person’s Acumin login (user), set their billing rate, and then verify the member’s properties. Follow the parts in order: the wizard prompts you to create the user when it finishes, and rates are set afterward.
|
Term |
Meaning |
|
Member (Mb) |
An individual in the firm (lawyer, paralegal, assistant, accounting staff). Time, transactions, and reporting attach to the Member. Members cannot be deleted because of historical data integrity. |
|
Acumin User |
The login name, password, and security group that give access to Acumin and control permissions. |
|
Rate |
The hourly or flat amount assigned to a Member in a rate category. Every Member needs at least a base rate. |
|
Tip: The wizard walks you from Member to User, then you continue to Rates. Each part can also be done or edited separately later. |
Before You Start
You need:
-
Rights to manage Member properties, create Acumin Users (Administrator), and manage time rates.
-
Full name (including prefix/suffix and middle name if used on invoices), phone numbers, address, and email.
-
Main Classification, Reporting Classification, Area of Practice, Practice Group, Functional Department, and Firm Title for the member.
-
For lawyers: Year of Call.
-
Primary assistant (if any).
-
Username, initial password, and Windows/Active Directory credentials if your firm uses them.
-
Security group to assign, and the base rate amount and effective date.
Part 1 – Create the Member (Member Wizard)
-
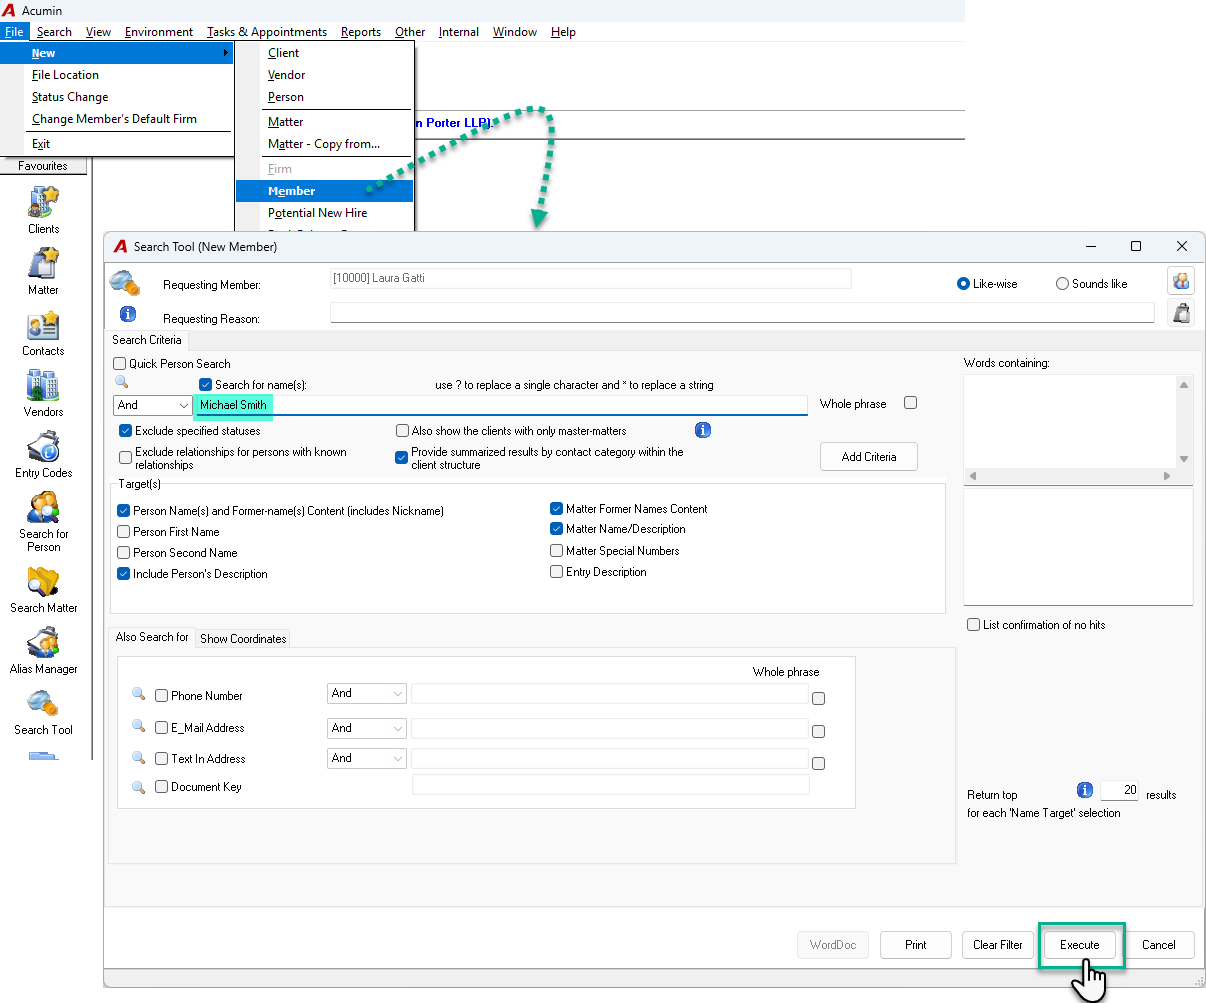
From the menu, select File > New > Member to open the search tool.
-
Add the person’s name to the search string, click Add Criteria, then Execute. This checks for an existing record (Client, Vendor, Member, or Basic Person) so you do not create a duplicate.
-
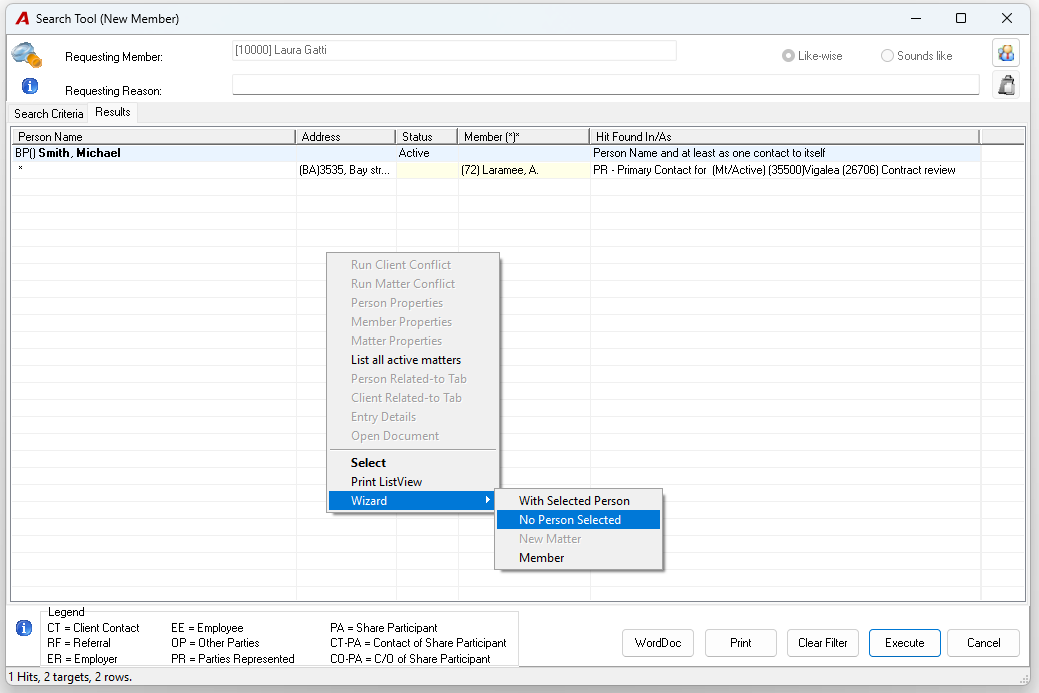
In the Results tab, right-click and select Wizard – No Person Selected to start the wizard.
Important Note: In cases where a Member also serves as a Client (Cl) or Vendor (Vd), it is recommended that separate profiles be maintained for each role to ensure proper functionality and reporting within the system. For more information, click here.
-
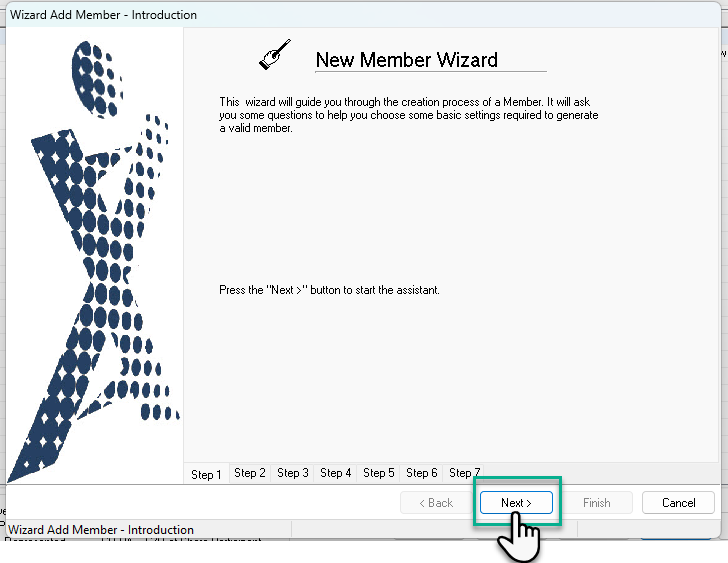
Click Next through Step 1.
-
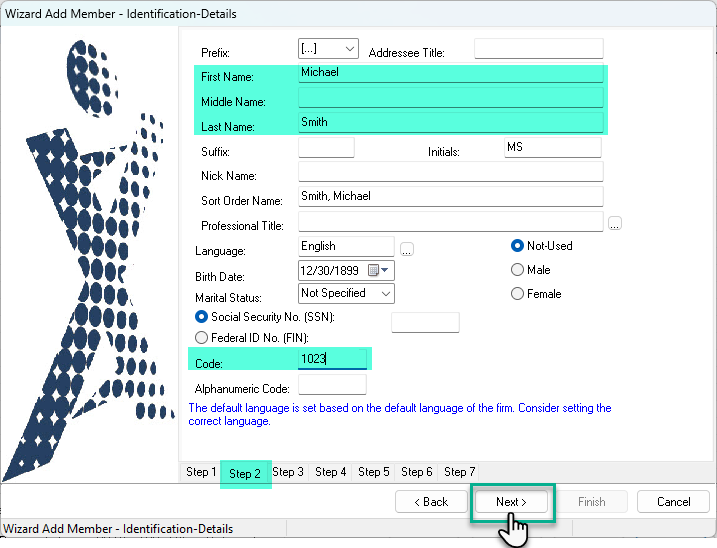
Step 2 – Name, Professional Title, and Code
-
Prefix / Suffix: these print in the invoice signature line. Example: Mr. / Howard / Lewis / Smith / Q.C. prints “Mr. Howard Lewis Smith, Q.C.” Leave the prefix blank if you do not want it shown.
-
Enter the First, Middle, and Last Name fields.
-
The system will automatically assign the next available member code. This code can be modified at any time.
-
-
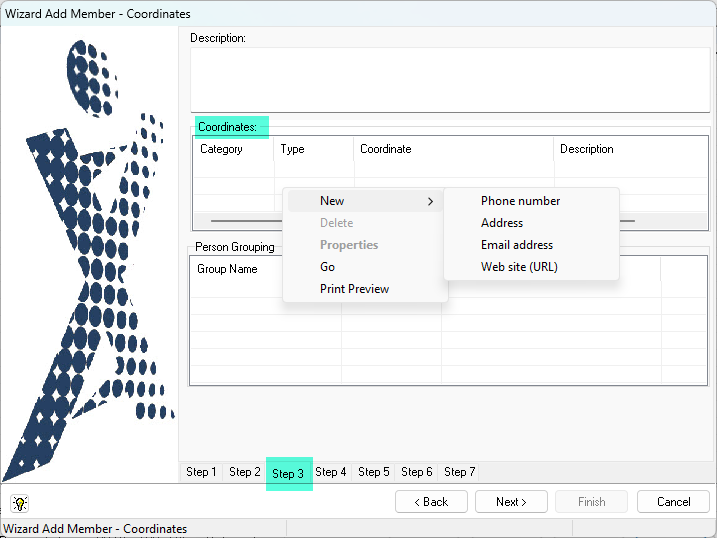
Step 3 – Coordinates. Right-click in the Coordinates list to add phone numbers, addresses, and email addresses.
-
Phone: you can add several (business, home, etc.). Complete the entry and click OK.
-
Address: search for the address first. If it does not exist, right-click and select New, complete the address properties, click OK, and then select it. Typically, user selects the firm address.
-
-
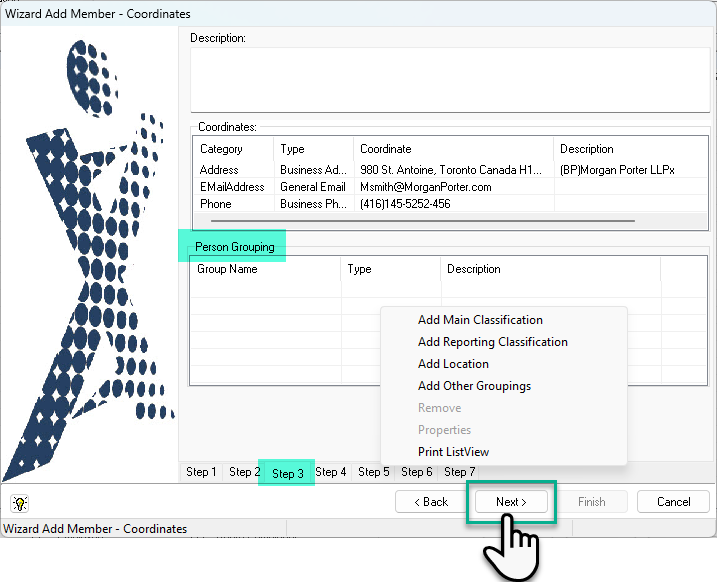
Step 4 – Person grouping: every new member must have a Main Classification and a Reporting Classification. Right-click and select Add to open the grouping filter. Both are firm-defined reporting dimensions and are mandatory. You may also need to select a location, depending on how your environment is configured.
-
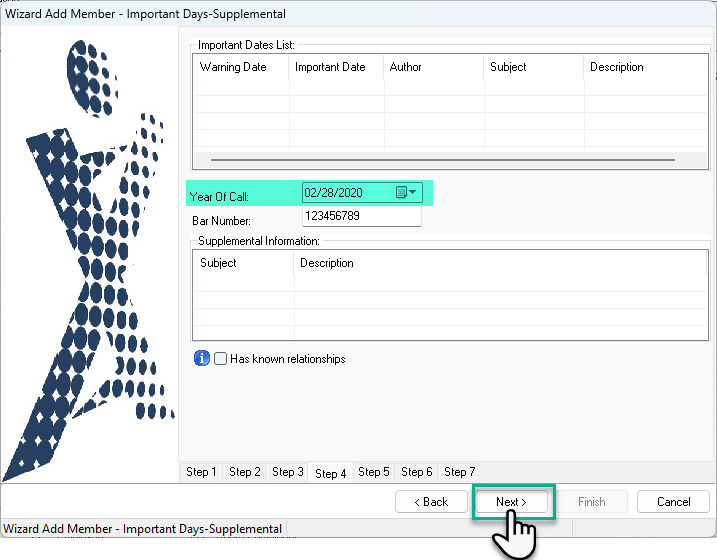
Step 5. If the member is a lawyer, enter the Year of Call.
-
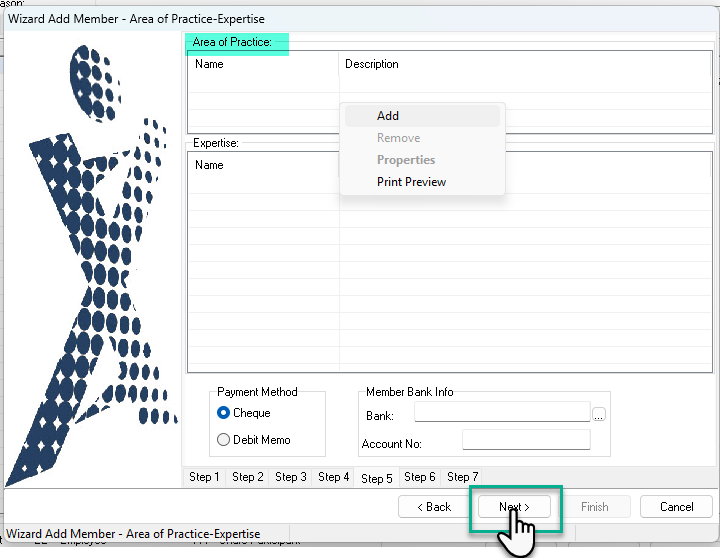
Step 6. Right-click, select Add, and assign at least one Area of Practice. This field is mandatory even if the member does not use it; if none applies, choose a generic value such as “None.”
-
Step 7 – Firm information. The wizard defaults to the firm you are in. All users must belong to firm 001, so it is easiest to always create new members in firm 001. Complete:
-
Practice Group, Functional Department, and Firm Title (mandatory).
-
Assistant: enter the primary assistant only, or leave blank if there is none. More assistants can be added afterward.
-
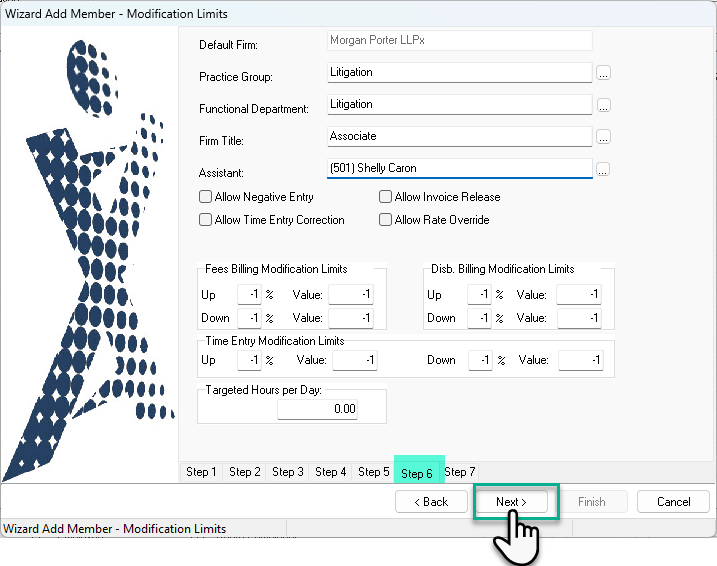
Modification Limits: -1 means no limit when preparing an invoice; 0 means an invoice cannot be prepared if any change (override request) is made. Fees and Disbursement limits matter only if the member can post invoices. Time Entry limits currently have no function, so leave the default of -1.
-
Targeted hours per day: optional exception-based override used in the utilization rate. Targets are normally set at the classification/reporting group level.
-
|
Note: The checkboxes Allow Negative Entry, Allow Time Entry Correction, Allow Invoice Release, and Allow Rate Override are no longer used. |
-
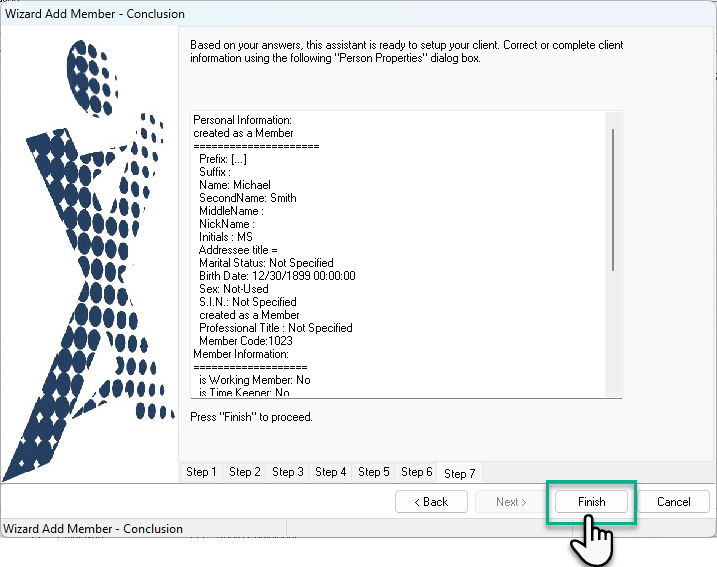
Step 8. Click Finish.
-
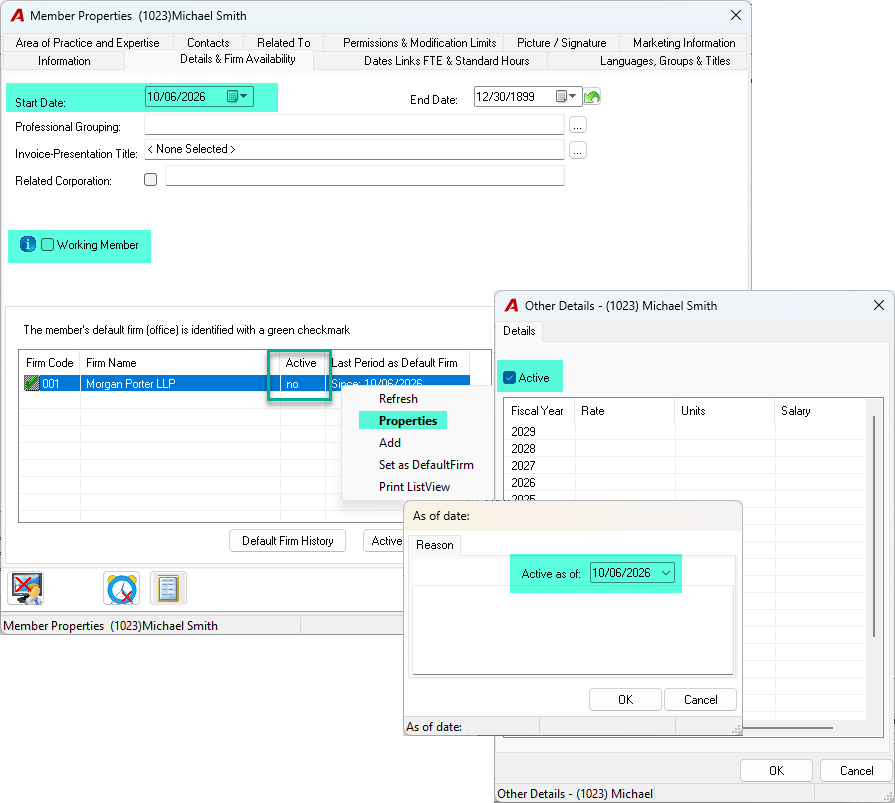
Acumin asks you to activate the member first. Click OK.

-
Activate and grant access to the member.
-
To activate a member, select the firm and then Properties. Check the Active option and click OK. Enter an effective date. i.e. the date the person was hired.
-
To add a member to a firm other than the main one, select the Add option and select the firm. You will have to activate this member in the second firm.
-
Start Date: If the member is not a timekeeper, select the same date as the effective date above. If the member is a timekeeper, this date can be modified later to be the date the timekeeper started to record time in Acumin which can be later then the effective date. This has impact on the member statistics in the My Hours tab.
-
Working Member option: check this option if the member is a timekeeper.
-
-
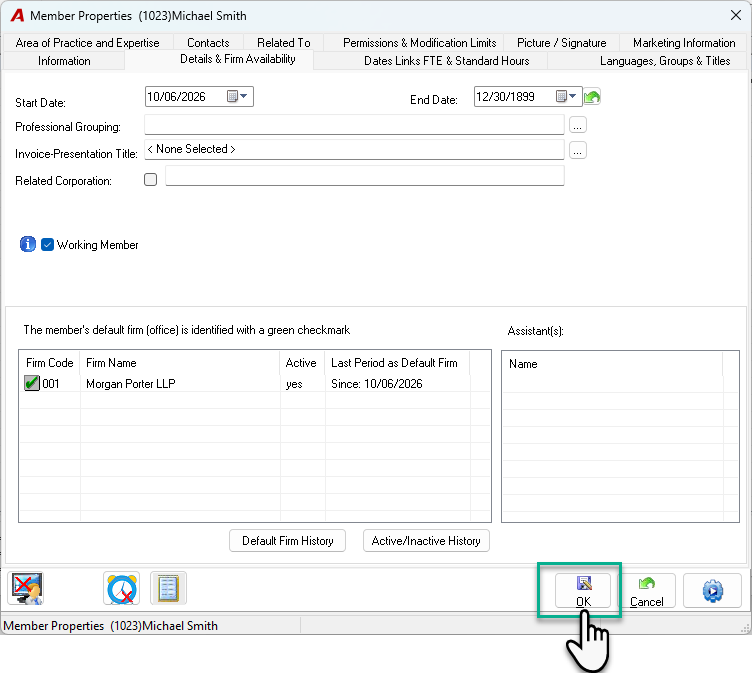
When completed, click OK.
-
Acumin asks whether to create a user. Click Yes to continue to Part 2.

Part 2 – Create the Acumin User
-
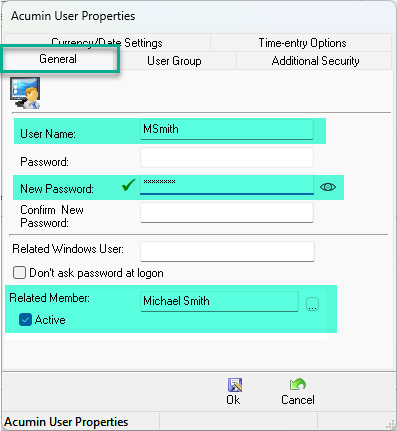
The system will launch the Acumin User Properties form directly. Complete the user properties according to firm requirements:
-
User name and Password (minimum 8 characters, with upper- and lowercase letters).
-
Related Windows User: enter the Active Directory / Windows username if the firm uses single sign-on (no Acumin password is needed in that case).
-
Related Member: the member you are creating will already be selected.
-
Active: check the box.
-
-
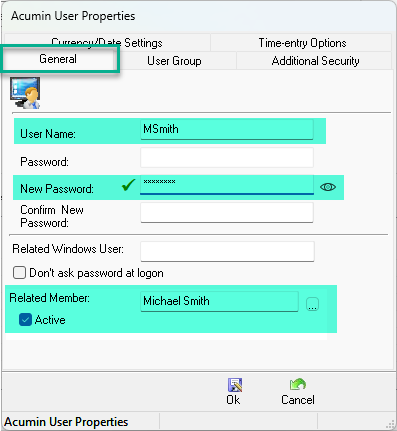
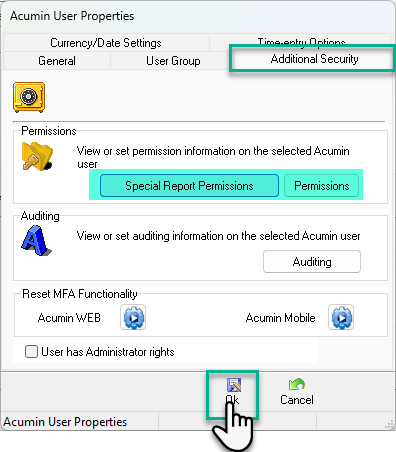
On the User Group tab, select the correct security group. Click OK to return to the Acumin Users form.
|
Optional:
|
-
When completed, click OK.
-
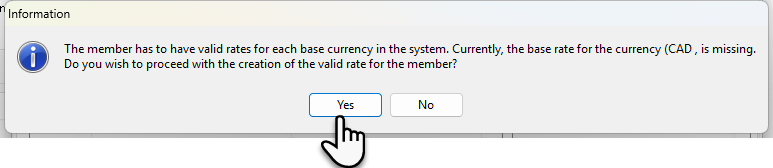
Acumin asks whether to create a valid rate for the member. Click Yes to continue to Part 3.
Part 3 – Set the Member’s Rate
Every member needs at least a base rate. Non-billing staff can be given a base rate of $1.00. Rates are historical: they apply according to their effective date.
-
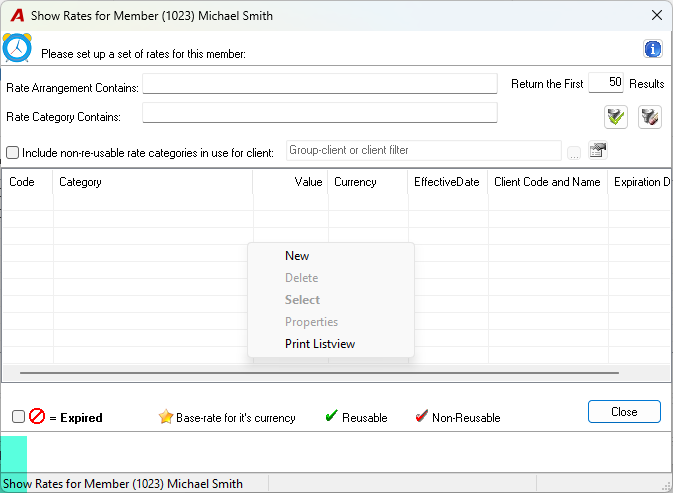
The system will launch the Show Rates For Member … form directly. Right-click and select New.
-
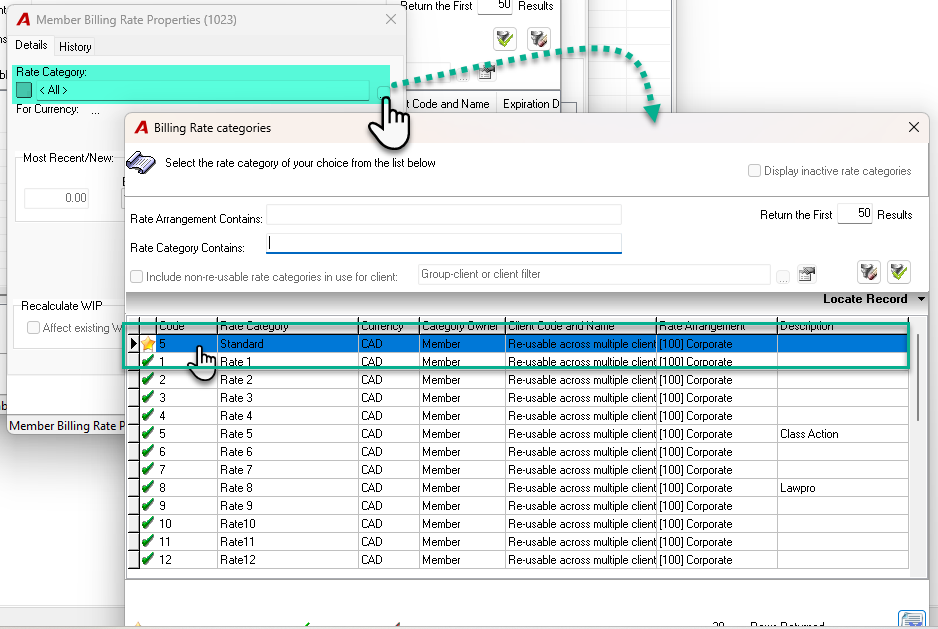
In the Member Billing Rate Properties form, click the ellipsis (…) next to Rate Category and select the base rate category.
-
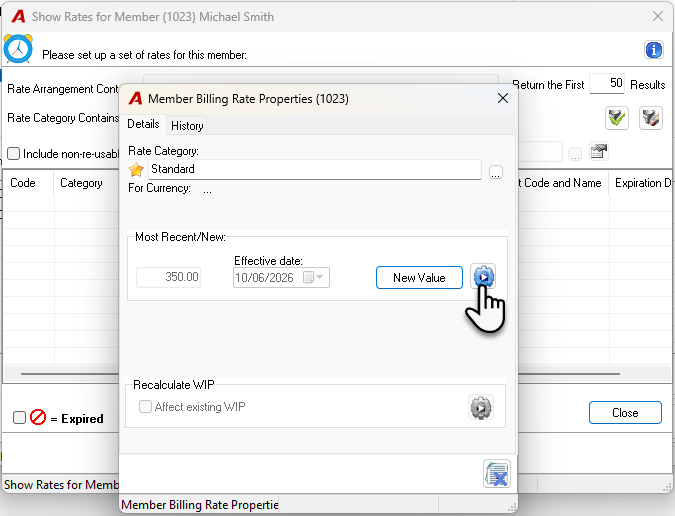
Click New Value to open the Show History form, then right-click and select New to open History Properties.
-
Enter the value and the Effective date, then click OK.
-
To validate the new rate, click the Execute button.
-
Click Exit.
-
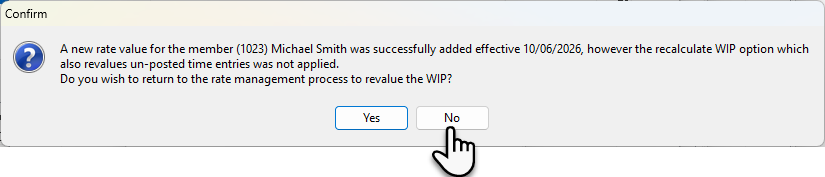
The system will launch a confirmation message. Click No because you do not want to revalue the WIP since you just created the member.
-
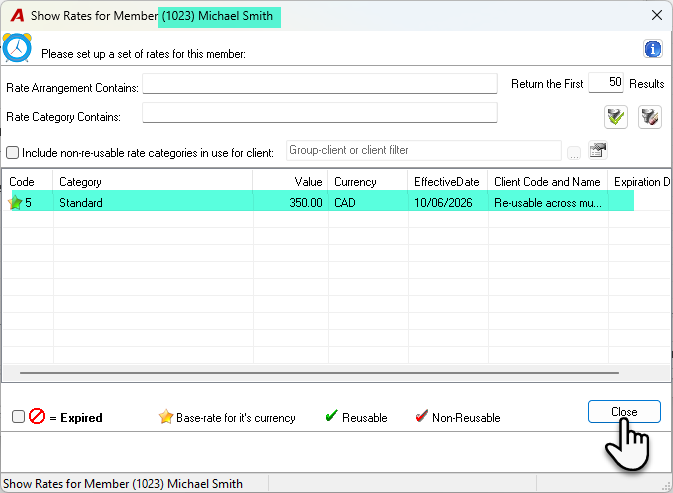
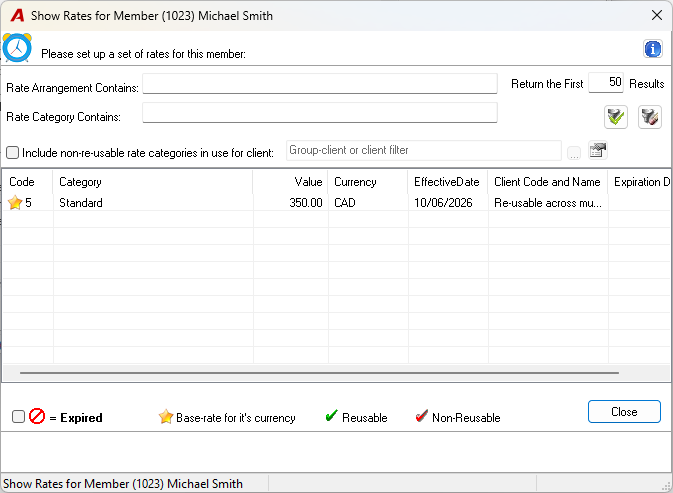
The base rate will appear in the Show Rates for Member … form.
-
Click Close.
Part 4 – Review the Member’s Properties, User Security Profile, and Member Rates
After the member and user exist, verify and complete the properties according to firm policy.
-
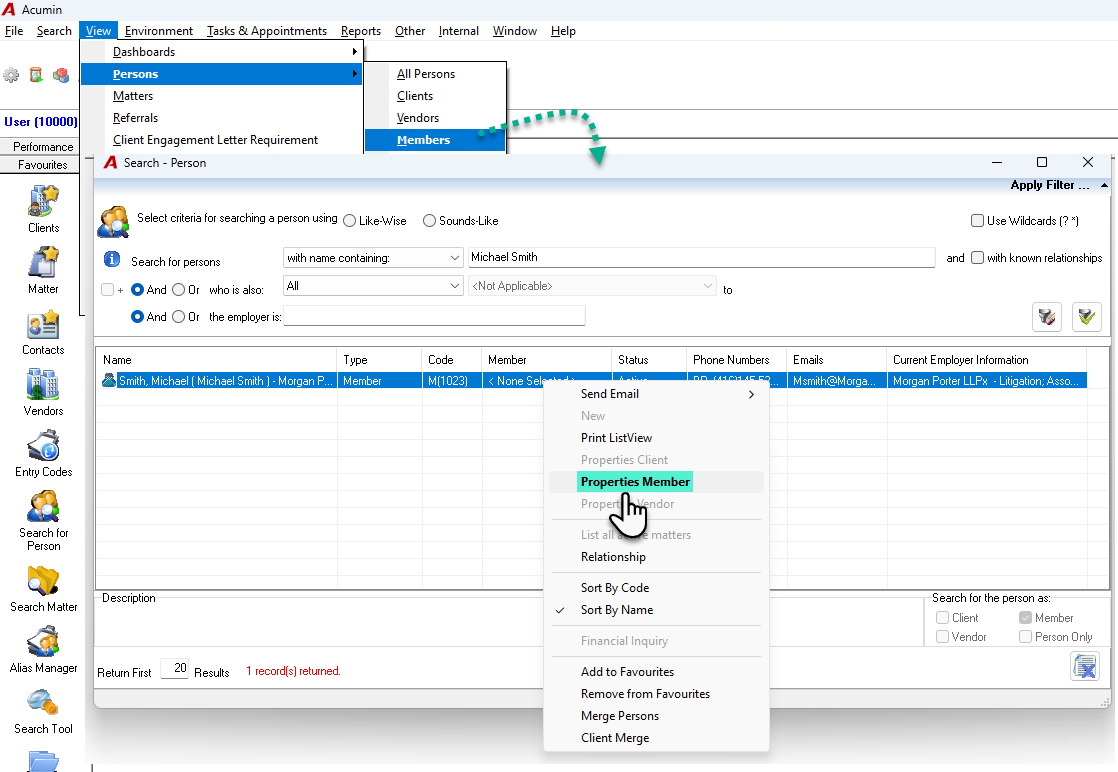
Select View > Person Properties > Members.
-
Search for the new member, right-click, and select Properties – Member.
-
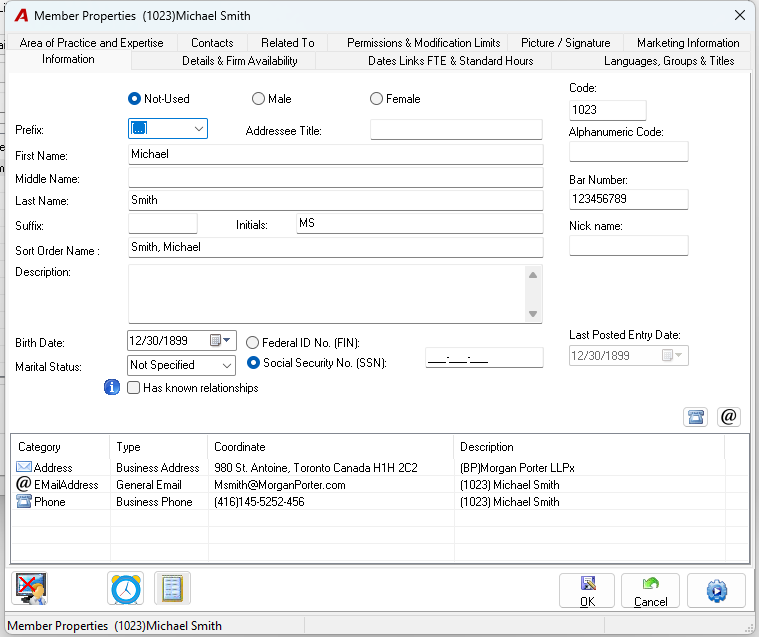
Confirm the general information is accurate and complete.
|
Reminder: When a member changes status, re-check the classifications and related properties against the firm’s reporting policy. |
-
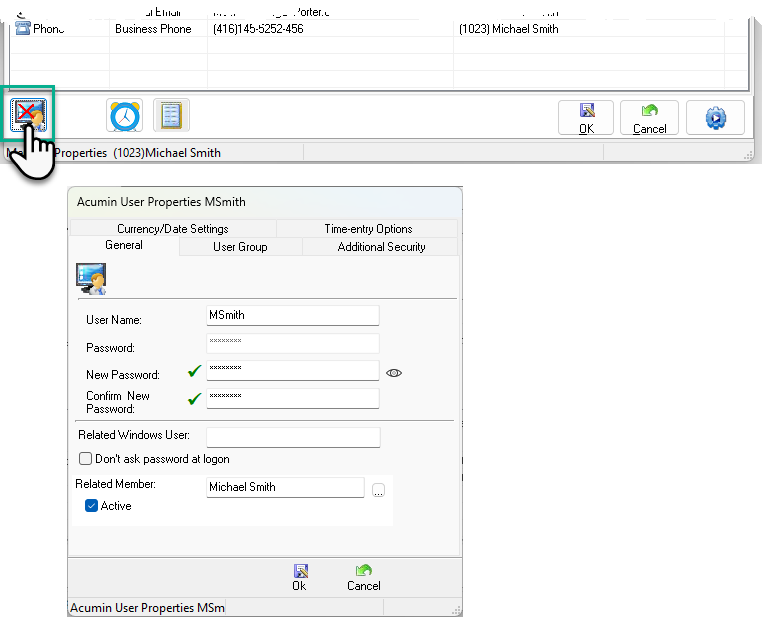
From this form, you can click the User Profile button and review the user security profile for the member or create one.
-
From this form, you can click the Member Rates button and review the member rates or add new ones.
Addional Documents:
-
Security Permission - How to create a new user profile | Acumin Documentation
-
Member - Activating or deactivating a member | Acumin Documentation