.png)
This function is subject to licensing. It must be activated first. Please contact Dexco for more details.
Step 1: Access the Time Upload Template Menu
-
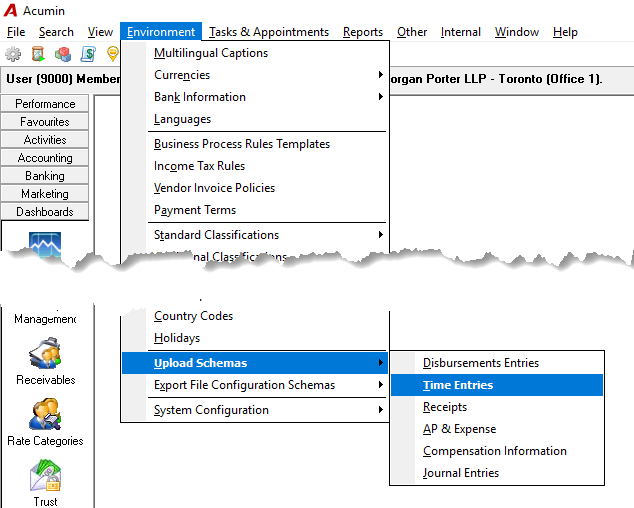
Navigate to Environment → Entry Upload Schemas → Time Entries.
-
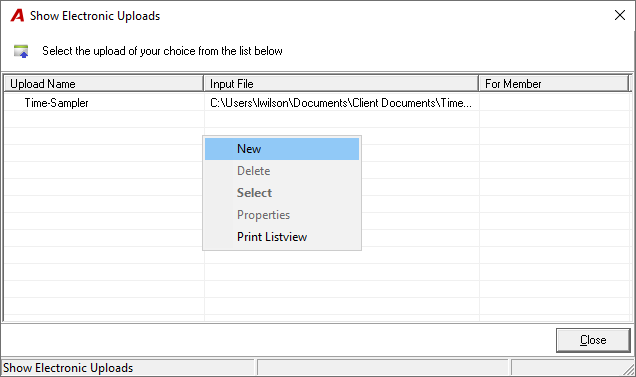
In the Show Electronic Uploads window, right-click anywhere in the list and select New to create a new time upload template.
Step 2: Create a New Time Upload Template
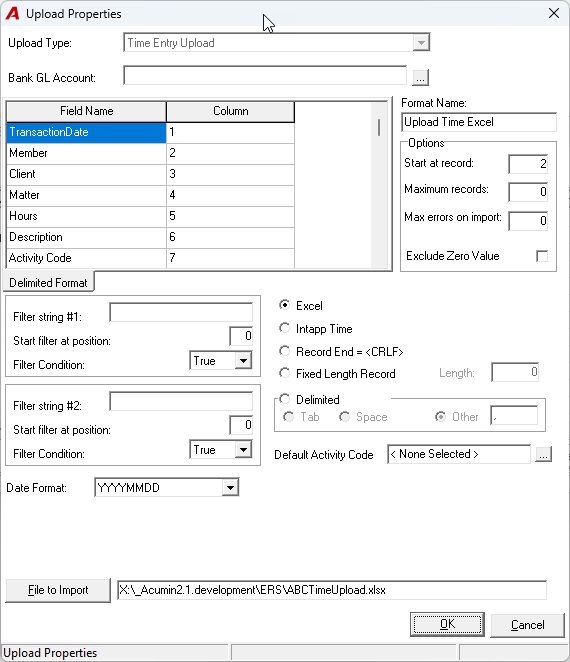
In the form that appears:
-
Name your template – Enter a meaningful name for easy identification.
-
Select the format – Choose the Excel radio button.
-
Map data fields – Select the data fields in the exact order they appear in your input file.
-
Default activity code – Leave it empty (non-applicable).
-
Set the date format – Ensure the format matches the one used in your Excel file.
-
Specify the file path – Enter the full input file path, including the file name and extension (e.g.,
C:\Uploads\TimeEntries.xlsx). -
(Optional) To have Acumin automatically delete the file after it’s read, append /Delete to the end of the file path (e.g.,
C:\Uploads\TimeEntries.xlsx/Delete). -
Click OK to save the template.
✅ Your template will now appear in the list of available templates.
To edit an existing template, right-click on it and select Properties.
Step 3: Upload Time Entries Using the Template
-
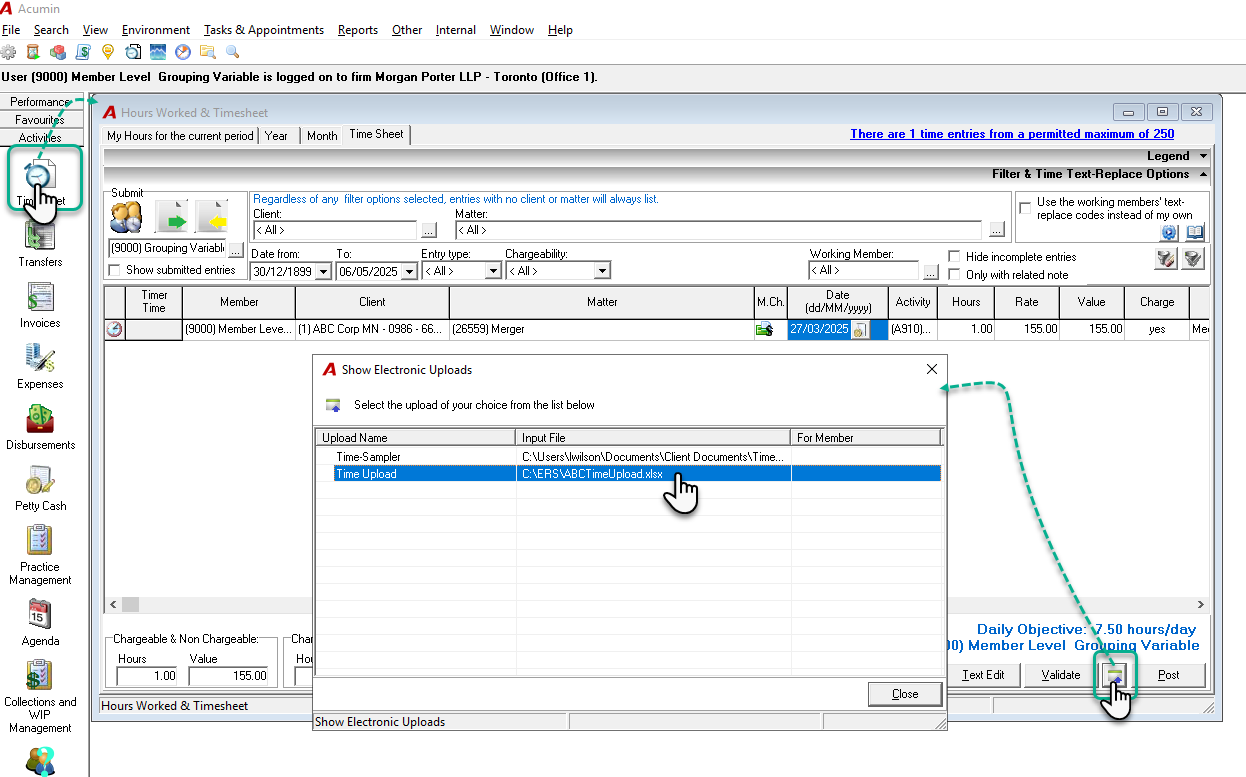
Click the Timesheet icon from the vertical toolbar.
-
In the Timesheet tab, click the Upload icon (bottom-right corner).
-
In the upload window, you’ll see a list of available upload files.
To begin uploading:
-
Double-click on either the file name or its path.
📥 The upload process will begin immediately.
Example
-
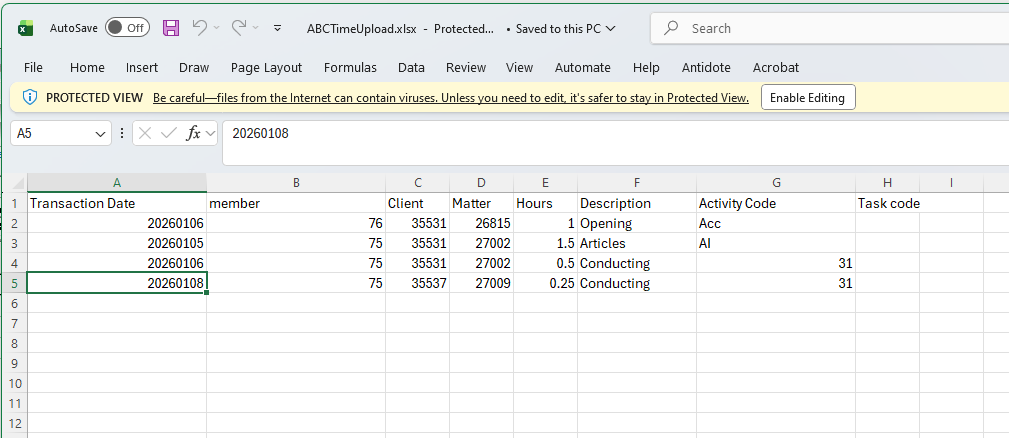
Excel spreadsheet with time entry data (see screenshot below).
-
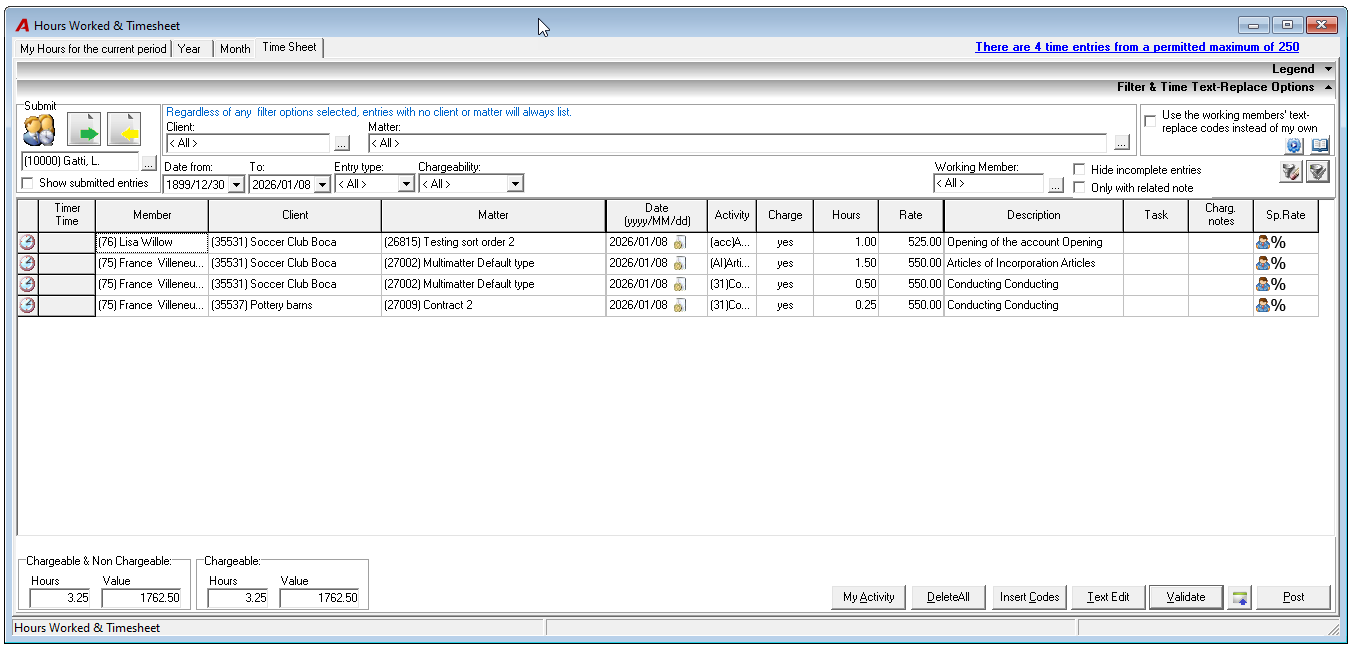
Result: Uploaded time entries will be visible in the Acumin Timesheet interface.
Important Notes
🔹Note 1: Deleting Source Files
If /Delete is appended to the input file path, Acumin will automatically delete the source file after processing it.
If this option is not used, the file must be deleted manually.
Please note that while Acumin attempts to recognize previously uploaded files, any alterations—such as renaming, adding new data, or copying—may cause duplicate uploads.
🔹 Note 2: Activity and Task Codes
Activity and Task codes included in the Excel file will be read and applied during the upload process.
🔹 Note 3: Activity Code Descriptions
If an activity code is included in the Excel spreadsheet, Acumin will append the description associated with that code to the entry—along with any description provided in the spreadsheet.
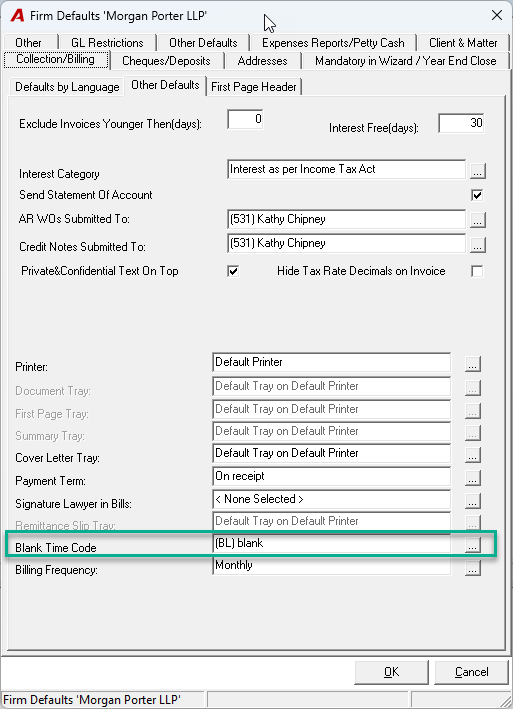
To avoid unintended duplication of descriptions, we recommend using a "blank" activity code (e.g., code BL) or leave the Activity Code column in the Excel spreadsheet empty.
🔹 Note 4: Default Blank Activity Code Required
Each firm must define a default "Blank" Activity/Time Code in Acumin in order for the time upload function to work properly.