.png)
New Vendor Creation
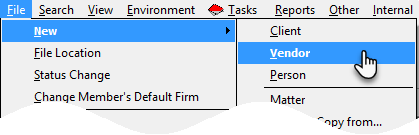
Select File - New - Vendor from the menu bar to start the process for creating a new vendor.
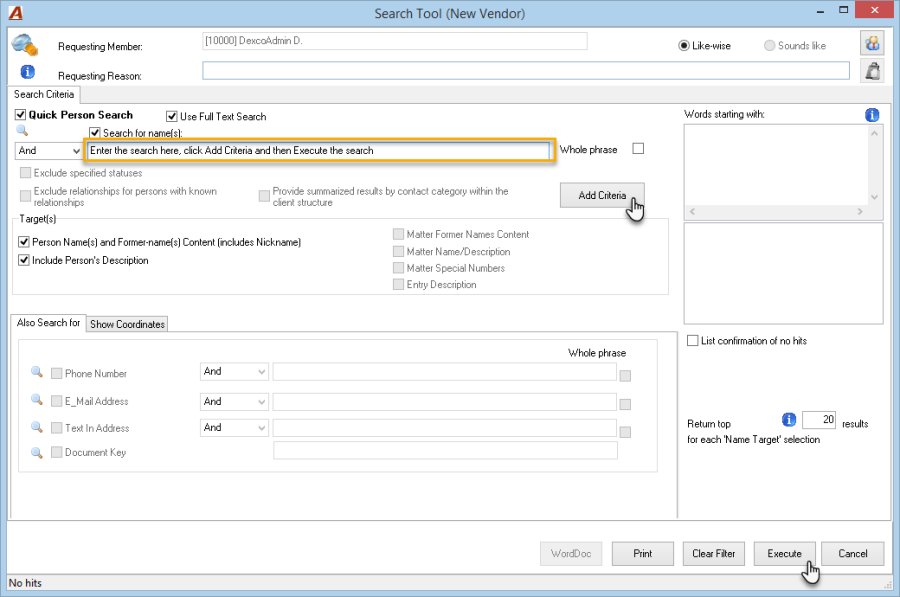
Search Tool – New Vendor
In order to proceed with the creation of a new vendor, a search must be performed to ensure the vendor does not already exist in the database.
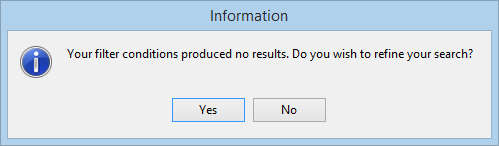
If the search produces no results, the user will be prompted with a message to either refine their search or proceed to the Vendor Wizard to create the new vendor.
If the desired vendor is listed on the Results tab with Vn indicated in the Person Name column, the user should not proceed with the creation of this vendor as it already exists in the database.
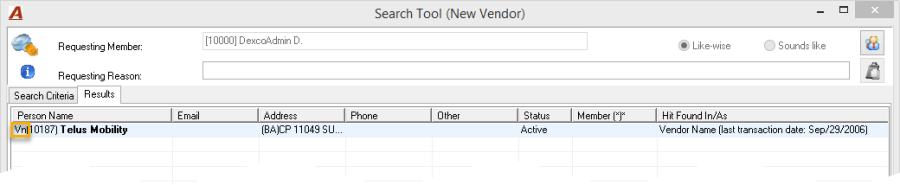
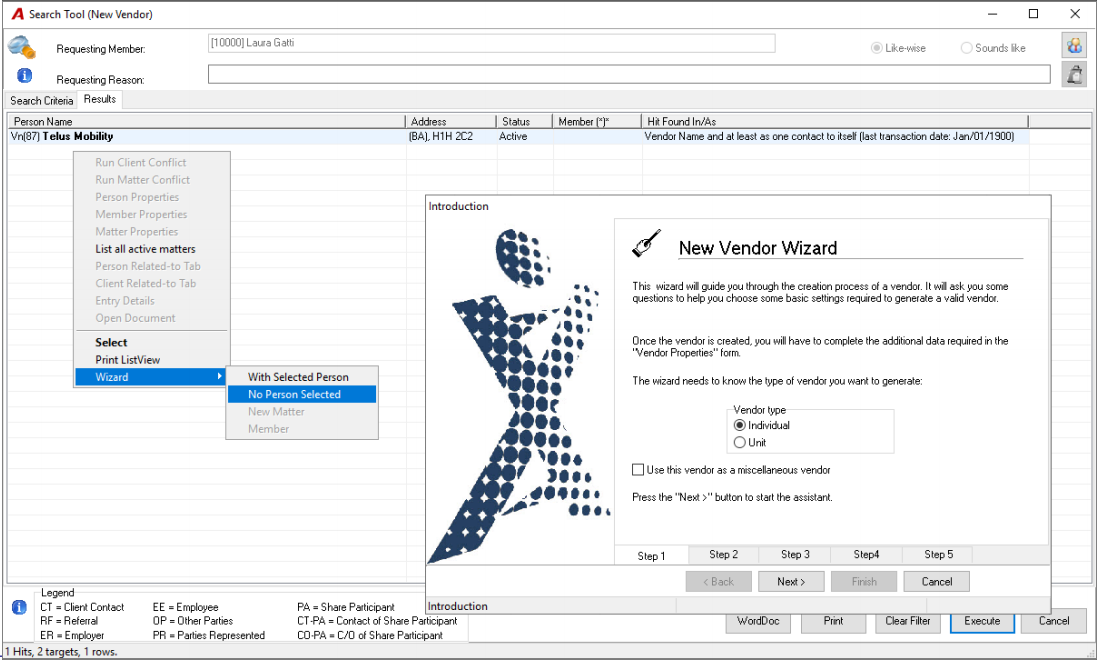
If the user determines that the new vendor does not exist in the database, the user should right-click and select Wizard – No Person Selected to open the New Vendor Wizard.
If the vendor to be created is listed on the Results tab as a simple person - designated by BP in the Person Name column - and the user determines that this person is in fact the vendor to be created, the user should highlight the person, and right-click to select Wizard – with Selected Person. The Vendor Wizard will open with the vendor components enabled for the existing person as a vendor requires more information than a simple person.
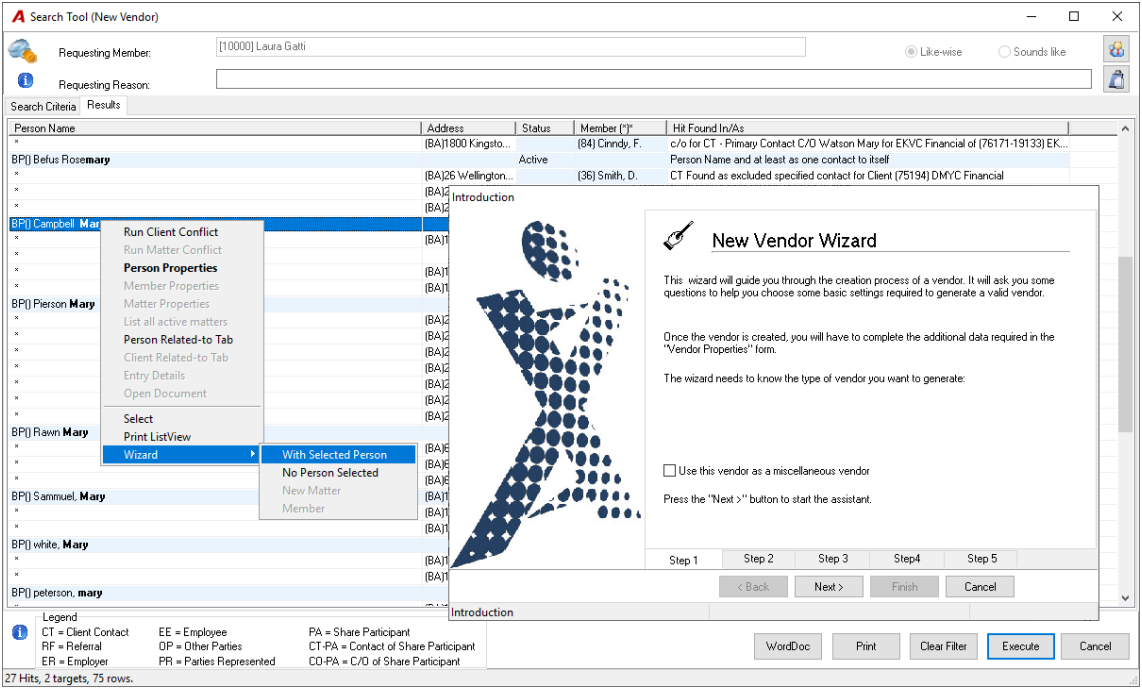
The New Vendor Creation Wizard
We will proceed with the creation of vendor through the Wizard – No person selected option. Each section should be populated with the necessary information.
Step 1:
A vendor can be an individual (a single person) or a unit (a business, a corporation, an association and/or a group of individuals). For the below example, we will select the unit vendor type.
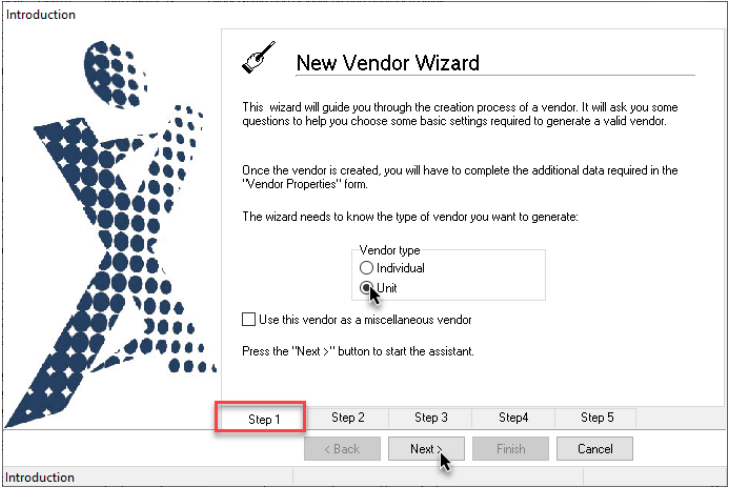
Once Step 1 is complete, we can move to Step 2 by clicking Next on the form.
Step 2:
The Name field is required to proceed to the next step of the vendor creation process. However, the following fields are optional: Second Name, Sort Order Name, Unit Status, Jurisdiction, and Industry Code.
The Year End Date, which represents the final date of the unit's financial year, is also optional.
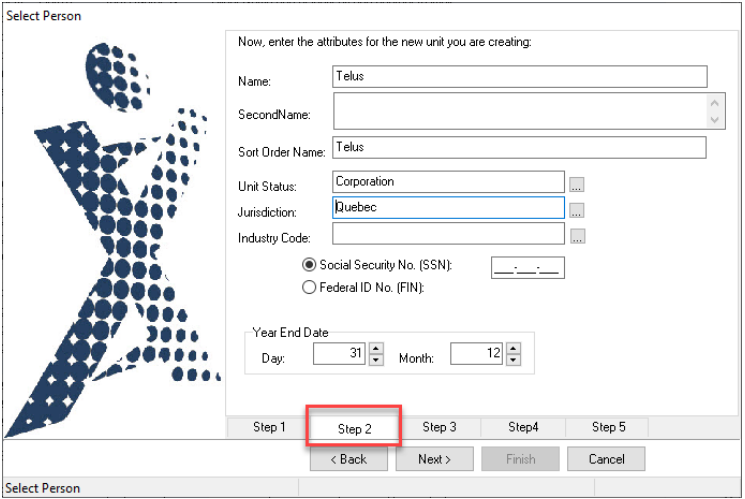
Note: When selecting the individual vendor type, the Name and Last Name are required fields.
Step 3:
Right-click in the Coordinates section and select New to add an address, phone number, fax number, website and/or e-mail address.
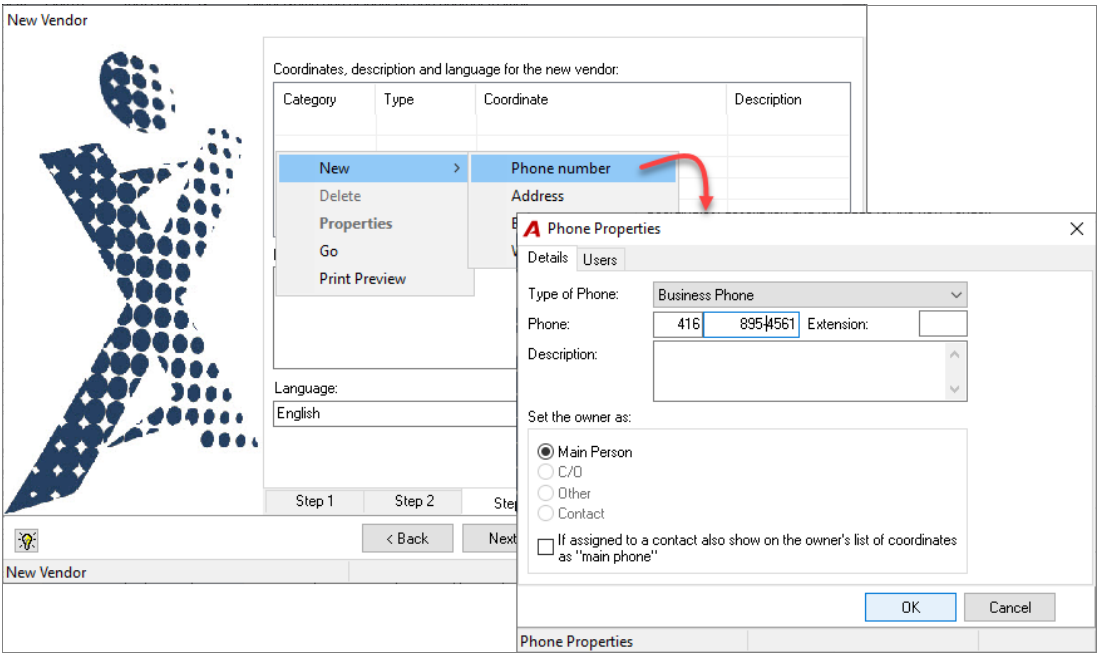
Note: A Business Phone and Business Address must be added to proceed to the next step.
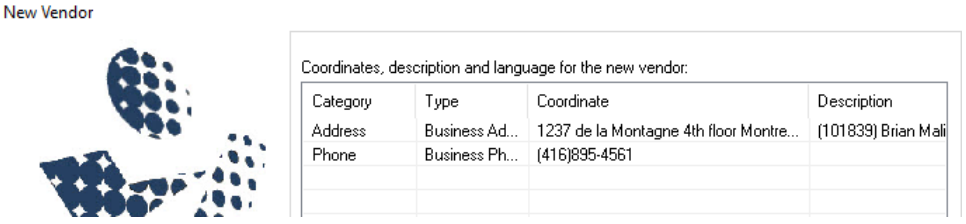
Additional Note: USA 1099 requirement
Critical: The 4 digits "1099" and nothing else must be put in at the beginning of the address Description field for a vendor or individual so Acumin recognizes the correct address for a 1099 USA tax form. It goes without saying that only one address for a vendor or individual should had the 1099 in its description.
Step 4
The appropriate information should be filled out in each tab before moving on to the next step.
The Financial Information tab
-
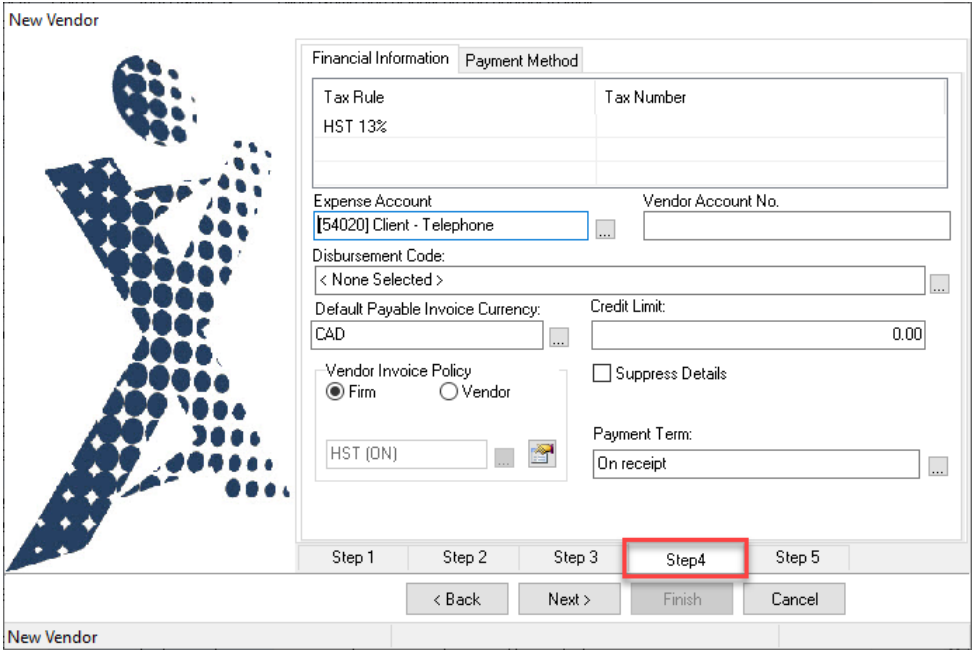
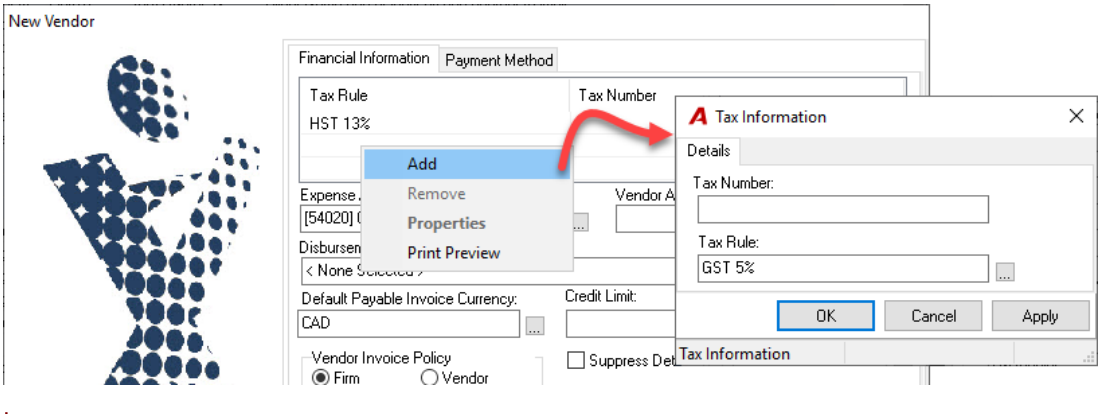
Add or Select a Tax Rule.
-
Select a default GL account in the Expense Account field. This GL account will be automatically inserted in the Distribution tab of a new Account Payables or Quick Cheques when a new payment is created for this vendor.
-
Select a Disbursement Code that can be associated to the Vendor. This disbursement will be automatically populated by default in the Distribution tab of any new Account Payables or Quick Cheques for this vendor.
-
Verify the correct Default Payable Invoice Currency is selected for the vendor.
-
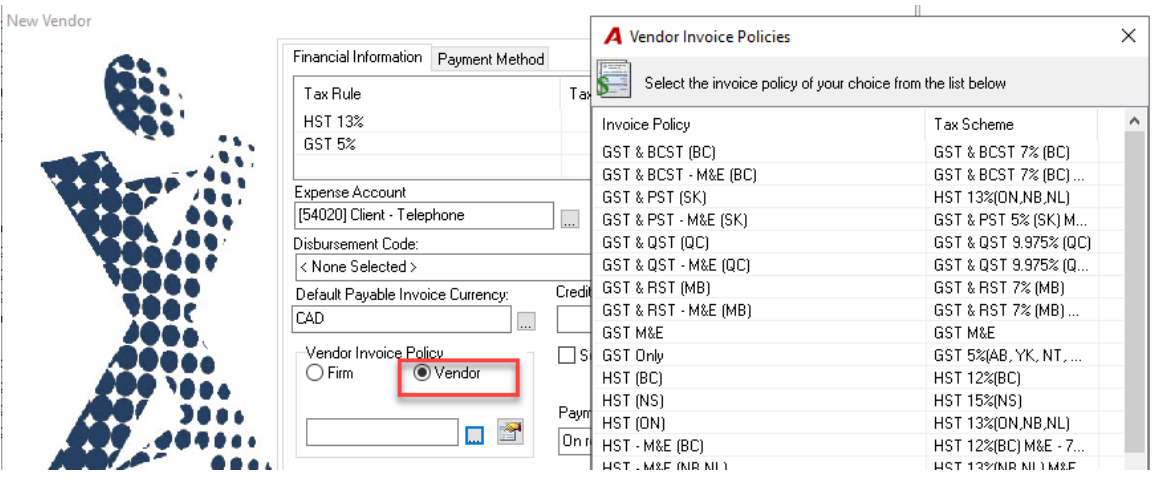
The Vendor Invoice Policy defaults to the policy setup for the firm; however, the option is available to select another invoice policy.
-
The Credit Limit can be populated for this vendor and is for informational purpose only.
-
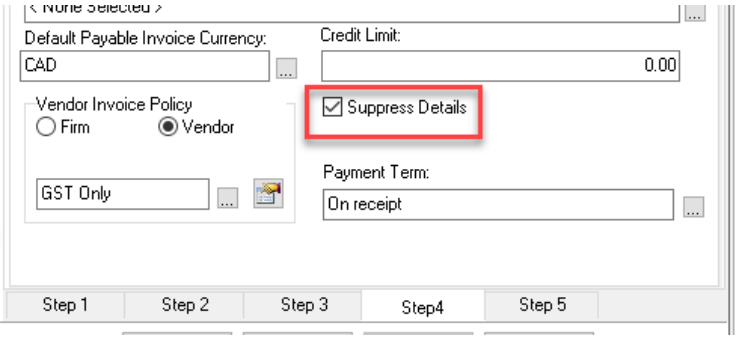
When the Suppress Details option is enabled, this will prevent the details from printing on the cheque stub. This is useful when the details will go beyond the size of the cheque stub.
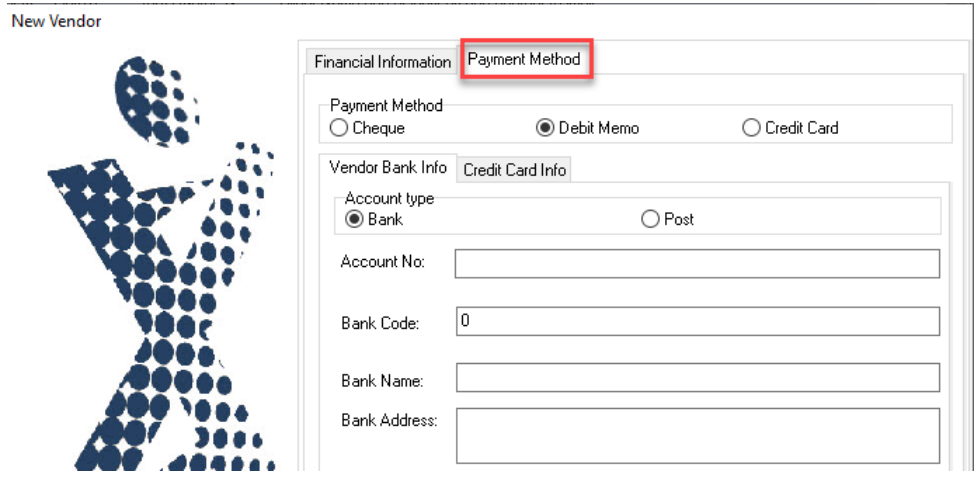
Payment Method tab
Step 5:
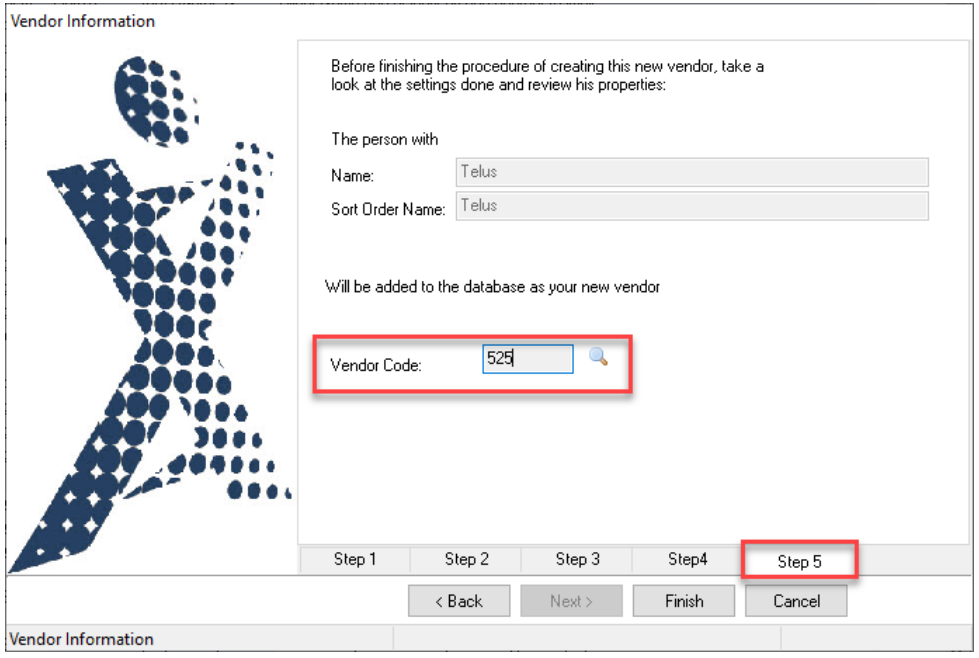
Acumin will automatically assign a numeric Vendor Code. Firms using alpha numeric codes will need to manually assign a code.
This code can always be modified once the vendor is created through the Vendor Properties.
Step 6
A summary of the new vendor will be displayed. Once the details are verified and corrected (if necessary), the vendor will be created by clicking Finish.
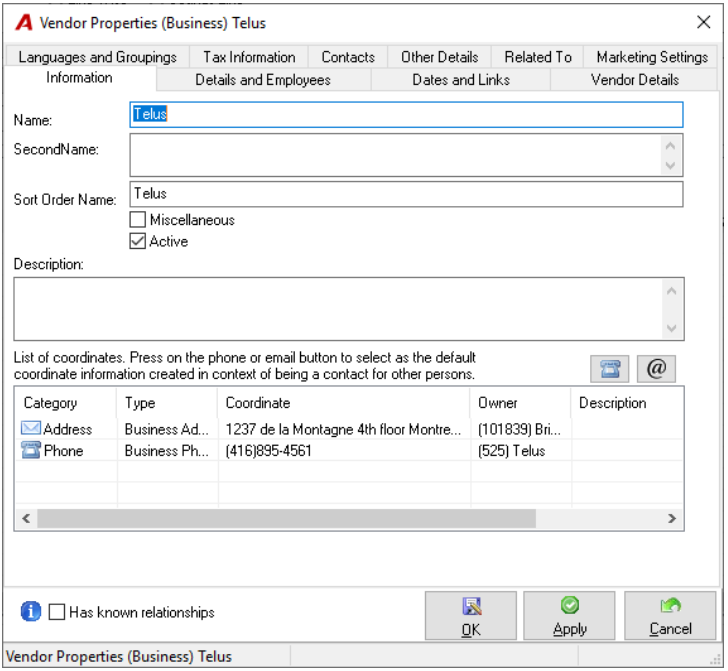
You can then open the properties of the Vendor to review.