.png)
Overview
This document should be used as a starting point when a new firm is created in their environment. We recommend reviewing all the sections that may apply to your organization before using the new firm even if the new firm was copied from an existing one. Note that this is not an exhaustive document. For additional questions, documentation or services, please contact Dexco.
Setting up Member’s Firm Availability
-
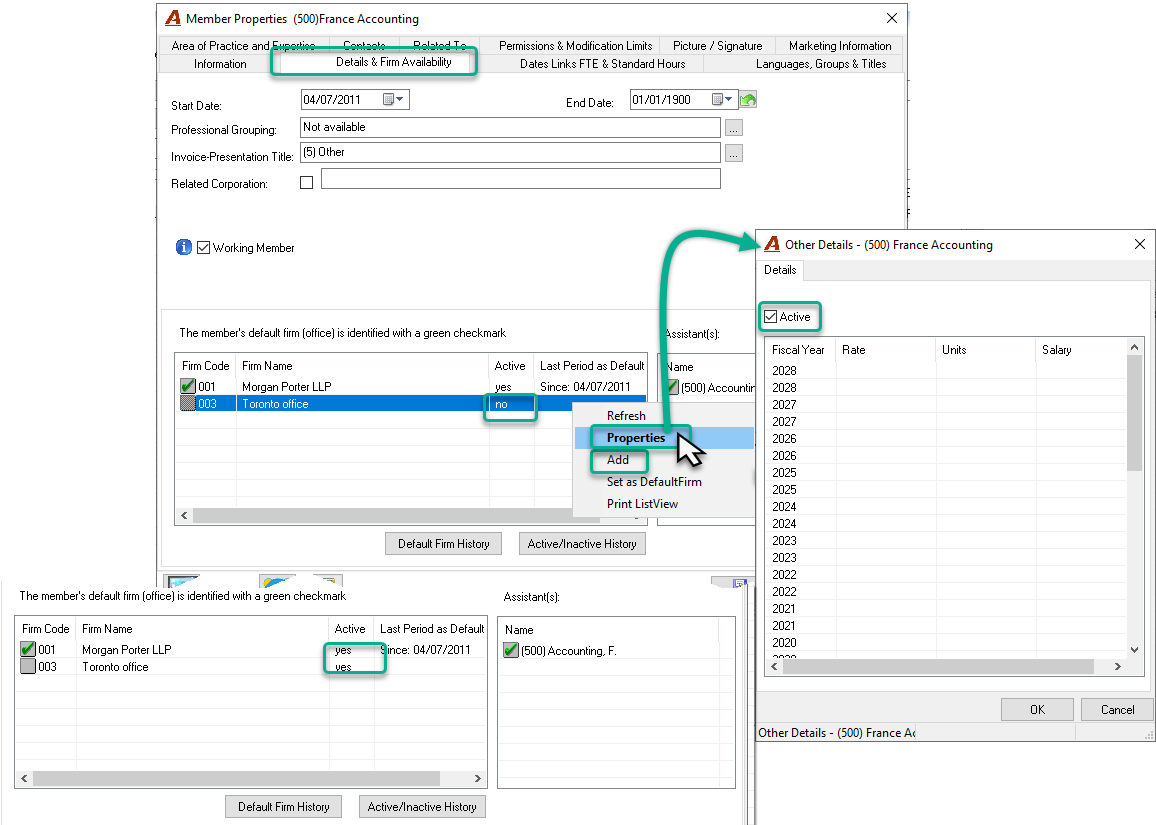
To set up the firm availability for a member, go to the Member Properties, in the Details & Firm Availability tab in the firm list section.
-
If the new firm is not listed, use the “Add” option in the contextual menu to add it.
-
Select the new firm and then select the “Properties” option in the contextual menu.
-
In the Other Details form, check the “Active" option and click on OK.
***Note that to be able to activate a member within the new firm, the member must be activated at least in firm 001 (main firm).
Setting up an existing General and/or Trust Bank Account
To use an existing bank account (trust or general) with the new firm, you will have to set the availability and the cheque number range if this account is set to “Allow cheques”.
-
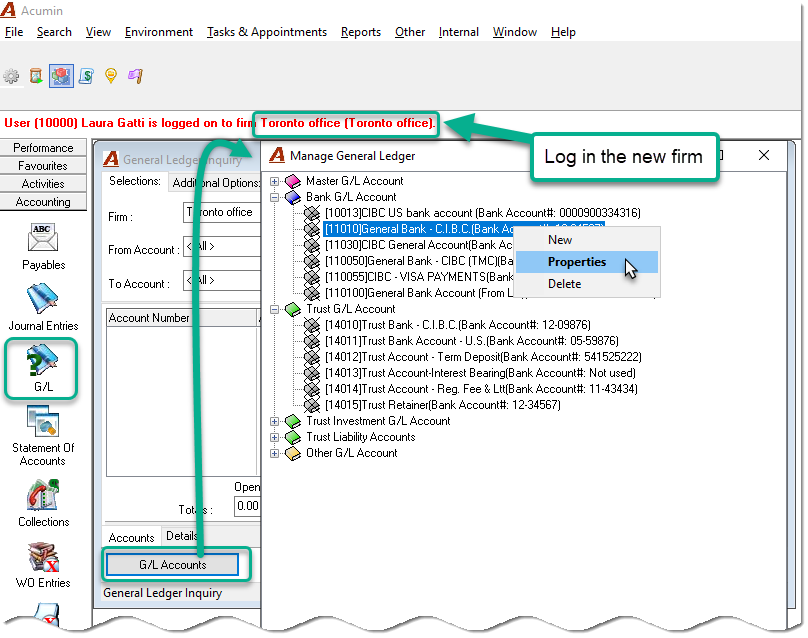
Log in the new firm (important);
-
In the Manage General Ledger form, go in the properties of the bank account you want to use in the new firm
Account Properties – Cheque number range
-
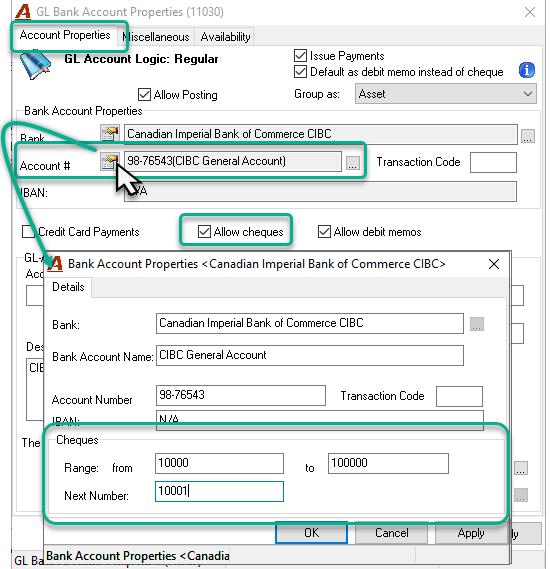
In the GL Bank Account Properties form, in the Account Properties tab, press the Properties button of the Account # field;
-
In the Bank Account Properties form, enter the cheque range number.
**Note that it can be the same number range as in the other firms for this bank account or a different one. The system doesn’t assign the same cheque number twice within a bank account regardless of the firm.
To create a new General and/or Trust Bank account. See instructions below:
GL Bank Account - Setting-Up a New General or Trust GL Bank Account
Bank Account Availability
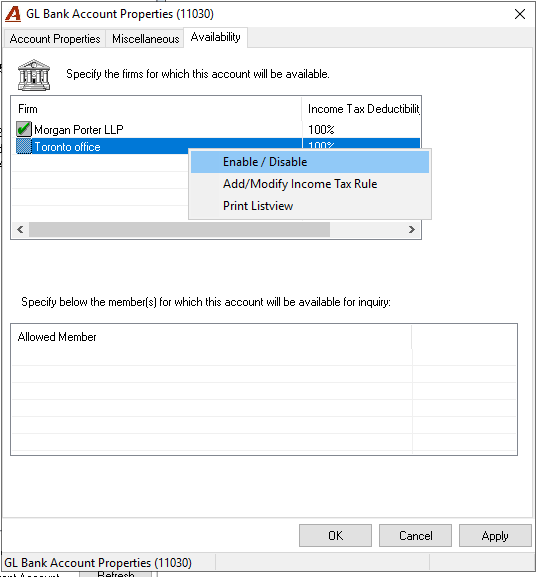
In the GL Bank Account Properties form, in the Availability tab, highlight the new firm and select the Enable option.
To set up a new general or trust bank account, please contact Dexco for additional information and services.
Reviewing the New Firm Properties
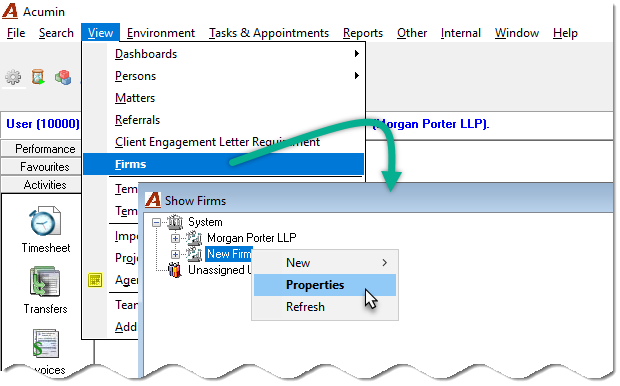
a) Go under View – Firm
b) Right click on the desired firm and select the Properties option
General Set-up
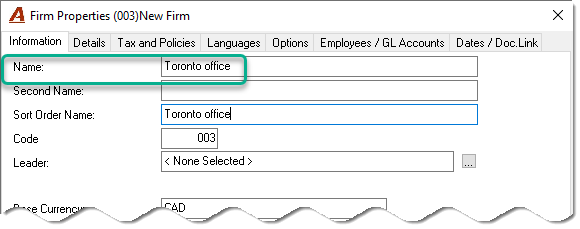
Firm Name
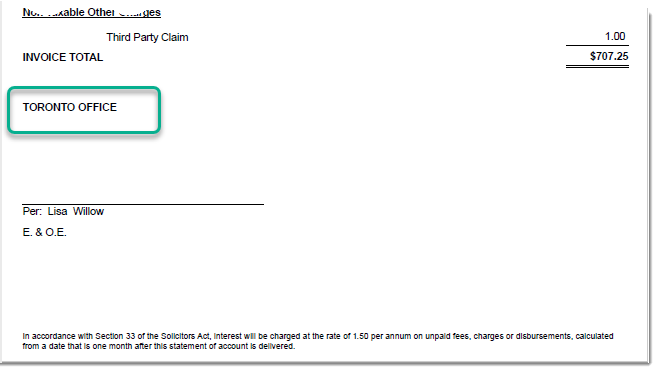
Name – This section should be completed with the Name of the firm as it will be displayed on the invoice. Please note that an invoice is journalized within the same firm or office as that of the matter, therefore this is the same firm or office that will print on the invoice (for those working with Dynamic Invoice license).
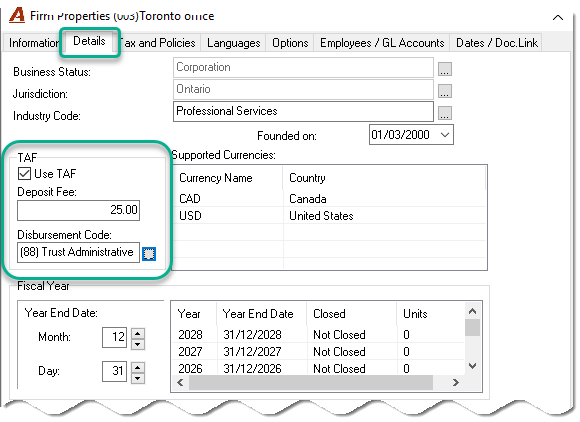
Trust Administration Fees (TAF) if required.
This option allows the firm to automatically charge a fee when depositing trust money for the first time in a file.
-
To set it up, please refer to the “How to” document:
Trust - Setting-up the Trust Administrative Fee (TAF)
-
To disable it, uncheck the “Use TAF” option.
Tax and Policies
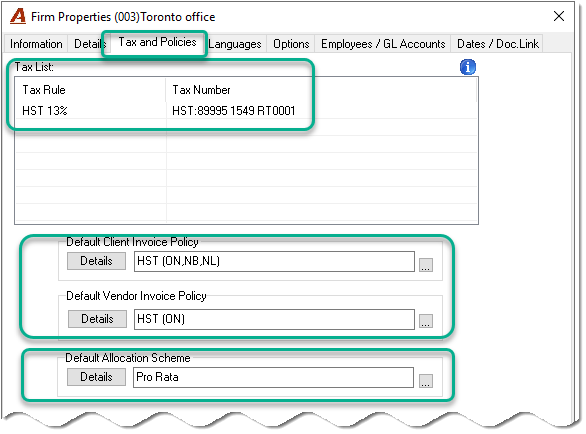
Tax List: Enter the desired label and tax number to appear in the invoice regardless of the language.
Default Client and Vendor Invoice Policy: Select the invoice policy to apply by default in this firm.
Note: You may need to review the tax rule properties (rate and GL accounts) related to the Client and Vendor invoice policies selected. Especially if the firm created is in a different province than the original one.
Default Allocation Scheme: Select what would be the default Allocation scheme to apply when creating invoices for this firm.
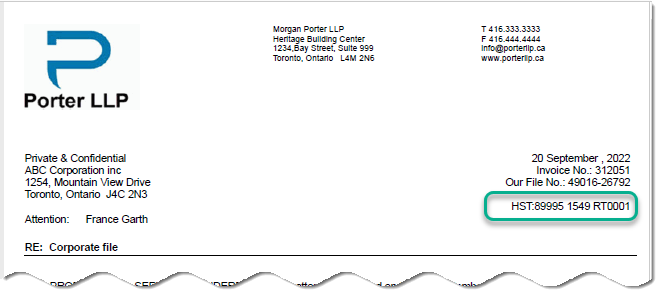
Setting up the Firm’s Defaults
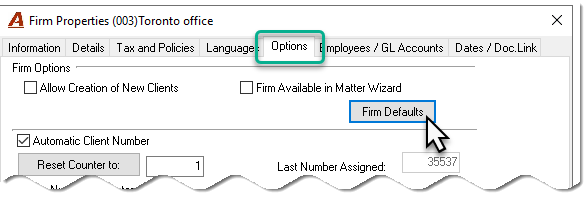
Collection/Billing – Default by Language
The defaults tab – bill format option - allows the authorized user to set the default time-entry presentation basis for use by the organization. The default setting should represent the most often used time entry detail presentation per licensed language in order to minimize modification by users on new client/matter creation or during the invoice preparation process;
The remaining fields are pre-populated based on the Standard Model which includes one fee presentation per product piece in the English language. The cover letter is an exception; these are completed by the organization subsequent to training received during the implementation period at which point the authorized user should set the default cover letter per language.
Collection/Billing – Other Defaults
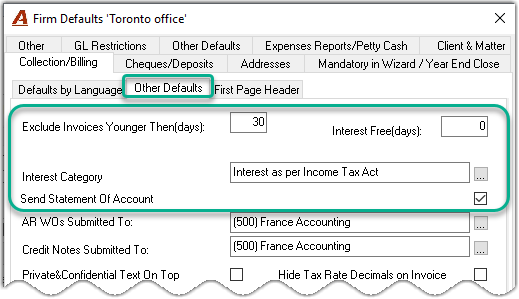
Complete the Exclude Invoices Younger than (Days) section with the number of days in which an invoice would need to be outstanding for it to be included on the statement of account. A value of “-1” – considered best practice - means that all invoices will be included in the calculation of any statement of account. For example, a client has an invoice which is 93 days old and a second invoice which is 2 days old. Assuming that the law-firm client issues statement of accounts on 90 days, the statement of account for this client will likely be triggered due to the invoice which is 93 days old, however, the value of “-1” means that the statement of account will include both invoices (the one that is 93 days old and the one that is 2 days old). Law firm clients that want to exclude invoices up to a certain age, should change this value from -1 to the required value;
Complete the Interest Free (Days) section with the number of days on which interest would not apply. In this example we have selected 30 days, to correspond with the value of the firm’s policy for charging interest on invoices older than 30 days;
Complete the default Interest Category section with the default interest policy. In this example the law-firm client follows the interest policy (rate) as prescribed by the law society which is as per the income tax act. The law-firm client has opted to label the policy with the words “Interest as per income tax act”;
Set the default for the Send Statement of Account checkbox. Typically the default is to send statement of accounts to all clients – exceptions are set within client or matter properties;
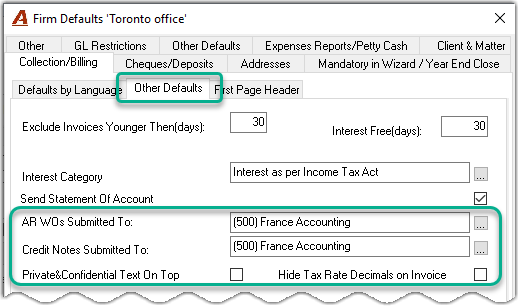
Set the Submit To persons by default for this firm for the AR WOs and the Credit Notes. Members selected should be set as “Active” in the new firm.
Private Confidential Text On Top – If checked ON, the “Private & Confidential” text will appear as the first line of the invoice “addressee”, else it will follow the name of the individual assigned as billing contact.
Example with Option ON – Standard Model
Private and Confidential
Morgan Porter
980 St. Antoine Street West, Suite 203
Montreal, Quebec H3C 1A8
Attention: Ms. Victoria Mackenzie-Porter
Example with Option OFF
Morgan Porter
980 St. Antoine Street West, Suite 203
Montreal, Quebec H3C 1A8
Attention: Ms. Victoria Mackenzie-Porter
Private and Confidential
Hide Tax Rate Decimals on Invoice: The standard model is check marked OFF. If checked ON, the sales tax decimals are not shown in the invoice.
Example with checkmark OFF – standard model: Sales tax @ 7.0%
Example with checkmark ON: Sales tax @ 7%
Collection/Billing – First Page Header
Firms with logos that differ from the one set at the system level must upload the corresponding firm-specific logo within this tab.
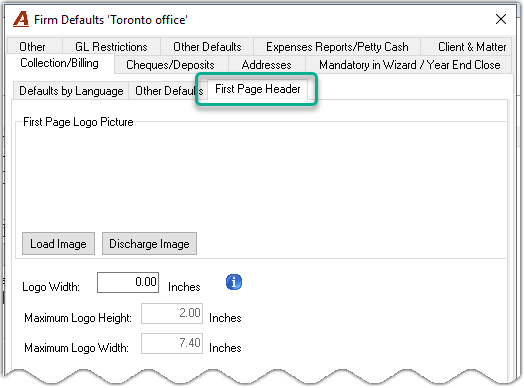
First Page Logo Picture Application: (Used as an exception per firm)
Whereas Clients are created at the system level, in multiple firm environments, matters must be assigned to a firm or office in order for the application to properly manage the work based on firm or office-specific rules including defining the billing entity to equal the firm or office.
In this case, it is possible that all or some of the firms have their own logo in which case once this section is complete with a Firm-specific logo, the latter will print on the invoice package in accordance with billing entity requirements based on the location of the matter.
Entered the measurement of the physical logo in inches. (Required when printing invoices in Crystal (PDF).
Cheques/Deposits – General and Trust Cheques
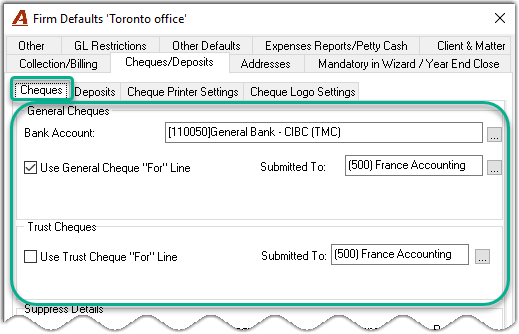
Bank Account – This section should be completed with the bank account of what would be the most often used. These fields will already be populated while completing a general cheque.
Set the Submit To persons by default for this firm for the general and trust payments. The member selected must be set as active in the new firm.
Cheques and Deposits – Deposits
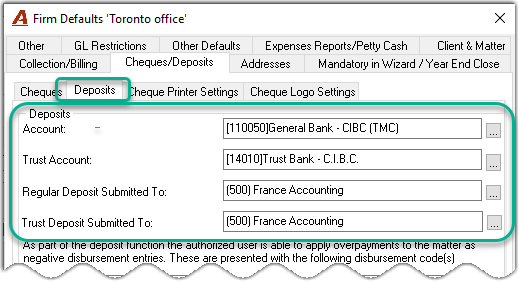
Account – This section should be completed with the general bank account most often used. This field will already be populated while completing a general deposit.
Trust Account: This section should be completed with the trust bank account the most often used. This field will already be populated while completing a trust deposit.
Set the Submit To persons by default for this firm for the general and trust deposits. Members selected must be set as active in the new firm.
Firm Defaults – Addresses
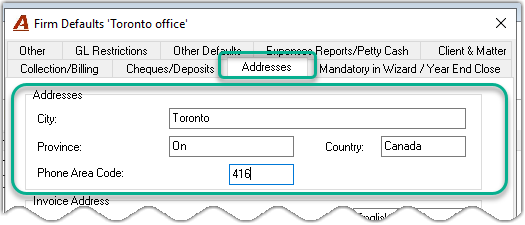
Addresses – This section should be completed with what would be the most often used as a city, province and phone area code when creating new contacts. These fields will already be populated while completing new contact information.
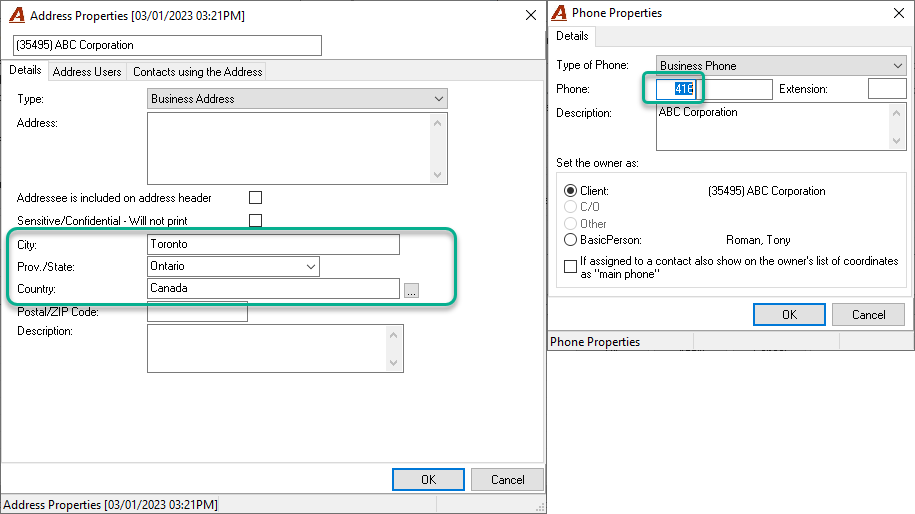
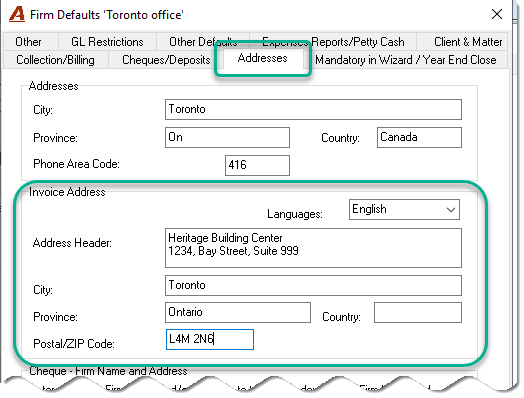
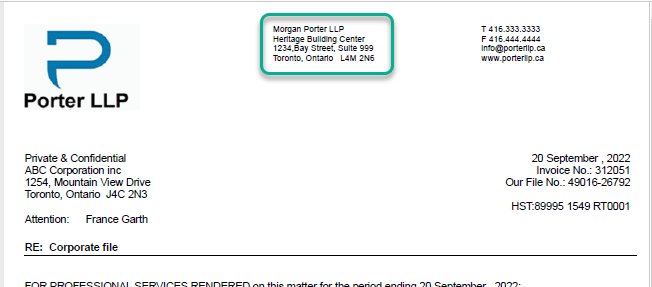
Invoice Address – This section should be completed with the Firm’s address if the latter is to print within the “Invoice Header” of the invoice document. Language is a consideration; the application requires one address per licensed language.
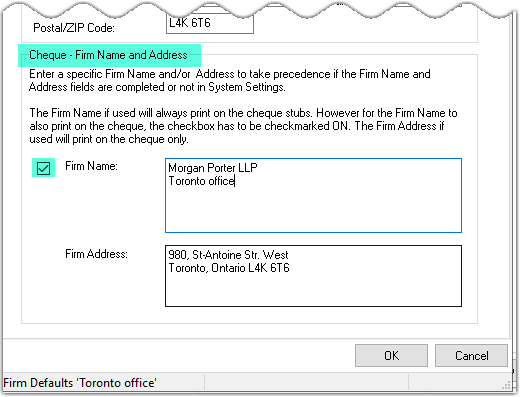
Cheque – Firm Name and Address – This section should be completed with the Firm’s name and address the firm wants to see when printing their cheques if different than the main Firm name and Address set in System settings- Cheques Tab.
-
Firm Name: Morgan Porter LLP
-
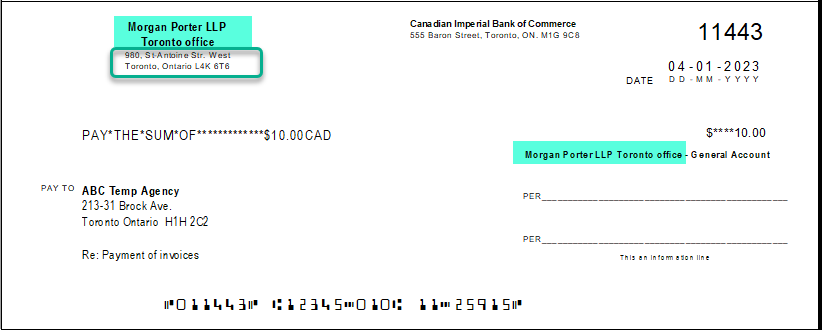
The standard model will take the “Name” and present it in bold as shown above. The option box controls the visibility of the “Name” on the top left corner of the cheque only. Uncheck this option to not print the “Name” on the top left corner of the cheque portion.
-
Address: The standard model will take the “Address” and present it below the Firm’s name.
Firm Defaults – Mandatory in Wizard/Year End Close
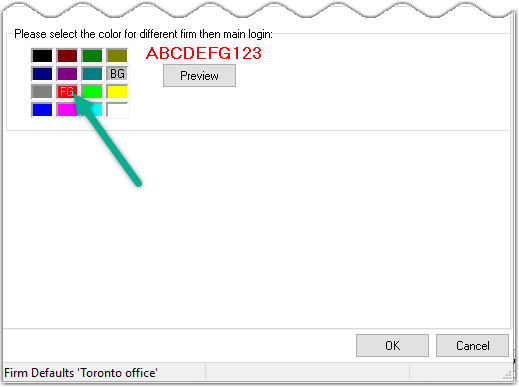
Colour: The firm can select a different colour when users are logged in this specific firm
Firm Defaults – Other
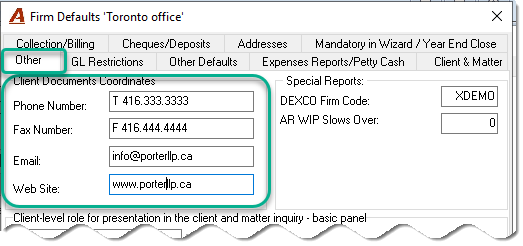
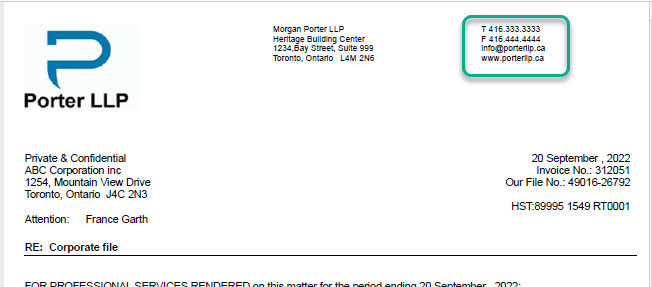
Client-Documents Coordinates: This section must include the Firm’s phone and fax number, general email and web site if they are to print within the “Invoice Header” of the invoice document.
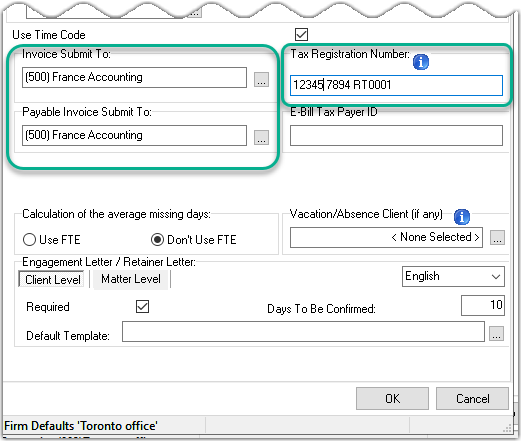
Set the Submit To persons by default for this firm for Invoices and Payable invoices. The member selected should be set as active in the new firm.
Tax Registration Number: Enter the tax registration number of the firm if you are on custom invoice templates or in a non-taxable environment.
Setting-up “Other” GL Account’s Availability
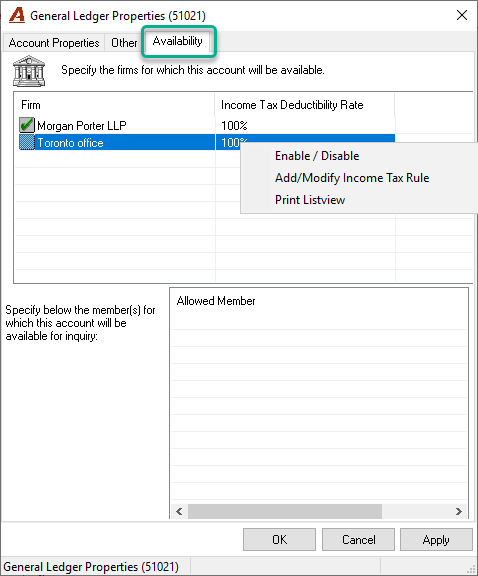
To set up the GL account availability for the new firm:
-
Go into the GL account properties – Availability tab;
-
Select the new firm and right click to get the contextual menu;
-
Select the Enable/Disable option.
Other Environment Set-up to review
System Settings – Accounting Requirements - Inter-firm GL Accounts
Review the list of inter-firm GL Accounts and create one if required for those using then and having the Multi Office or Firm license.
Interfirm - Interfirm GL Account Setup
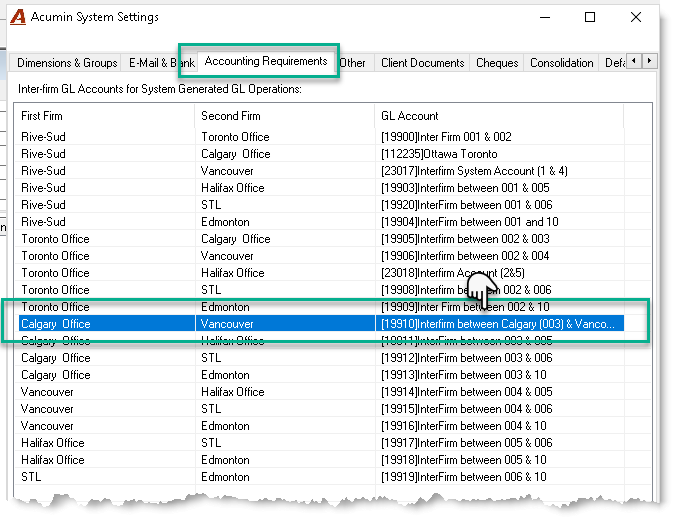
Contact Dexco for additional services.
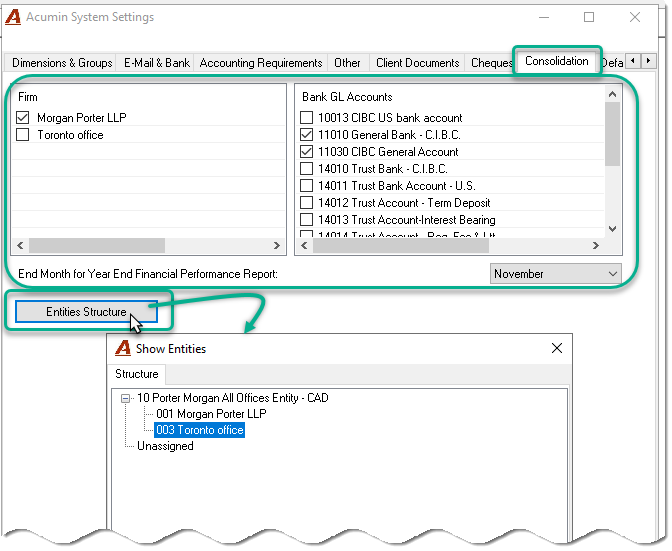
System Settings - Consolidation
-
Review what firms should be consolidated by default in reports if required.
-
Review the Entities structure if required.
System Settings – Defaults - Payment and Deposits
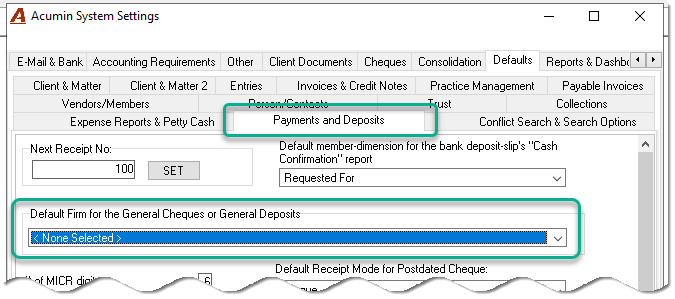
This option determines which firm will appear by default when creating a general payment or deposit. This is set at the system level.
-
If none is selected, it will default to the firm where the user is logged in.
-
If a firm is selected, it will always default to this firm whatever firm the user is logged in.